Drip, Drip, Hooray!
Dear Bubbles:
I’ve never photographed in the rain before. How do you do it?
~Margaret
Dear Margaret:
Do you remember the nursery rhyme “Rain, rain, don’t go away, Come again every day. Little Bubbles wants to play”?
Oh wait, that’s not exactly how it went…but it’s exactly how I feel about welcoming and photographing in the rain. A rainstorm can’t happen soon, or often, enough for me!
Maybe it’s because the Sonoran Desert—where I live—gets less than 6 inches of rain a year on average. When the rains do come, the musky scent of petrichor from the creosote fills the desert air.
Maybe it’s because not many people share this sentiment. When I venture out in the rain, I usually have the place to myself! An introverts dream! Plus, if you just so happen to slip on your butt in the mud, no one sees it. Ask me how I know this sometime…
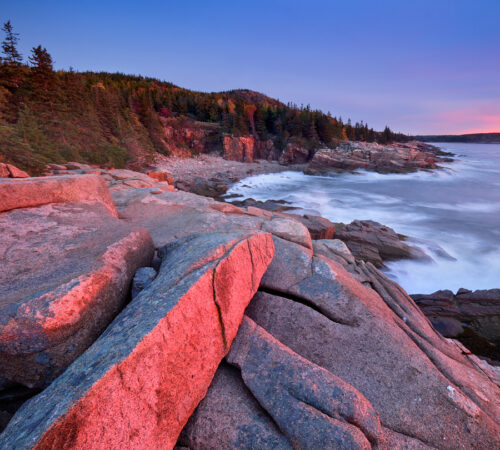
Maybe it’s because the rain clouds dim the bright, direct light from the sun which helps to create more even illumination. This soft, diffused light helps to eliminate harsh shadows and deepens the apparent color saturation among our subject matter. You don’t have to get up for sunrise or stay out until sunset to make moody images. You can play All. Day. Long. in these conditions!
Or maybe it’s because rain reminds us to be more mindful and have patience with ourselves as we explore our craft during challenging times. On one of the first times I photographed in the rain, I covered my camera gear with a shower cap and aimed it at moss. I accidentally clicked the shutter with the shower cap still covering my lens. At first, I cursed myself for such a silly oversight. Then I studied the photo on the LCD as said, “Hey, that doesn’t look so bad! That’s cool!” And that’s how my ethereal filter—that is, shooting through a shower cap on purpose—came to be.
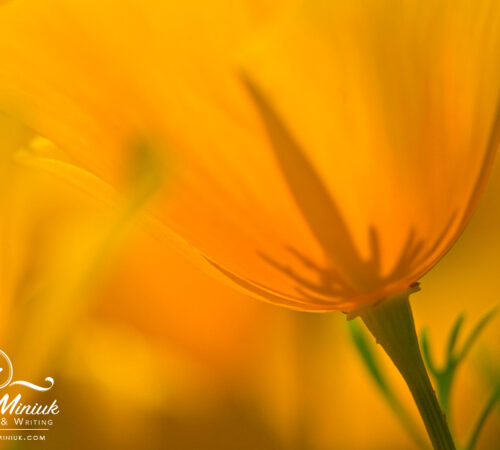
Or maybe it’s because rain is basically a bubble maker. I mean, water drops are everywhere after a good drizzle or downpour! Life is better with bubbles!
Or maybe, just maybe, it’s all the above! Photographing in the rain is one of my favorite things to do!
Sure, photographing in the rain takes more effort, time, and tolerance than photographing in sunshine. Mist, sprinkles, showers, and downpours alike bring logistical challenges and special considerations we don’t have to deal with in dry conditions. You have extra gear. You may feel soggy and chilled. Raindrops blur your lens’ view. But it doesn’t have to be all doom and gloom.
I believe the most fulfilled photographers are curious problem-solvers. Our creative vision doesn’t shut down when rain falls. We don’t let a little rain get in the way! We rise to the challenge! We make the most of what Mother Nature delivers to us—in all weather conditions. Yeah! Let’s go!
First things first. As the saying goes, there’s no such thing as bad weather, only bad clothes. To my knowledge, no one has ever melted while playing in the rain…so long as you’re dressed properly for it. If you’re comfortable and dry, you’ll be way more willing to keep shooting instead of bailing early because you’re soaked and shivering.
Pay attention to the weather forecast for the location you plan to visit. Be mindful of hypothermia in cooler air temperatures and lightning during thunderstorms. Safety first, always!
Start with a breathable waterproof rain jacket and pants. Find waterproof shoes you’d wear if you were going rafting, kayaking, or fishing. I prefer NRS Neoprene Booties. No matter your choice, make sure the shoe has solid treads to grip slippery surfaces like rocks and mud. If you opt for an open shoe (like Keen’s, Salomon’s, Teva’s, Chaco’s), pair with neoprene socks to keep your feet warm and dry.
In cooler temperatures, use warm layers made of wool, fleece, or synthetic materials underneath. It is said, “Cotton kills.” Cotton absorbs moisture, making it a poor choice in cold, wet conditions. Add fingerless gloves as needed to keep you warm. These types of gloves keep your hands warm but still let you work the buttons and dials without doing an awkward mitten dance.
If it’s really pouring, like it’s raining horizontally, you might don swim or ski goggles to keep the rain out of your eyes. Think of how stylish you’ll look (while no one is watching…). Yes, I’ve really done this…for the love of rain!
Standing under a large golf umbrella can keep you and your camera gear dry (so long as it’s not raining horizontally…). If you don’t have an assistant or a third-arm handy, use a Plamp or other clamp to help hold the umbrella in place over your tripod.
While a little rain never made a human melt, water could make your camera cranky—or at worst, stop functioning. Rain and electronics do not mix well. Some cameras, such as the Olympus, claim they are weather-sealed. From experience, these cameras perform acceptably well for a short time under misty or sprinkle-y conditions. They tend to puke during prolonged outings in a downpour. Ask me how I know this sometime…
If you plan to stay outside for a while, make sure you have a rain cover for your backpack too. Or leave it in the car or building while you explore with minimal gear. When photographing in rain, less is definitely more. Less stuff to worry about means more photographing.
Protect your camera with a rain cover. You can buy fancy ones like ThinkTank or Peak Design. They tend to be a little fussy to get on the camera and to use but you get used to it after a little practice and patience. If it’s not raining too hard, I prefer using a cheap Op/Tech cover which is basically a glorified plastic baggie with a bit more shape to it. A thick plastic baggie or trash bag and a rubber band can work wonders in a pinch. Just poke a hole for the lens, secure it, and voilà! Instant rain gear. Bonus points if you double-bag like you’re safeguarding avocados (to make avocado pie later! Mmmmmmm….)
With or without a rain cover, applying a lens hood can help to keep raindrops off your lens’ front element and reduce lens flare from lights or reflections. To keep your lens free of moisture, bring plenty of lens cloth, towel, or chamois to wipe down the lens periodically. I have a system where my right pocket in my raincoat contains dry lens cloths, my left contains the wet, used ones. This way, I don’t cross-contaminate.
(As an aside, I do the same with camera batteries. Because cold, wet weather can drain batteries quickly, I put full batteries in my right pocket. Except I don’t put the used ones in my left pocket with the wet lens cloths. I use a different pocket or put them in my backpack. I digress…)
Maybe you want a few little harmless water droplets on your glass! Shooting through drops on your lens creates dreamy, soft-focus effects. Shooting through a car windshield or a building’s window that has collected water droplets—while you dry and warm up—produces a similar effect.
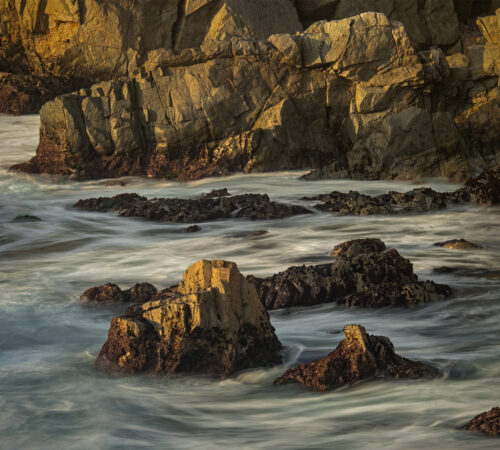
To really make the most of a rainy day, though, you gotta be outside IN it. While you can create dramatic wide-angle landscapes, using filters like a polarizer and graduated neutral density filters will be more difficult—but not impossible—to handle and keep dry during your exposures. When the rain falls, I tend to turn my lens to smaller scenes and details. Reflections in a puddle. Fog moving across a ridge line. Champagne bubbles on flowers. A telephoto or macro lens can help isolate these beautiful details from washed out, grey skies.
Note that rain moves so quickly through the air, it’s hard to capture its movement unless you find a darker background to offset its transparency. You can freeze drops midair with a fast shutter speed—try 1/500 second or faster (increase your ISO as needed to achieve this speed and your desired depth of field through your aperture setting). If you prefer to blur the falling rain into streaks, slow your shutter to around 1/30th second. Longer exposures, like 1 second or longer, will actually make the raindrops disappear from your frame—they’re moving too fast to reflect enough light to render on your pixels during your exposure. (Similar to how you can make people disappear from a busy street scene if you use a long enough exposure…).
Rain can also make focusing a challenge. Because of the low contrast inherent on rainy days, autofocus might get locked into “hunting” for focus. Meaning it tries to focus but can’t, so it keeps searching and searching and searching—all while your decisive moment of the “jaguar running across the street under a double rainbow” happens… Manual focus takes more human effort but tends to be a more reliable way to focus in grey scenes. Especially if your camera offers focus peaking functionality.
Technical details aside, I’m looking to create images that leverage the moody light to help me deliver a more emotional visual expression. Words I tend to use to direct my compositions are all over the board. They could include fresh, renewal, spring, summer, drama, melancholy, somber, tranquility, calming, hope, anticipation, dreamy, limerence, cleansing, and contemplative. As I narrow down how I am responding to what I’m experiencing, I make key decisions regarding my composition in terms of orientation, positioning, relationships between shapes, light, colors, etc.
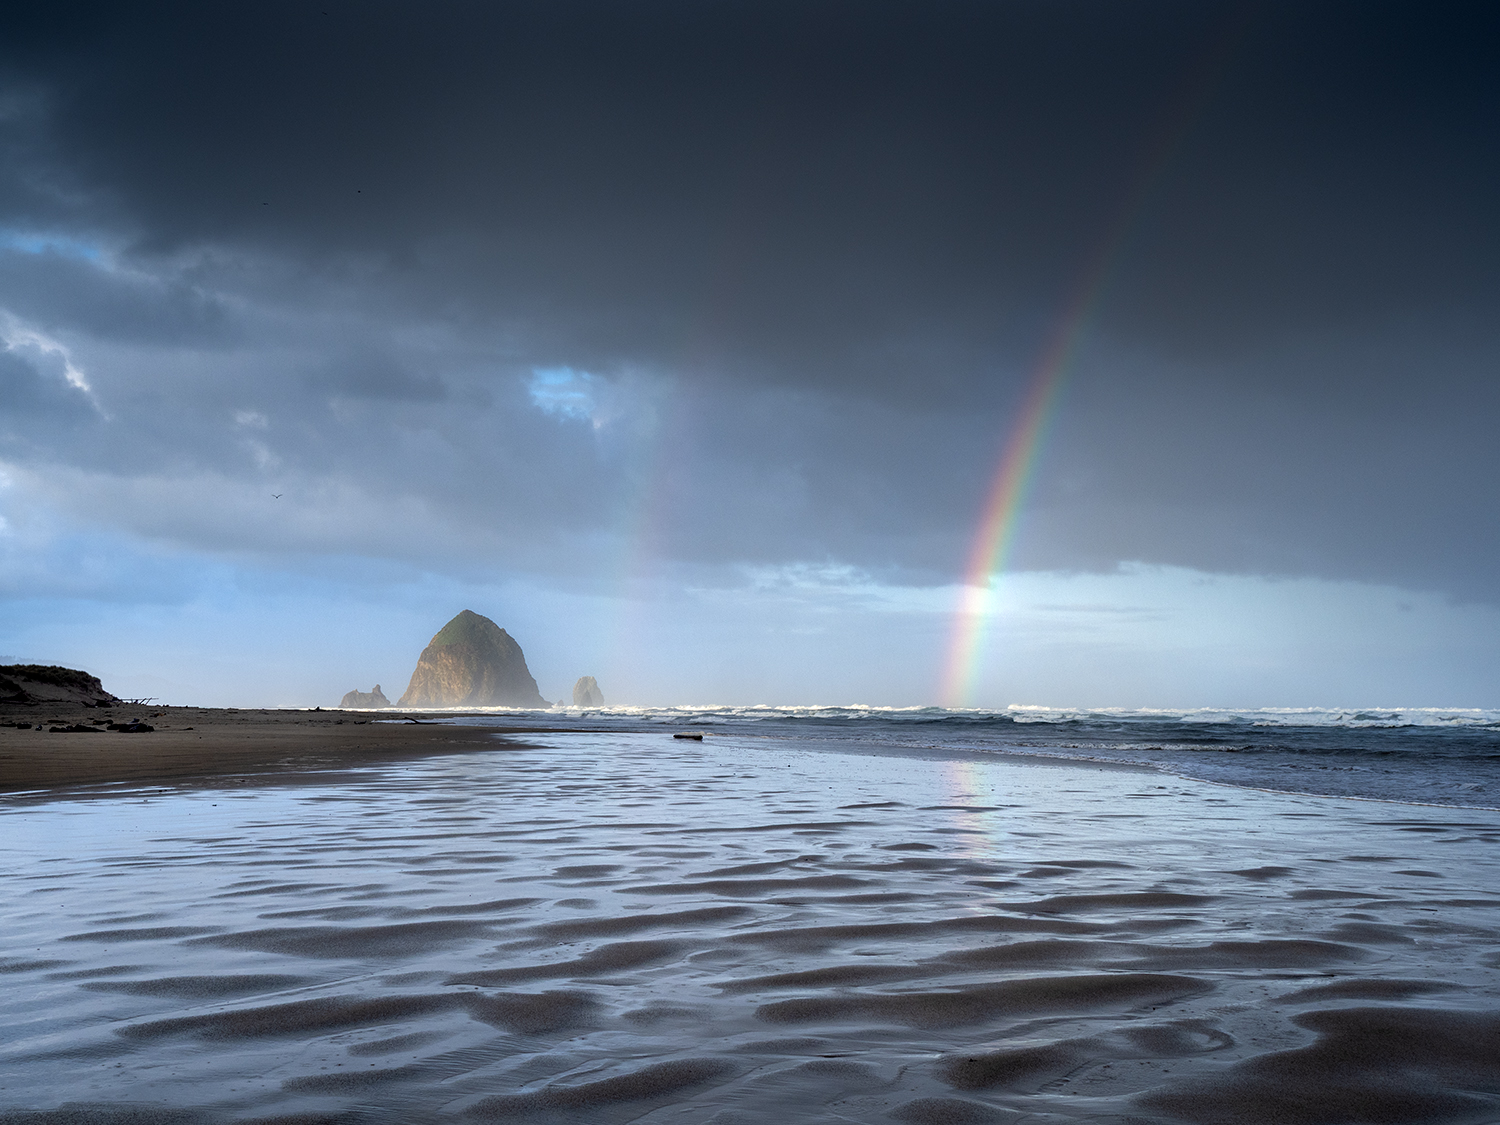
As the storm passes and the sun streams through a rain curtain, sometimes, just sometimes, you’ll get a rainbow arcing across the sky. Rainbows occur anti-solar, at 180-degrees opposite the sun. They also appear at low angles relative to the horizon (i.e. earlier in the morning and later in the evening but not midday when the sun is overhead). When this happens, just grab a lens, any lens! A wide-angle lens can help you record the whole rainbow (maybe even a double rainbow!). A telephoto lens can help you emphasize an especially colorful part of it. Either way, either remove your polarizer or turn it on your lens such that the colors of the rainbow are emphasized. You can make a rainbow disappear if the polarizer is turned incorrectly. Nobody wants that!
Processing can help your rainy images shine. RAW files may start off looking flat but boost the contrast to taste through adjusting the black, shadow, highlight, and white sliders in processing software. Increasing the texture, clarity, and dehaze can also add punch. Alternatively, lean into the dreamy mood by decreasing the contrast and softening the tones into a more pastel, ethereal look (Or! Just use a shower cap over your lens! HA!)
Emphasizing cooler blue and green tones will increase a sense of subdued and tranquility respectively in your frame. For even more drama and starkness, strip out the color and shift to black and white tones.
Of course, don’t forget to touch up any distracting water spots or smudges from your lens.
So the next time the forecast calls for showers, don’t pack your camera away. Gear up, head outside, embrace the mood, have patience with yourself, and enjoy the quiet renewal. Make a splash! After all, Vivian Greene said “Life isn’t about waiting for the storm to pass, it’s about learning to dance in the rain.”
Be well, be brave, be dry, and be wild!
~Bubbles
Have a question about photography and/or the creative life? Need some advice? Looking for inspiration? Send your question to Dear Bubbles at colleen@colleenminiuk.com to be possibly featured in a future column post. (If you’d prefer a different display name than your real first name, please include your preferred nickname in your note.)
If you liked this free post, please consider supporting Dear Bubbles either through a monthly contribution through Patreon or a one-time donation through Buy Me a Coffee. Learn more about both at https://dearbubbles.com/support.
The new “Making the Photo” video series is here! Check out the first episode at https://dearbubbles.com/2025/02/making-the-photo-turning-the-page. Catch the other monthly episodes by becoming a Patreon supporter for just $2/month.