Got Your Back

Dear Bubbles:
What is “back-button focus”? Should I be using it? Thanks,
Julie
Dear Julie:
Out of the box, most cameras pair the shutter button with autofocusing functionality by default. This means, once a photographer composes a scene, he/she presses the shutter button halfway down to autofocus and then presses the shutter button all the way down to make his/her photograph.
Back-button focusing separates this process into two independent actions: one button—typically on the back of the camera—performs the autofocusing and the shutter button remains responsible for making the frame.
To enable back button focusing, a photographer must manually reassign the autofocus function to a different button on the camera. Most photographers find assigning the autofocus to either the AEL/AFL or AF-ON button easiest since they are usually most accessible by their shooting hand’s thumb (while your shooting hand’s pointer finger rests on the shutter). That said, you can assign the autofocus function to any button you wish through the camera settings. To keep things simple here, I’m going to generically refer to whatever button you assign focus to as the “back button”.
To remap the autofocusing function, dig into your camera menu and look for something like Button Function, Custom Controls, or Custom Key. Unfortunately, the camera manufacturers don’t use the exact same terminology, buttons, knobs, dials, switches, or approach to complete this reassignment task. For exact instructions, it’ll be best to do an internet search for “[your camera brand and model + back button focusing] set-up”. My Olympus OMD EM1 Mark III requires multiple adjustments in multiple menus items…in other cameras, it’s much simpler.
Once you’ve made the new mapping, to make an image using back-button focus, you’ll press and release the back button once you are satisfied with the autofocus placement within your frame. Then you’ll snap the shutter separately. The camera will not focus or refocus as you press the shutter.
Keep in mind—and this is important if you like sharp images!—that if you snap the shutter without setting your focus first, your frame might end up out of focus. Or who knows, you might get lucky, and it happens to be in focus?? Don’t leave your image sharpness up to the fate of the Photography Gods! Remember, back-button focusing involves two steps, and you must complete the focusing task first before you make an image.
Splitting this process into two steps while using two buttons and two fingers may sound inefficient. And risky. Who needs more to remember in an already complicated process?! While it may take some practice to integrate back-button focusing into your photographic approach, it has some advantages and can actually lead to your focusing process to be more efficient—and effective—once you get used to it.
To get the most out of back-button focusing, you’ll want to switch your autofocus mode. Out of the box, most cameras default to single autofocus mode which is also called single-shot and is typically represented AF-S, S-AF, or just plain S. In single autofocus mode, the camera will lock the focus point when the shutter button is depressed halfway (when the autofocus function is still paired with the shutter button). Single autofocus mode works great when you are photographing non-moving subjects as we do in landscape photography. You pick a focus point, lock on it, shoot the frame. Next frame, same thing. Pick a focus point, lock on it, shoot the frame. Lather, rinse, repeat. Easy peasy.
If you are photographing moving subjects, especially wildlife, people, sports, or anything with unpredictable motion, switching into continuous autofocus mode is more effective. Continuous autofocus mode is also called continuous-shot and represented by AF-C, C-AF, or just plain C. In this mode, the camera will continually adjust its focus as the shutter button is depressed halfway (again, when the autofocus function is still paired with the shutter button). The camera will try to track your subject before and as you make your photograph. You pick a focus point, the camera tries to track your subject, and then you shoot your photograph whenever you achieve your desired focus and composition.
(Some cameras offer additional autofocus modes but for the sake of relevance and universality, I’m sticking to just these two modes—single autofocus and continuous autofocus—for this discussion. If you want to, and are able to, get even more fancy with your autofocusing, go for it. I’m keeping it simple here.)
Now, you can use either single or continuous autofocus modes with back-button focusing. However, the biggest benefit comes with using back-button focusing with continuous autofocus mode. In doing so, you get the best of all focusing worlds, including single autofocus, continuous autofocus, AND manual mode. Yes, you can really have that much focusing power! Mwwwwwahahahahaaaaa!
Here’s how this works: let’s say you wish to photograph a bird fluttering about in a mix of chaotic branches. You can continually hold down your back button to continuously track and focus on the bird’s eye as it moves around. Simultaneously, you can press the shutter exactly when the perfect moment strikes—even while changing your composition!
But then maybe the bird lands on a branch. It pauses for a few breaths. When you release your finger from the back button (after tracking the bird successfully to its resting place), your focus locks. The continuous autofocusing stops. Your camera stops tracking the bird. You can press the back button again to refine your focus if you need to. Tapping the back button acts like single autofocus as you press and release it. You could adjust your composition without refocusing. So long as you keep your focusing distance consistent, you’ll see sharp images.
Then! You could also refine your focus manually (and quickly) on the bird by turning the focusing ring on your lens. That’s three focusing options!
Having three focusing options may sound like way too many options. But back-button focusing saves you from having to dig into a menu or camera settings as your situation changes. It offers more dexterity and flexibility in the field. You really don’t want to have to flip from single autofocus to continuous autofocus as your subject starts to move and then back to single autofocus when it stops moving.
And you really don’t want to stay perpetually in continuous autofocus mode (when autofocus is assigned to either the shutter or back button), especially if you’re photographing non-moving subjects like landscapes. Continuous autofocus drains the camera battery faster. Also, you may want precise control over your focus point. You may not want your focus point to move during your exposure once you set it. Imagine composing a scene with trees. You set your focus point very specifically on THAT branch for your desired depth of field. Then a little bit of wind kicks up or a bird flies into your frame and lands on a different branch. In single autofocus mode, your camera will ignore this movement and remain set on your focus point. In continuous autofocus mode, though, your camera will shift focus elsewhere in the frame to track the movement. This could yield slightly blurred images or render inappropriate depth of field. To achieve optimal focus, it’s best to match the autofocus function with your subject matter.
For many years, I didn’t think back-button focusing had much value for my photography. After all, I was a landscape photographer who mostly photographed subjects and scenes that didn’t move (or at least didn’t move very fast): rocks, trees, sky. Truth be told, I didn’t often use autofocus. I preferred to manually focus to maintain precise control over my focus placement and depth of field. By manually focusing, I had already separated the focus and making-the-photo functions. The focusing ring on the lens focused while the shutter button made the image. Boom! We could call this approach “front-lens focusing.” HA!
But then the wind would kick up or I wanted to photograph moving waves. A few times I photographed wildlife that ran across or flew into my landscape frame. I went from non-moving subjects to moving subjects. I’d quickly switch from single autofocus mode to continuous autofocus mode. I liked having the combination of autofocusing and making the image available in a single button. I’d compose my frame, then position my autofocus point to the exact place within the frame I wanted (using the AF Area Select on my Olympus). Then, when the scene came together, I snapped the shutter quickly. The camera grabbed the focus and made the exposure in one fluid motion. For me, this process felt more efficient. I didn’t have to remember to autofocus separately. It was one finger motion and one snap to success!
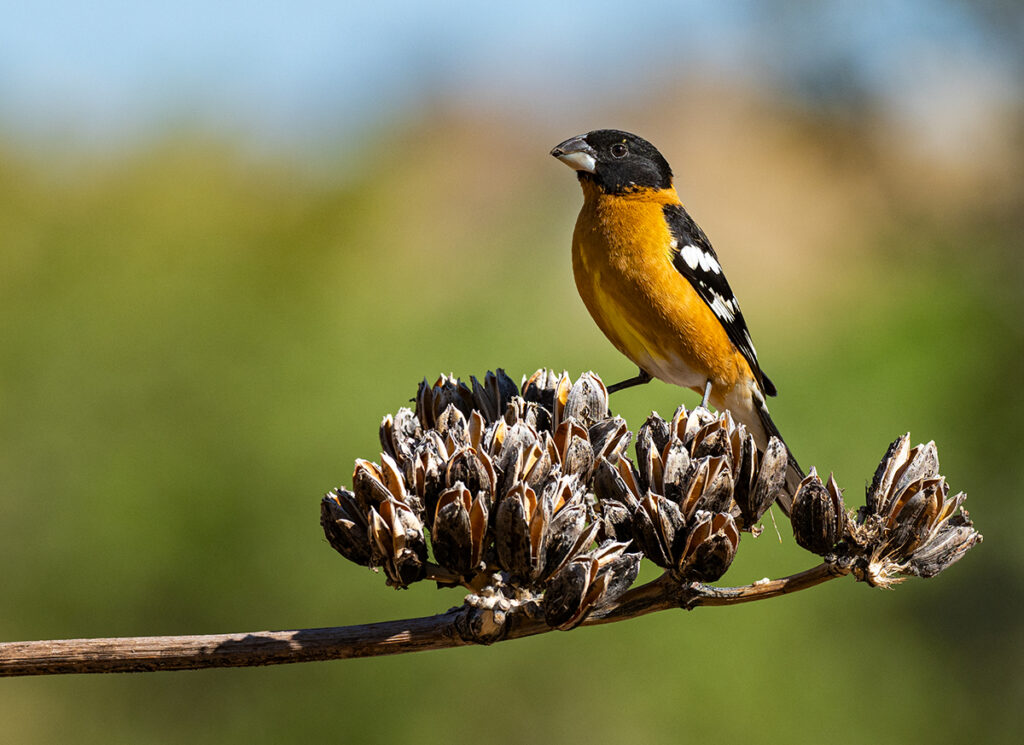
Then, in April 2021, I spent a morning photographing birds from a blind with a friend of mine. The only way I could keep any of my frames of birds spazzing around everywhere was by using back-button focus with continuous autofocusing. (To be sure, the birds were probably acting completely normal, but to a landscape photographer, the scene was the very definition of chaos! Fun chaos! But chaos nonetheless.) I held that AF-ON button down all morning as I clicked-clicked-clicked-clicked-clicked. I made 1481 images (1480 were of “bird on a stick” like the photo to the right…)
Then I went home and completely forgot that I had reassigned my autofocus function from my shutter button to back-button focusing. A few weeks later, I drove to the Oregon coast. Started making photographs. Couldn’t figure out why my autofocus didn’t kick in when I snapped the shutter. “Oddly” (it was odd then, but makes perfect sense now), even though my camera was in continuous autofocus mode, I could still manually focus my lens. Which is what I did. Until I suddenly remembered I had assigned back-button focus.
“Wait a minute. Do I really need to change out of back-button focusing mode?” I asked myself.
I realized that if most of my landscape subjects aren’t truly moving, then single autofocusing on every single frame is technically wasted time and effort. With back button focus, I could focus once (by pressing and releasing the focus button) and then make multiple frames without having to refocus the camera every time. Once my compositions are set-up, I might move an inch or two or shimmy my camera left or right in between frames. But none of that would really affect my focus.
If I left back-button focus enabled, I would have the control of full-time manual focus (“front lens focusing”) PLUS the convenience of instant autofocus either through single autofocus (press and release the back button) or continuous autofocus (by holding down the back button). It’d save me the time and effort to switch focus modes.
In setting up back-button focusing, my camera would have my back no matter what I was photographing. “Ohhhhhhhhhhhhhhhhhhh, I get the hype now!”
So I left my camera set to back-button focusing.
I’m a control freak when it comes to my image making, so even though I have my autofocus set to my AEL/AFL button on the back of my Olympus, I still use manual focus 98.27461% of the time. I like the precision. (Actually, I just like the sparkly yellow my focus peaking shows me when I manually focus…everyone needs more sparkles in their life. And bubbles and pie too.)
As with most things in photography, there are many ways to accomplish our goals. All of them are right answers. We just need to find the right answer for ourselves and our process. As I’ve said before in this column and in my other teachings, I don’t care how you make your images, just that you do—AND! You do so with confidence to get the results you are proud of. You do you.
No matter what type of photography you do, if you haven’t yet given back-button focusing a spin, give it a good college try and see if it works for you. If not, you can always switch back to shutter-button focusing. If nothing else, you’ll learn something new about yourself, your camera, and your photographic approach in the process. And you can never go wrong focusing on growing!
Be well, be brave, be wild,
~Bubbles
If you liked this post and others like it, please consider supporting Dear Bubbles either through a monthly contribution through Patreon or a one-time donation through Buy Me a Coffee. Learn more about both at https://dearbubbles.com/support.
Have a question about photography and/or the creative life? Need some advice? Looking for inspiration? Send your question to Dear Bubbles at colleen@colleenminiuk.com to be possibly featured in a future column post. (If you’d prefer a different display name than your real first name, please include your preferred nickname in your note.)


