Having F.U.N. with Silhouettes
Dear Bubbles,
How do you make a photograph of a silhouette?
Amy
Dear Amy,
I have a confession to make. There are two words in the English language that, no matter how many times I use or type them, I am not able to spell them. One is silhouette. (The other is toilet.) You can safely assume that Microsoft has autocorrected every single occurrence of silhouette in this post. Fortunately, photography is a visual, not a verbal, art. You do not need to know how to spell silhouette in order to know how to make a photograph of it.
A silhouette is formally defined by Merriam-Webster in two ways. One, “a likeness cut from dark material and mounted on a light ground or one sketched in outline and solidly colored in.” And two, “the outline of a body viewed as circumscribing a mass.”
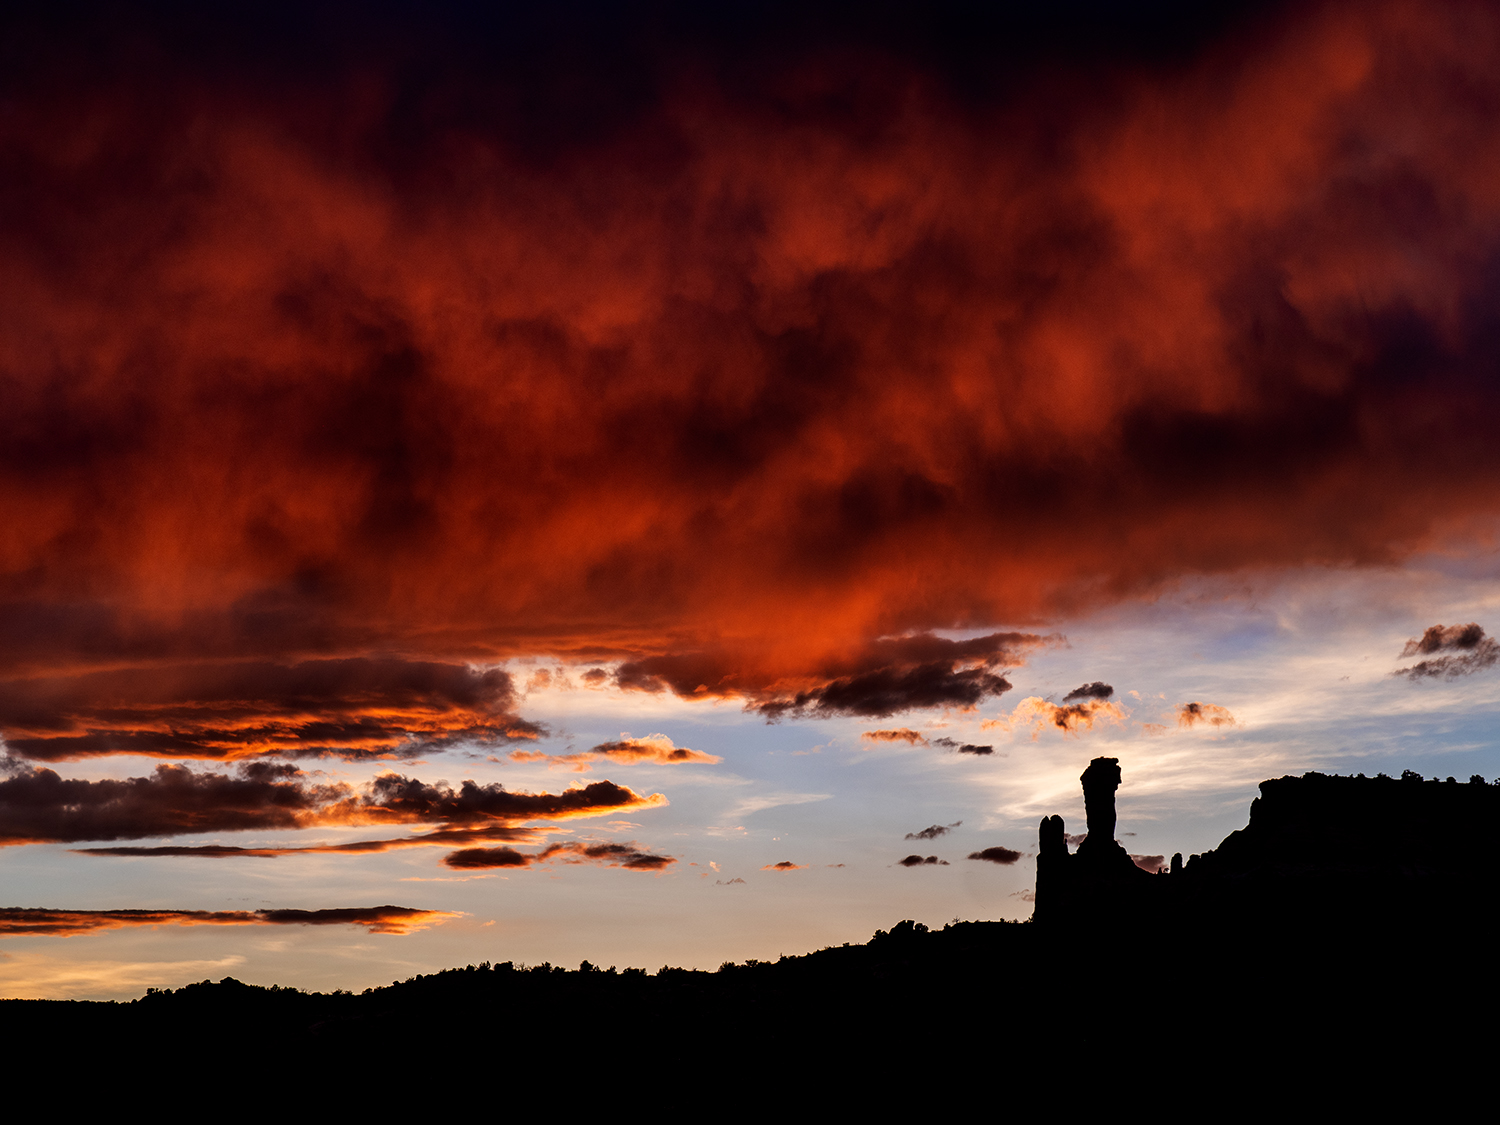
From a photographic perspective, we’re aiming to accomplish a blend of both definitions simultaneously. We strive to give contour to a figure—a tree, plateau, mountain, animal, or some other mass—by rendering it black and offsetting it with a lighter colored background. To do so, we start by turning our cameras into the direction of the sun or other light source to achieve backlighting (which separates a figure from a ground in a visual sense).
Backlighting suggests that the subject is illuminated from behind and the shadow of that subject falls in front of itself. While there are many ways to incorporate backlighting effectively into our photographs—a silhouette only being one of them—the goal for a silhouette remains the same: to produce a detail-less, black shape of a subject against a typically colorful background. Ideal times to make silhouettes include when the sun sits below the horizon like during nautical and civil twilight before sunrise and after sunset. It is possible, though, to create one when the sun is above the horizon, when the sun filters through another backlit object (like a window curtain or stained glass), and when the sun’s light bounces off other illuminated objects like the moon. Shadowed areas falling against lit surfaces also technically qualify as a silhouette.
When photographing backlight, which means you’ll be pointing your camera directly into a light source, be sure to remove all filters from your lens to prevent lens flare. Lens flare results when the light reflects on the lens glass. It looks like a bunch of dots-dots-dots across your photograph (which are in the shape of your lens’ aperture). Adding more glass or resin in the form of a filter will only multiples these undesirable artifacts. A UV, polarizer, and neutral density filter won’t provide any benefit to you in rendering a silhouette. Using a graduated neutral density filter, which is used to reduce the dynamic range of a scene and increase detail in the highlights and shadows, will actually make it more difficult for you to achieve a true silhouette.
If you’re photographing bounced light, instead, a UV and neutral density filter still won’t help. A polarizer could help reduce some of the intensity of the reflected light. This could increase the saturation of the reflected material. A graduated neutral density filter could help darken specific areas of your frame. It just depends on your composition.
To determine what to include in your frame, consider why you are interested in photographing a backlit subject. What are you responding to and why? Although some might say “the pretty or dramatic clouds in the sky,” the real reason may lie deeper. For if you are primarily attracted to pretty or dramatic clouds in the sky, then I’d argue that you don’t need a landform or land-based form to express that in a single frame. You only need to include the clouds in the sky, nothing more, nothing less. When it comes to composition, remember: K.I.S.S., or “Keep it simple silly.”
While pretty or dramatic clouds in the sky may grab your attention first, I’d guess it’s the relationship between the landform and the sky that draws a photographer to create a silhouette. Everything in the frame then, including landform and sky should support delivering that visual message of “pretty and dramatic”—or whatever other words and meaning you assign to the moment and scene in front of you.
Thus, silhouettes tend to work best (i.e., are most visually appealing) when you feature graphic horizon line or subject—something with an interesting profile, an intriguing gesture, or unusual character, anything that has a strong and striking shape to begin with—to compliment the sky or background. Flat, straight horizon lines (as one may see in a desert plateau or in a coastal rock formation, for example) tend to be perceived by viewers as stable, not moving, at rest. While flat, straight horizon lines can provide great visual interest, they can contradict the effect you’re trying to accomplish in expressing a silhouette, especially if you feel a great deal of excitement about what you’re experiencing.
How you balance this relationship between land and sky depends on what you’re drawn to. If you the sensual shape of a tree, aim to fill your frame with the sensual shape of that tree (figure) and use the color in the sky as the background (ground). If you’re drawn to a dramatic sky, drop the horizon to the lower part of our frame (ground) to provide a foundation and fill the rest of the frame with the sky (figure). Both examples are right answers but for different reasons.
The tree, land, or whatever shape you choose to emphasize should appear pure black in color in your photograph. To accomplish this, we need to expose such that the subject remains in its shadowed state and the background retains mid-tone colors and details. This differs from the “expose to the right,” or ETTR, maxim we’d be told to follow. Exposing a silhouette is one of the exceptions to this approach. We don’t want to expose to the right. We want to record a “whale’s tail” histogram instead. I promise you, you will not spontaneously combust if you do not ETTR your RAW format to record a silhouette. (At least I haven’t yet…)

To properly record dark tones, you’ll want to add or subtract light such that the background isn’t overly bright but is bright enough to retain detail. This will keep the shadows in the land. You should see a spike on the far left side of the histogram. This spike in the black tone area of the histogram is what I call a whale’s tail. You should also see a rounded bump rising near the middle of your histogram which represents the mid-tones. This is what I call the whale’s body. Finally, you may see a small gap in the highlights area of the histogram. For this situation, that’s OK.
Some people call this approach “exposing for the background” to get rich detail and saturation in the midtones and then let the shadows fall where they may. After all, you can’t make a black tone any blacker no matter how much you underexpose (to reduce the brightness of the highlights and midtones). Black is black is black. (Did anyone win Critingo with that one?! HA!)
To avoid overexposure, or blowing out your highlights, keep an eye on your RGB histogram, not just your composite luminosity (a.k.a. brightness) histogram as you play with your exposure settings. Brilliant oranges, reds, yellows, pinks, and purples clouds can skew your red and blue channels into overexposure. We don’t often get green skies, unless you’re in tornado country, so your green channel is probably safe from overexposure in this situation (unless you’re photographing a sky before a tornado…in which case, yikes! Please be safe!).
Typically, a silhouette does not feature a close-to-camera subject, so a medium-range aperture like f/8 will usually suffice when it comes to depth of field. When you are photographing a static subject and your camera sits on a tripod, your shutter speed and ISO speed settings can be fast or slow. They don’t matter much so long as they help to facilitate that whale’s tail histogram.
If you decide to handhold your camera, make sure your shutter speed is at least “1/focal length of your lens” to ensure sharp focus. (This means, if you’re photographing with a 300mm lens, for example, your shutter speed should be 1/300th of a second or faster. If you’re photographing with a 50mm lens, your shutter speed should be 1/50th of a second or faster. And so on and so forth.)
Be aware that once you’ve dialed in your composition and exposure settings, the autofocus function on your camera may struggle to find focus especially in lower light situations common in civil and nautical twilight. If that’s the case, position your focus point (either manually or automatically) along the edge of a highlight and shadow. Your camera likes to see a bit of contrast to achieve focus.
So there you have it! To photograph silhouettes, find some backlight paired with an interesting graphic form, underexpose, and notice the shape of your histogram. And do you know what the first letters of find, underexpose, and notice spell? That’s right! FUN!
Once you get the hang of it, photographing silhouettes is fun. And I know we ALL know how to spell fun! So get out there and go have some!
Be well, be brave, be wild,
~Bubbles
If you liked this post and others like it, please consider supporting Dear Bubbles either through a monthly contribution through Patreon or a one-time donation through Buy Me a Coffee. Learn more about both at https://dearbubbles.com/support.
Have a question about photography, art, and/or the creative life? Need some advice? Looking for inspiration? Send your question to Dear Bubbles at colleen@colleenminiuk.com to be possibly featured in a future column post. (If you’d prefer a different display name than your real first name, please include your preferred nickname in your note.

Accidental JPEG