Getting it White
Dear Bubbles:
I tried to photograph snow for the first time last week but all my pictures came back too dark. I was able to lighten them in Lightroom, but I’m wondering if something is wrong with my camera? Do you have any idea what I could be going on?
~Sandra
Dear Sandra:
Something might have gone awry with your camera. It’s more likely, though, your camera simply didn’t collect enough light during the exposures. Were you keeping an eye on your histogram, young lady?
Even so, snow is tricky to photograph. Our cameras “see” a scene, light specifically, differently than our eyeballs do. Understanding how the camera evaluates light can direct us to make the necessary adjustments to render the proper exposure in these bright situations. So let’s talk this through before you send your camera in for a check-up.
All digital cameras have something called a “meter” built into them. No matter what camera mode you shoot in—whether it’s Auto, Program, Aperture-Priority, Shutter Speed-Priority, or Manual—the camera’s meter evaluates the quantity of light within your frame before you make a photograph. It considers the light reflectance based on subject-to-camera distance, lighting conditions, focus, and color.
Cameras have the capability to analyze these variables in different ways. These ways are referred to as metering modes. The four most popular metering modes include:
- Evaluative Metering (also referred to as matrix, honeycomb, and multi-zone): The camera takes into consideration the entire frame before determining what it believes is the correct exposure. It’s the best general-use metering mode.
- Partial Metering: The camera considers only a percentage of the frame, typically 8-15% of the total view falling in the center of the frame, to determine the exposure setting. This mode is most useful when the light in the center of the frame is substantially lighter or darker than the light around the edges of the frame (e.g. backlit situations).
- Center Weighted Average Metering: The camera evaluates the entire frame and averages the light between the subject and background in the frame, placing more value on the subject in the center of your frame to determine the correct exposure. This mode is most useful when the subject and background are in substantially different light.
- Spot Metering: The camera evaluates a small percentage of the center of the frame, typically 1-5% depending on the camera. The meter does not consider the light falling on anything outside of this small circle. This mode is most useful in applying the Zone System (which I’ll cover in a minute), where precise evaluation of specific tones occurs to determine the correct exposure, similar to what is accomplished with an external light meter. It’s also the most helpful when using graduated neutral density filters, when precise measurement of the light difference between the sky and the landscape is needed to choose the appropriate strength of filter.
Metering is how the camera communicates the current light levels for a scene with you so that you can decide how much light you need to collect through your ISO, shutter speed, and aperture settings. The results are displayed in a graph (also called a “meter”) which is typically visible at the bottom of the camera’s viewfinder and/or the LCD on the back of the camera when your shutter is active (i.e., you aren’t in Playback mode). You may need to enable this function by pressing the Display or Info button a few times or by digging into your camera’s menu for Display settings. It will look something like this: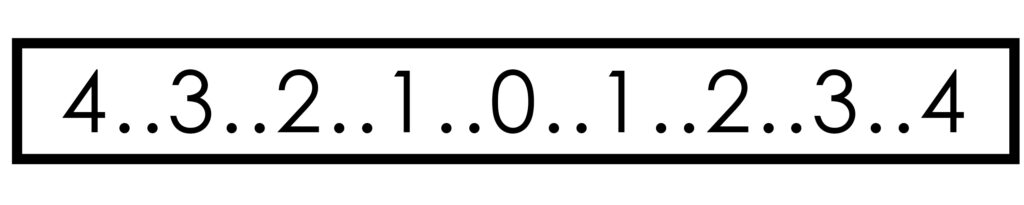 This graph represents a series exposure levels as expressed in stops of light. The -1 and -2 represent minus one and minus two stops of light respectively. This is the same as underexposure by one stop and two stops of light–or halving the light, then halving the light again. The +1 and +2 represent plus one and plus two stops of light respectively which is the same as overexposure by one stop and two stops of light–or doubling the light, then doubling the light again. (Also, your plus sign might be on the right or left side depending on your camera model.) You might see 3 or even a 4 stops on your meter. You may not see any numbers at all but rather just thick dots or lines. (My Olympus OMD EM1 Mark II only shows three-stops worth of thick dots, no numbers.) The smaller dots in between the numbers or lines represent one-third stop increments. You may only see half-stop increments (or one dot versus two). Whether you see one-third or one-half increments on your meter can be adjusted through your camera’s menu. I prefer one-third increments because it gives me more precise control in handling exposure compensation. Even though each camera displays this meter a little differently, each meter works in the same way.
What about the 0? The 0 is a neutral position. No matter which meter mode you choose, repeat after me: the camera always, always, always wants to “see” middle grey when it meters (specifically 18% grey, which on the lightness scale, comes to an 18% reflectance in visible light.) That’s it’s baseline. That’s the value behind the “0” (or the centered dot or line if you don’t see numbers on your meter).
In Auto, Program, Aperture-Priority, and Shutter-Speed priority camera modes, you might notice “tick” mark lining up with this 0 position no matter what shutter speed or aperture you set. (If you see it in another place in your meter, you have somehow changed the exposure compensation–intentionally or unintentionally–using your dials or the “+/-” button on your camera.) As you point your camera at different scenes, this tick mark doesn’t move from 0. That’s normal. The camera is adjusting your shutter speed and/or aperture settings, depending on your camera mode, to render a meter reading that results in middle grey.
(Also of note, once you settle in on a composition, you may also notice that your shutter speed and/or aperture setting may change should you modify your metering mode because the meter is reading a different scope of light as outlined above. Your tick mark will remain at 0.)
In Manual camera mode, however, as you move your camera around or change your metering mode, you’ll see that tick mark jumping around on this graph. If you point it to something white, it may jump to +2. If you point it to something black, it may shift over to -2. That’s also normal. It’s not touching your aperture or shutter speed settings. (Remember, in Manual mode, the camera goes on vacation so you’re in charge of all the exposure settings.) You can line the tick mark up with the 0 position (or any other position on this meter) by adjusting your shutter speed, aperture, and ISO. The “0” is still middle grey.
Generally speaking, in any metering mode and in any camera mode, starting off your exposure settings–at 0 for every frame will get you close to an appropriate exposure combination. It’ll at least give you a baseline in which to decide whether you need more light or less light for your composition.
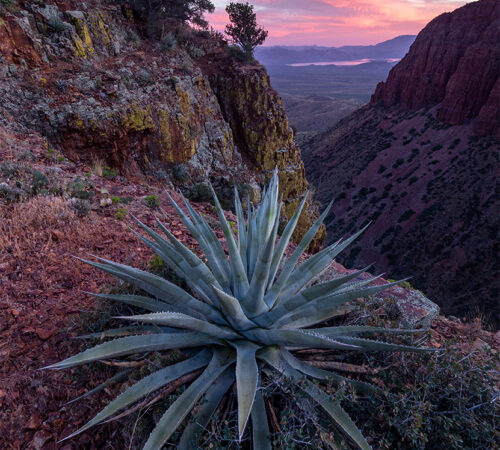
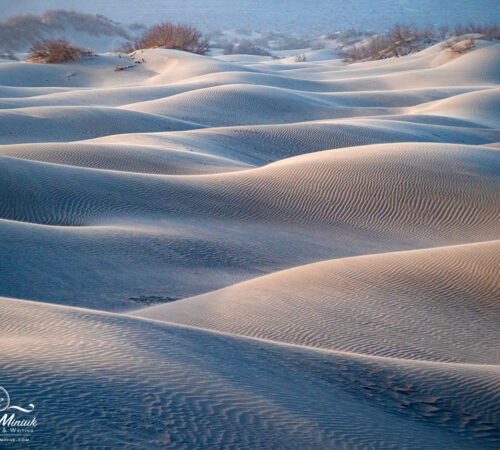
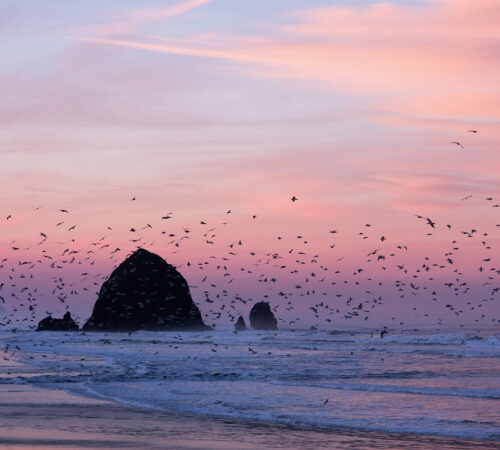
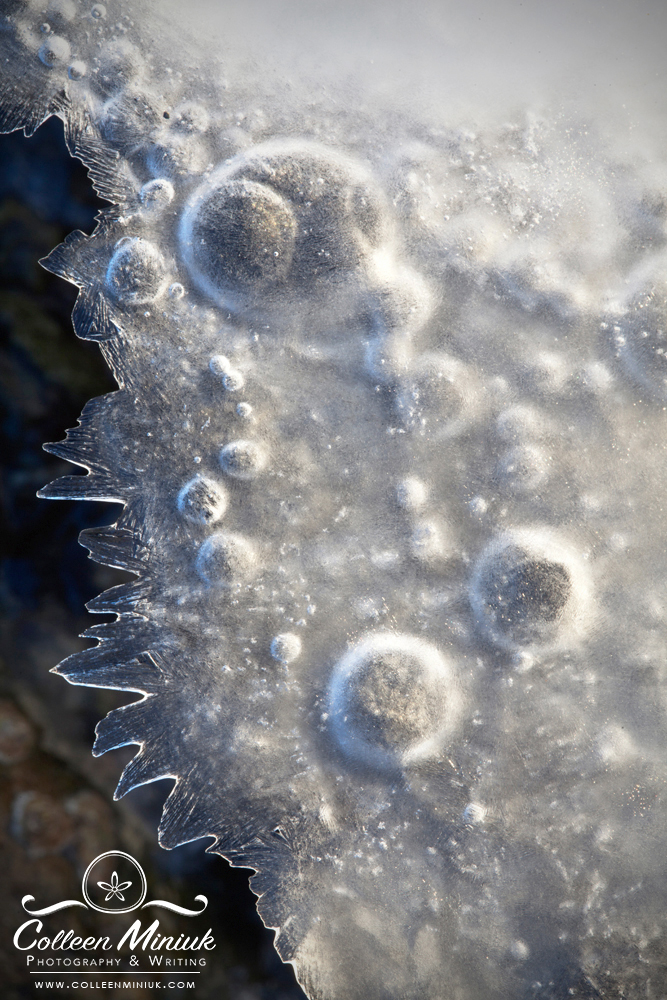
BUT–and here’s where it gets tricky–when we’re dealing with overly bright subjects like snow (and things like sand, water, and ice too), the meter doesn’t match up with what we see with our own eyeballs. What color do you see when you see snow in bright sunlight? White, right? It’s not middle grey. When you point your camera at white snow, though, the camera thinks it’s middle grey. If we don’t adjust our exposure compensation before we make the photograph, the camera will underexpose the frame to render middle grey. It’ll look too dark. To render snow as white, you’ll need to add light, typically in between +1 and +3 stops of light depending on how sunny it is (i.e., line your tick mark up in between +1 and +3). It sounds counter-intuitive to add light to a bright scene, but if you keep in mind that the camera always, always, always wants to “see” middle grey, it makes perfect sense.
While we’re at it, similarly, if you point your camera at a black wall, the camera thinks that’s middle grey too. As such, the camera will overexpose the frame to render middle grey. If you wish for that black wall to appear black in tone and color in your photograph, you’d need to subtract in between 1 and 3 stops of light depending on how dark it is. Yep, you guessed it, line your tick mark up in between the -1 and -3.
Now what if you’re photographing snow on an overcast or foggy day when everything is middle grey? Your camera will dish out a perfect exposure recommendation for you with the tick mark on 0. No adjustment required.
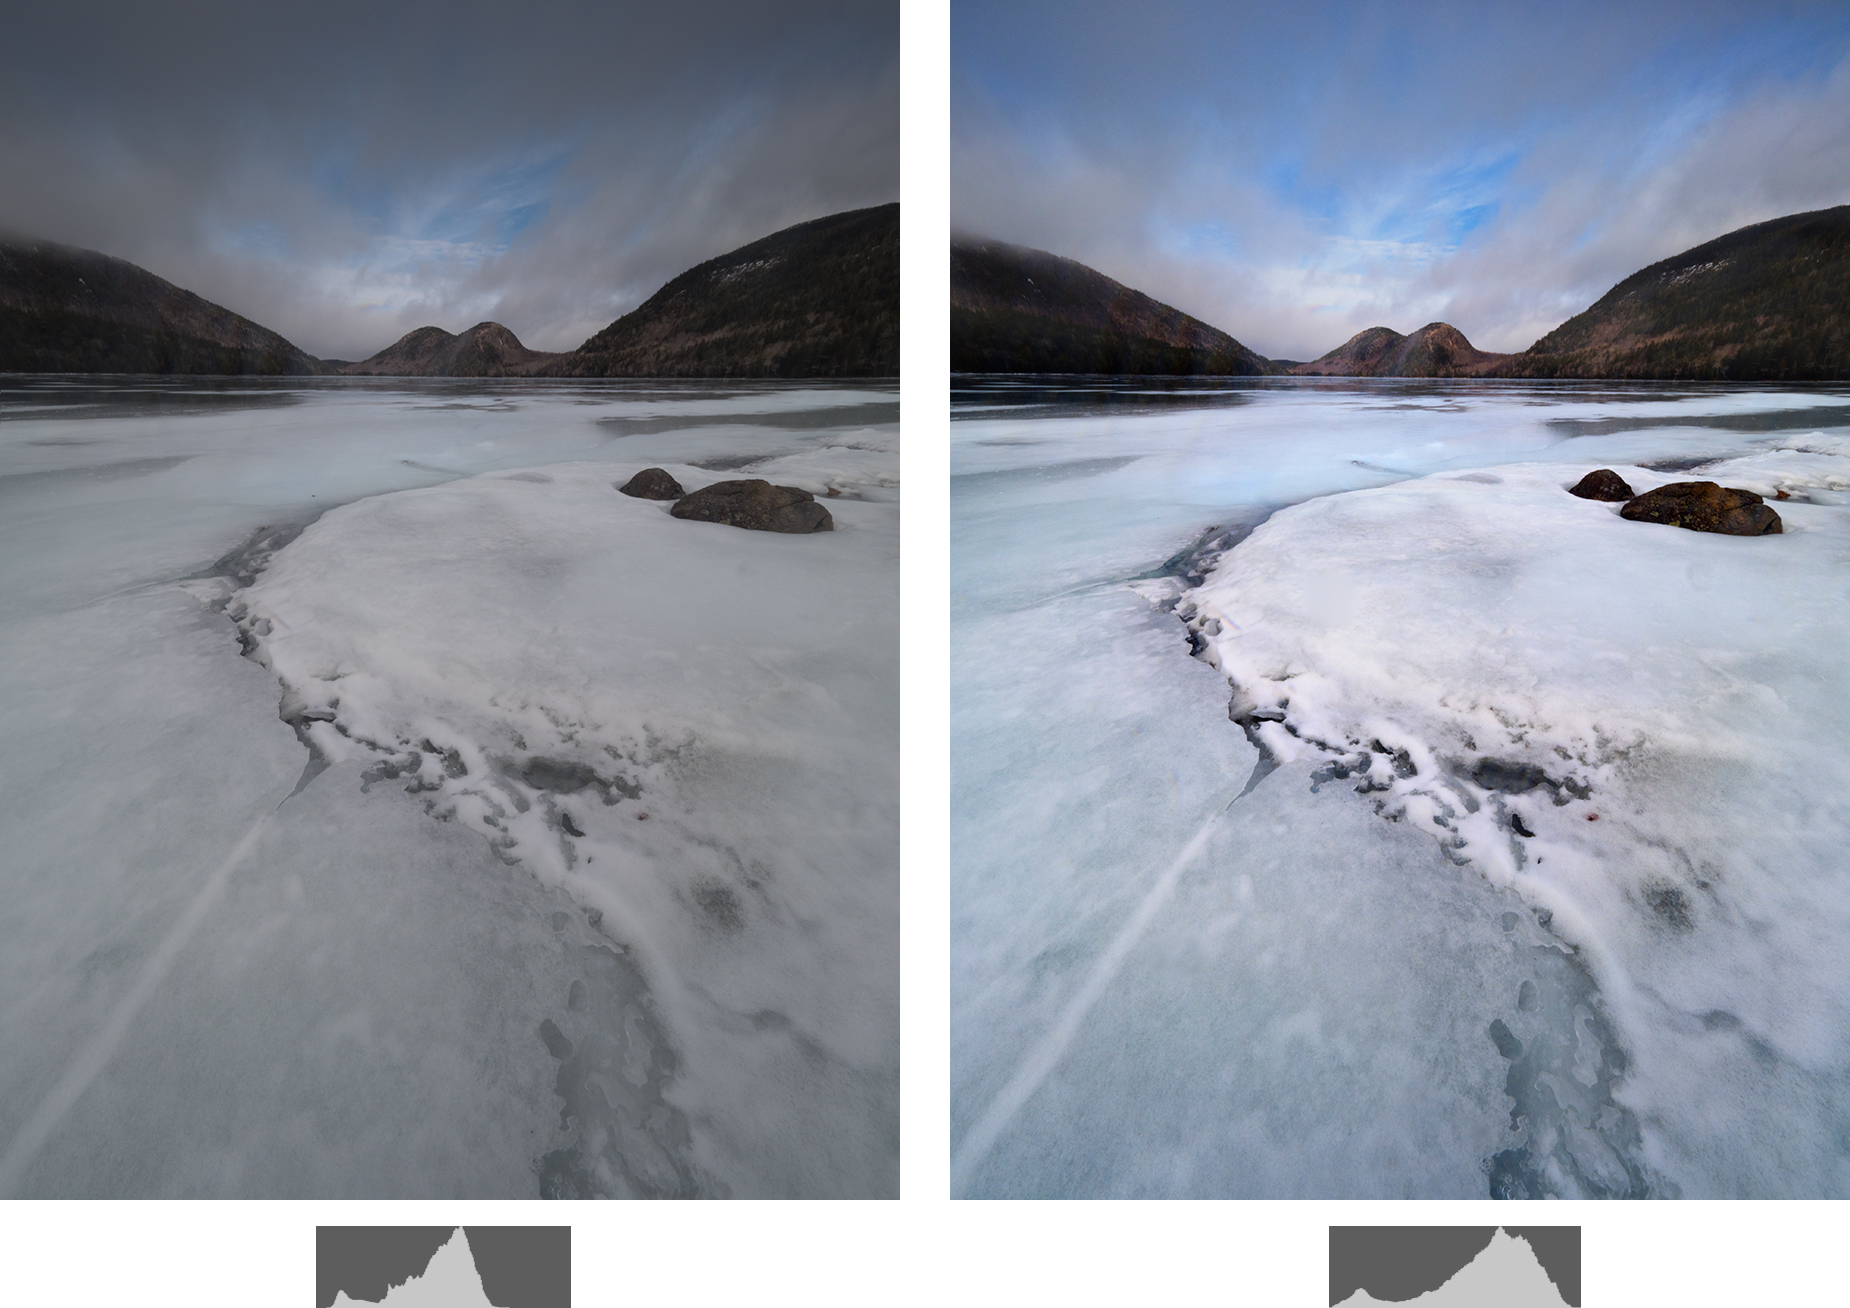
In this sense, for outdoor photography, particularly with scenes that don’t involve motion or a fleeting moment, it really doesn’t matter which metering mode you use. Pick one and stick with it. With digital photography, it’s more important you keep a close watch on your histogram which will give you immediate feedback on how much light your camera collected during the exposure. From this information, you can make adjustments to exposure compensation as needed. If your histogram appear too dark (i.e., the graph is shifted to the left), the photograph is underexposed. Add light through EV compensation (+/- button) towards the “+”. Or, if you’re in Manual mode, by adjusting your aperture and/or shutter speed to increase the amount of light hitting the sensor. If your histogram appear too light (i.e., the graph is shifted to the right and you see the “blinkies” or the highlight alert flashing in Playback mode), the photograph is overexposed. Subtract light through EV compensation (+/- button or dials) towards the “-“. Or, if you’re in Manual mode, by adjusting your aperture and/or shutter speed to decrease the amount of light hitting the sensor. (For more about reading your histogram and adjusting the compensation, visit my Histogram is Out of Shape article.)
I meter using the Spot metering on my digital camera, a habit leftover from my film camera days when I didn’t have a built-in meter or a histogram giving me instant feedback. With my large 4×5 format camera and 6×4.5 medium format cameras, I relied upon an external spot meter device. I’d point my Pentax Digital Spotmeter at different tones within the scene and note the measures of light to determine the best combination of aperture, shutter speed, and ISO. I used these readings in conjunction with the Zone System to “place” tones in the proper exposure zone.
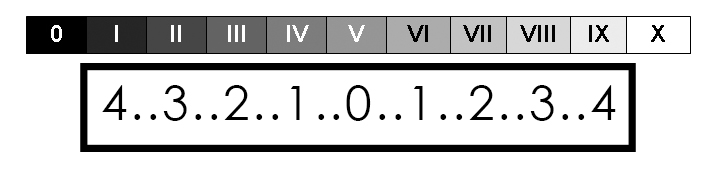
Ansel Adams, in partnership with Fred Archer, developed the now famous “Zone System” which offered a seemingly fool-proof method for determining the optimal exposure for a given scene. (Any screw-ups in exposure were due to user error. At least in my case…) In the Zone System, there are 11 zones, ranging from absolute black without detail to absolute white with no detail. A range of midtones sits in between. Each zone has a number, spanning 0 to 10 (usually expressed in Roman numerals), and represents one stop of light:

Adams also described what each zone meant in terms of how it would appear on photographic paper:
- Zone 0 = Pure black, no detail
- Zone I = Near black with slight tonality but no texture
- Zone II = Textured black; the darkest part of the image in which slight detail is recorded
- Zone III = Average dark materials and low values showing adequate texture
- Zone IV = Average dark foliage, dark stone, or landscape shadows
- Zone V = Middle grey; clear north sky, dark skin, or average weathered wood
- Zone VI = Average Caucasian skin, light stone, or snow in sunlit landscape
- Zone VII = Very light skin, shadows in snow with acute side lighting
- Zone VIII = Lightest tone with texture; textured snow
- Zone IX = Slight tone with texture; glaring snow
- Zone X = Pure white, light sources and specular reflections; paper white, no detail
(As an aside, I’m not sure why, but I’ve always associated the Zone System with the teeth whitening guide one of my dentists had hanging on a poster in his office…)
Although the Zone System was developed specifically as a guide for visualizing the exposure for developing black and white prints in a darkroom, I still use it with my with digital photography, whether shooting in color or black and white, to help me visualize the proper exposure before I photograph. Here’s how this works:
(Fair warning: explanations of the Zone System tend to either completely make order of the world or totally confuse people. If the latter, ignore everything from this point on and simply use your meter and histogram to add and subtract light as needed. You’ll do great with that approach.)
Consider that Zone V lines up with the 0 on our meter and corresponds with the stops of light you see on your meter:
 Set your meter mode to Spot metering so you have the ability to precisely measure the tones within your frame. Then identify an object within your composition that is white or black. A cloud. Sand. A black bear. A shadow beneath a rock. Get a meter read on that tone (i.e. in Manual mode, set your aperture and shutter speed such that the tick mark lines up at 0 while you’re pointing at this object. In all other modes, take note of the combination your camera suggests). To do this, you might need to move the camera around your composition as you would an external light meter. Just don’t go chasing a bear down to get a meter reading please…
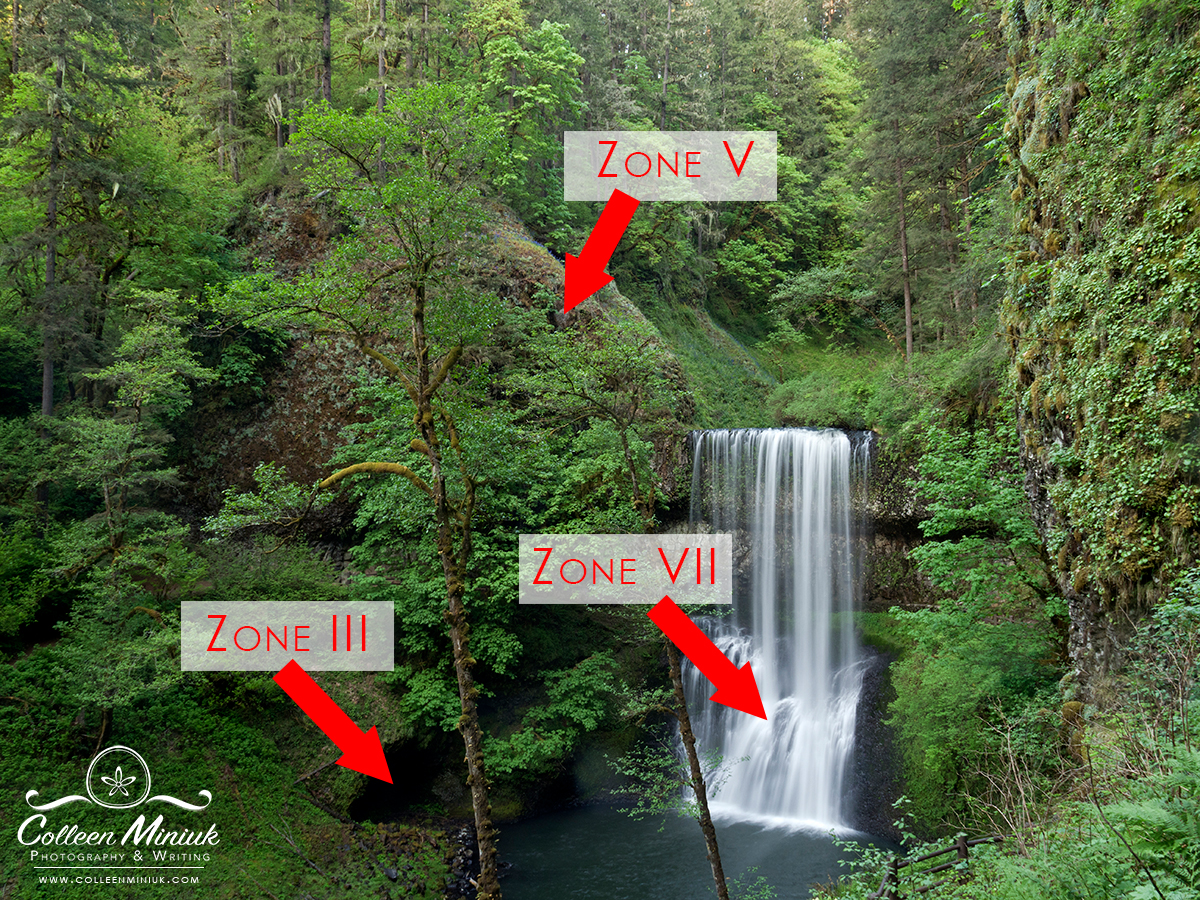
Let’s say you have a broad landscape scene of a waterfall composed. You point your camera at the waterfall on Spot metering and the camera spits out an aperture and shutter speed combination that renders middle grey, or Zone V. The waterfall is not middle grey though. It looks white to your eyes, but is it pure white or a shade of grey in between white and middle grey? Do you want to render that water as absolutely white without any texture? Probably not. It’d end up being a bright white blob of nothingness. In consulting the descriptions Adams provided, Zones IX and X are not options then. Somewhere in between Zone VI and VIII are viable options though, depending on how bright you want that waterfall to appear in your image and how much texture you wish to retain, so you’d add in between +1 and +3 stops of light to get the proper exposure for the entire scene, either by slowing the shutter speed, slowing the ISO, making the aperture bigger, or a combination of the three. (Note when photographing water, a longer shutter speed will reduce the amount of texture you see in your photograph…)
For the exact same scene, you could pick out a dark shadow beneath a rock on the side of the waterfall instead, get a meter reading on it (i.e. aperture and shutter speed combination), and “place” it in Zone II or III. As such, you’d subtract 2 or 3 stops from the initial meter read, either by speeding up the shutter speed, speeding up the ISO, making the aperture smaller, or a combination of the three.
Theoretically, you could also identify a middle grey tone within your composition and “place” it on Zone V. In that case, since our cameras see middle grey already, you would not need to add or subtract light. In my film days, I had a remarkably difficult time identifying a middle grey tone (versus an almost middle grey tone and a slightly darker than middle grey tone), though. Black and white tones were and are more obvious and much easier to identify within a scene for me. At this point, I place blacks around Zone III (or -2 stops) and bright whites around Zone VII (or +2 stops) to retain detail.
No matter what I’m photographing–snow, sand, water, black walls, the inside of caves, rocks–AND no matter where I place the tones though before I photograph AND no matter what aperture and shutter speed I choose AND no matter where I line my tick mark on my meter, I always check my histogram after every shot. I add light if the data tells me my exposure is too dark; I subtract light if the data tells me my exposure is too light. It’s really that simple. Being mindful of your histogram will help you get your snow white.
So monitor your histogram. Play with the Zone System too if it helps. And if, after all that, your images are still dark, then yes, we can conclude that something isn’t right with the camera .
Be well, be wild,
~Bubbles
Have a question about photography, art, and/or the creative life? Need some advice? Looking for inspiration? Send your question to Dear Bubbles at colleen@colleenminiuk.com to be possibly featured in a future column post. (If you’d prefer a different display name than your real first name, please include your preferred nickname in your note.

Happy Birthday, Dear Bubbles!