Expand Your View
Dear Bubbles:
In one of your webinars, you mentioned photographing a panorama. I’ve never tried to do a panorama photograph but want to. I think you said to turn the camera vertically, but I’m not sure I heard you right. Can you help me?
~Turned Around
Dear Turned Around:
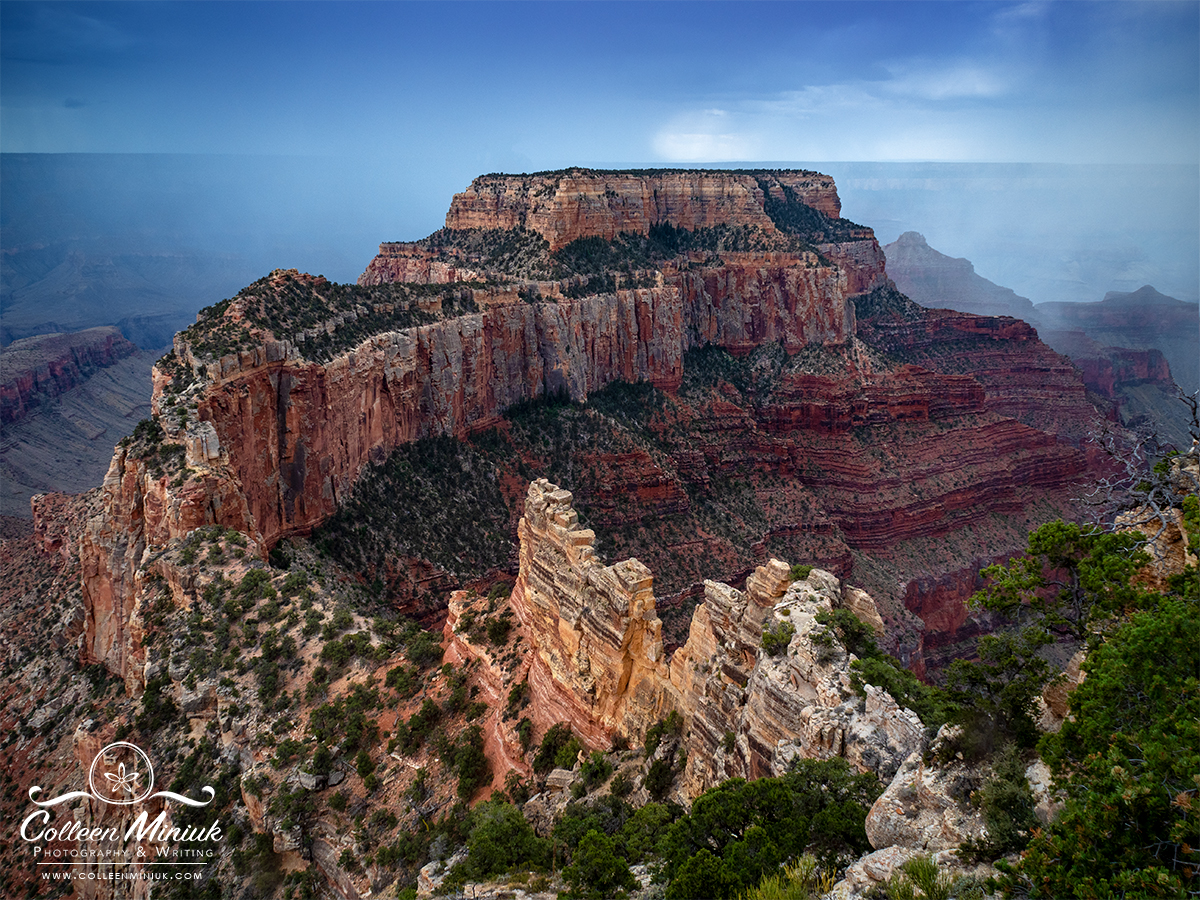
Just last week I found myself at the edge of the North Rim of the Grand Canyon watching a thunderstorm cross behind Wotan’s Throne with my camera and my 28-300mm lens in hand. I quickly realized my 28mm wasn’t broad enough to make the image I wanted, but I had left all of my other gear in my vehicle because of the threatening weather.
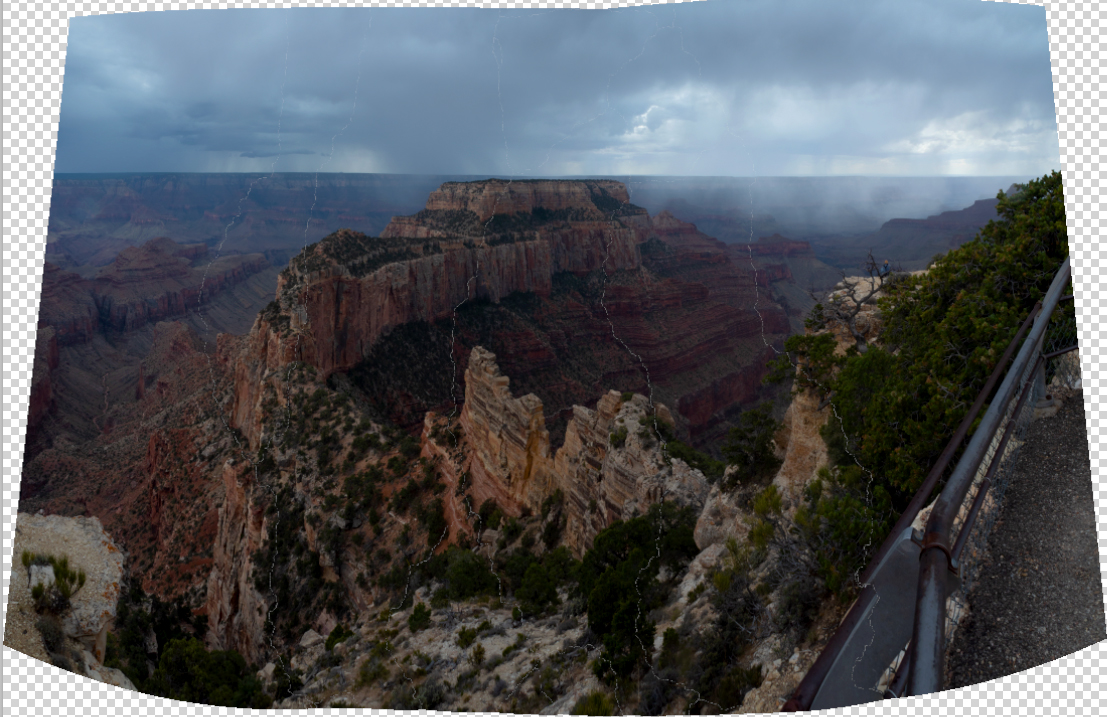
Rather than spend precious time returning to the parking lot, which was about a quarter-mile walk away, to grab my wider angle lens, I turned my camera vertically and photographed 13 overlapping frames to stitch together later in processing software to create a panoramic rendition of the scene. Problem solved! I can’t say this is a crutch I care to rely on all the time, but in this case, it saved my bacon. It made the difference between making a photograph and missing the moment.
Knowing the technique for making panorama photographs can help you record more expansive views of a scene (even when you have all the right gear with you). Sometimes our visual message simply doesn’t fit in the rectangular box the camera manufacturers have given to us. Sometimes our composition just feels panoramic—a wide, elongated, sweeping view.
Here’s how I do it:
- Turn your camera to the vertical orientation and set atop tripod. Any lens will suffice but you’ll get more distortion in the final panoramic image with super-wide-angle lenses (wider than 24mm).
- If applicable, remove your polarizer from your lens. Polarization is most effective at 90 degrees from the sun. Typically panoramic images perspectives exceed this measure. When polarizer filters are used during panoramas, it can lead to uneven polarization across the sky. (Graduated neutral density, neutral density, and UV filters are fine to use.)
- Visualize a starting point (“Point A”) for your panoramic scene and an ending point (“Point B”).
- Level your composition. Some fancy tripod heads rotate around their base. You can also purchase a Nodal Ninja to rotate around the nodal point to avoid parallax (for more information about this, visit www.nodalninja.com). I eyeball it by lining up the horizon with a grid line in my viewfinder/LCD and manage just fine 99% of the time.
- Evaluate the depth of field within Point A to Point B. Set your aperture and lock your focus point via Manual focus (or autofocus lock, AFL in auto focus mode) to keep the depth of field consistent throughout the entire frame set. Make sure your foreground isn’t too close to your camera. Processing software has a tendency to distort close objects when it attempts to stitch them.
- Test your exposure for the lightest part of the frame. Set your exposure settings (i.e. shutter speed and ISO) to record detail in the lightest part of the frame otherwise you’ll get blown out highlights you can’t recover in processing software. This may mean the rest of your frames appear underexposed—that’s OK. You can recover detail out of the shadows during processing. Unless you plan to employ High Dynamic Range Imaging, HDR, imaging techniques—which increases the number of frames you’ll record—keep all exposure settings the same throughout the entire shooting process. Do not change aperture, shutter speed, or ISO settings. I use Manual camera mode to do this, but you can use autoexposure lock, AEL in aperture-priority, shutter-speed priority, and program camera modes.
- Position your camera just beyond your designated Point A. I call this the starting “tail”. This gives your processing software some breathing room when it stitches the photographs together later.
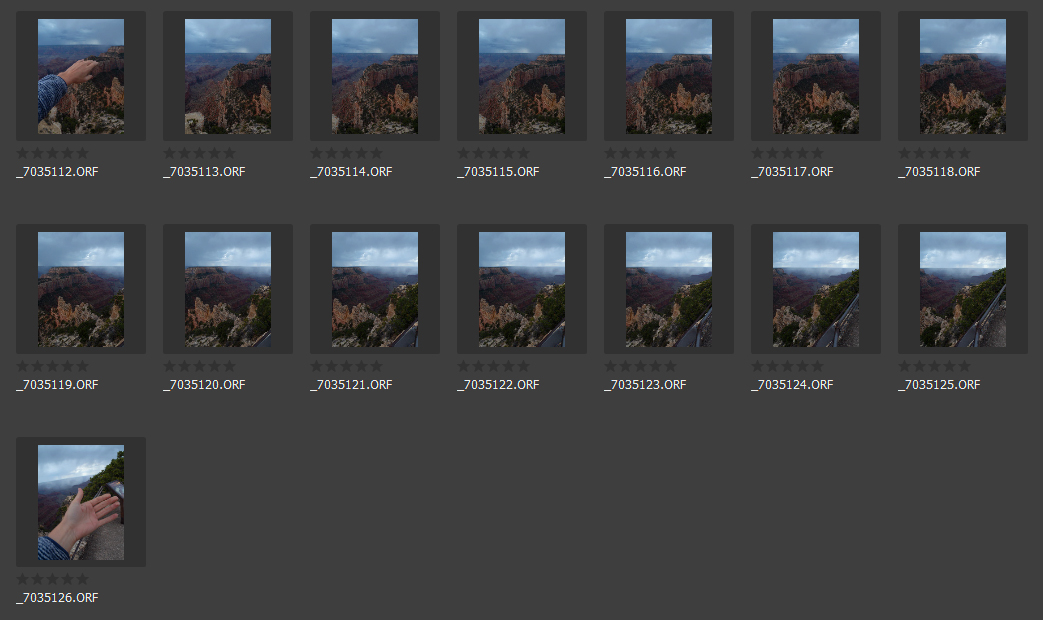
- Snap a frame of your hand to indicate the start of the panoramic series (so you can find it among your 1000’s of images when you get home and download your memory card).
- Remove your hand and snap your first frame to start the panorama.
- Carefully rotate your camera (not your tripod!) being mindful that the next frame overlaps the previous one by about 30-50%. Make another frame. Rotate. Make a frame. Rotate. Repeat until you reach your designated Point B—this may require two frames, two hundred, or something in between. Take as many frames as you need. (If you wish to combine HDR techniques with panorama, just take three or five or however many you need frames at each stopping point.)
- Rotate your camera to just beyond Point B (the ending “tail”). Make a frame.
- Photograph your hand to indicate the end of the sequence.
When you get home, in processing software, select the series of images (minus the ones with your hands in it).
If you’re using Adobe Bridge, select Tools/Photoshop/Photomerge. Photoshop will open. Select Auto, then OK. Photoshop will merge the images. (If you’re doing an HDR panorama, process the individual HDR frames first, then merge the images.)
If you’re using Adobe Lightroom, select Photo/Photomerge/Panorama to accomplish the same process. When utilizing HDR, select Photo/Photo Merge/HDR Panorama.
After the processing software works its magic, you might see white “cracks” in your panorama when it’s finished. Do not fear! This is an artifact of the software rendering and won’t appear in your actual image. If you zoom in on the photograph, you’ll see the cracks disappear.
Crop the image, trimming off or filling any white space you see around the image on the screen. Then process your image as you would any other. Voila! You have a panoramic image!
Now, whether you shoot in raw or JPEG format, the decision to make a panoramic image should occur in the field. Even though it sounds simple enough, we don’t want to crop a horizontal image to turn it into horizontal panoramic image. Instead, we want to maximize your data capture in the field to aid in your processing later by turning your camera vertically and making multiple vertical images. This gives you more data at the top and bottom of the frame. (The same concept applies if you wish to create a vertical panoramic: shoot multiple images horizontally vs. cropping a single vertical image.)
For example, after stitching together the 13 vertical frames for the Grand Canyon photograph above, the raw uncropped file ended up being 28” x 18”. When I cropped the excess off in processing software, my final image ended up being 21” x 16”. To compare, a single horizontal frame is about 17” x 13” out of my camera which is already smaller than my stitched panorama. Had I cropped a single horizontal image into a panoramic orientation, my final image would have been even smaller. If I’ve done my math right (and you all know how much I love math…), the panorama I produced for the Grand Canyon gave me minimally 52% more data. (This percentage will vary based on how many frames you end up taking for the panorama, but generally speaking, it will always be larger than a single horizontal image.)
In the case of my experience at the North Rim of the Grand Canyon, creating a single horizontal image then cropping it down wasn’t possible in the first place since I didn’t have a wide enough angle lens with me. By tapping into panoramic photography techniques, I not only brought my vision to life, but did so with more data which resulted in a bigger image.
As photographers, I believe one of the most important skills one can possess is the ability to solve problems in the field using all the tools in our toolbox. Here’s hoping this gave you another one in yours.
Be well, be wild,
~Bubbles
Have a question about photography, art, and/or the creative life? Need some advice? Send your question to Dear Bubbles at colleen@colleenminiuk.com to be possibly featured in a future column post. (If you’d prefer a different display name than your real first name, please include your preferred nickname in your note.

Take vs. Create