Get a Move On
Dear Bubbles:
I’m a little embarrassed to ask, but here goes anyway: how do you get the water to look so soft in your pictures?
~Inquiring Minds Want to Know
Dear Inquiring Minds Want to Know:
First off, under no circumstance should you ever be embarrassed to ask a question of anyone about anything on your mind. I mean, this is what Dear Bubbles is for! Inquiry is a sign of curiosity, and curiosity leads to personal growth and creativity. How else are we supposed to learn?
Besides, anyone who has spent even a small amount of time dabbling in outdoor photography has likely had the same question at least once before. I know I did back in the day. And it’s from speaking up that my love for photographing moving water started—and has intensified ever since. You just never know what opportunities may present themselves after asking a question…so ask away!
The short answer to your question: long exposure.
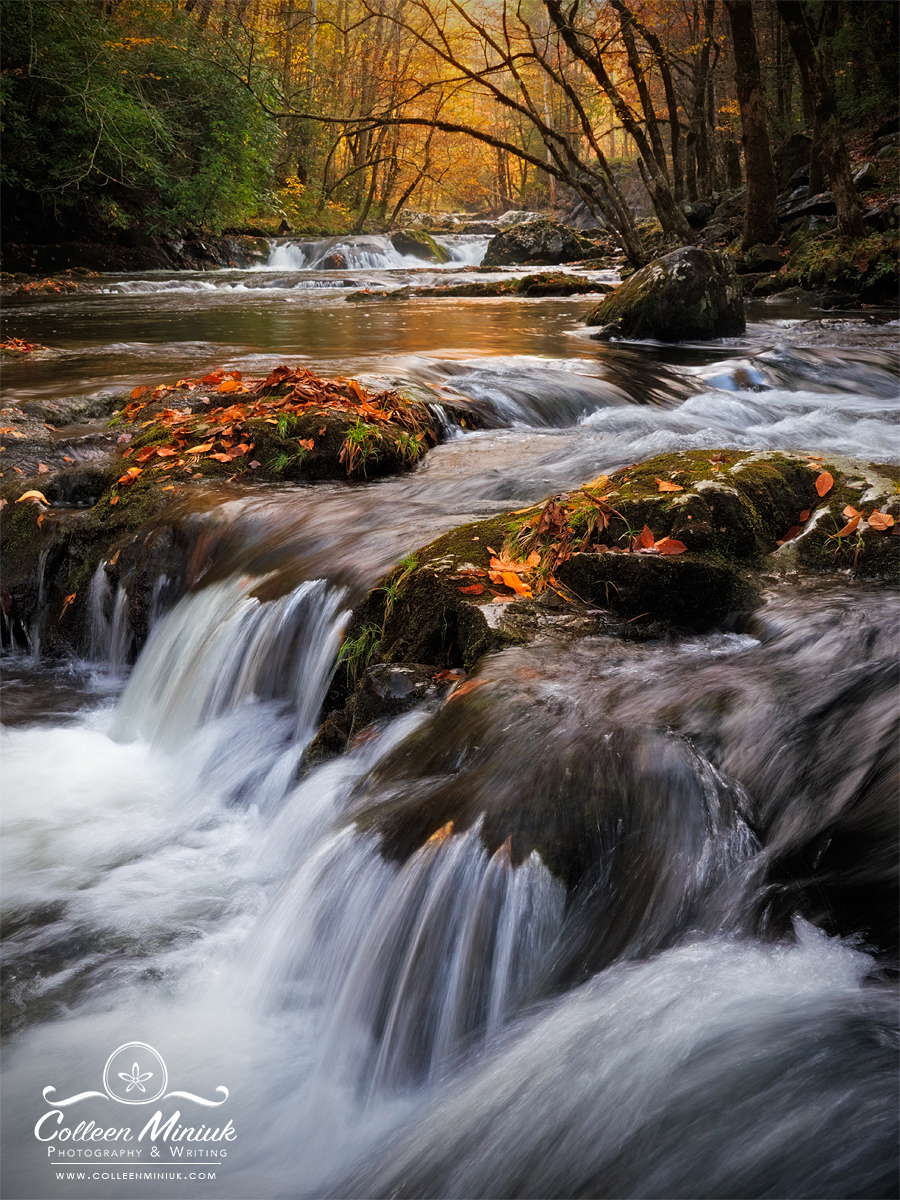
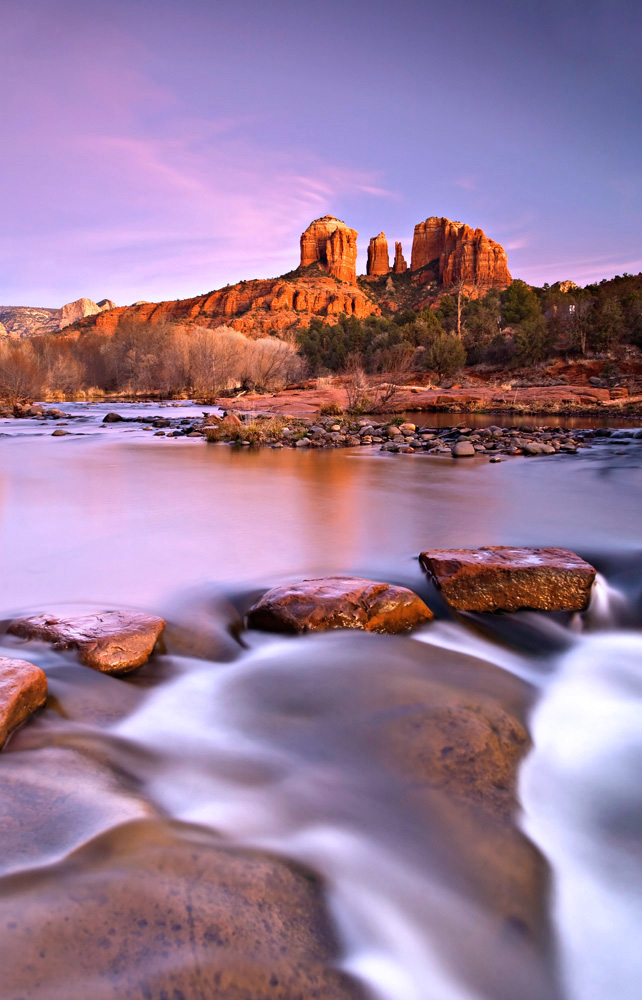
To achieve soft water—which is sometimes also described as blurred, cottony, silky, misty, and ethereal—you need a slow enough shutter speed to allow the water to move through your frame during your exposure. What’s slow enough? It depends…(isn’t that the answer to almost all photography questions?)
It depends on how fast the water is moving in your scene and how much structure and texture you wish to convey in the movement. I typically start around 1/8th of a second, but that can be too slow for a gush of a waterfall or two fast for a trickle. What I’m generally looking for in my images are subtle streaks in the water to give a sense of motion while avoiding turning any froth into detailless white blobs. That said, sometimes I aim to turn the water into a dreamy fog-like appearance. Depending on what I’m after—and I defined this before I make a photograph—my final shutter speed setting can range from upwards of 1/100th of a second to several minutes.
Because of this broad span, when you’re standing in front of cascades or crashing waves, I’d recommend making a series of images at different shutter speeds to see what suits your tastes. If you’re mindful of your own practice, you’ll likely notice a pattern in your preferences, which will give you a better sense of how much motion is too much or too little and how much structure you like in your work—thus determining what setting you prefer starting from given the conditions.
To enable a long exposure, I often slow my ISO speed down from my standard ISO 200 to ISO 100 or even 50. I also adjust my aperture to get my desired shutter speed and appropriate histogram reading for the overall exposure (taking into consideration the depth of field, of course). A small aperture (e.g. f/16 or f/22) lets in a small amount of light which lengthens the shutter speed (which lets in a greater amount of light).
To help me render a slower shutter speed for water-based subjects, I’ll often seek out lower natural lighting conditions like twilight, sunrise, sunset, shadowed areas, and overcast conditions—assuming I have the flexibility within my travel schedule to do so. Even if I slow my ISO speed down to ISO 50 and close my aperture down to f/22 (the combination of settings that lets in the least amount of light possible on my camera), though, sometimes the natural light is too bright to slow my shutter speed down to the setting I desire. In these cases—or when I want to reduce the shutter speed beyond 30 seconds in any lighting scenario including sunny—I’ll apply a neutral-density filter to my lens.
A neutral-density filter is a circular- or square-shaped filter that appears grey in color across the entire filter. A neutral-density filter is not to be confused with a graduated neutral-density filter which appears grey at the top of the filter then fades to clear at the bottom. Both filters serve to hold back light, but the former reduces light across the entire frame which slows shutter speeds; the latter reduces light across only part of the frame which helps balance difficult exposures. (Read more about this at Graduating to Grad ND’s.)
Neutral-density filters are available in varying strengths from 1-stop to 16-stops (meaning they block 1 to 16 stops of light from the lens accordingly). Shopping around for neutral-density filters can be confusing and frustrating because of the different conventions used to indicate a filter’s strength. Some manufacturers using straight stops of light (the easiest to understand).
You may, however, see references to ND2, ND4, ND8, etc. The numbers here refer to the denominator (the bottom) of a fraction when the numerator is 1. An ND2, then, means the filter will permit ½ as much light in compared to normal. This corresponds to 1 stop of light (e.g. a 1/100th of a second setting without an ND2 will become 1/50th of a second with an ND2 applied). An ND4 yields ¼ the light, or 2 stops, while an ND8 is—you guessed it—1/8 the light, or 3 stops.
You may also see neutral-density filters referred to as 0.3, 0.6, and 0.9. These ratings, which designate the optical density of a filter, correspond to 1-stop, 2-stop, and 3-stop respectively. To get from 0.3 to 1-stop (and 0.6 to 2-stops and 0.9 to 3-stops) involves a level of logarithmic math my brain purged from memory the second I learned it in school. (I mean, who thought that’d ever be useful?! Clearly not I…) For those who wish to get insight on calculating optical density, absorption, and transmittance, knock yourself out with a visit to this website: https://www.newport.com/g/neutral-density-filter-selection-guide. (You’d think with something called Beer’s Law involved I’d have more interest in this…)
Some neutral-density filters are built in fixed stops, meaning the filter possesses one strength: 3-stops for example. You can stack multiple fixed-stop filters to reduce light even further. For example, using a 1-, 2-, and 3- stop filter simultaneously can create a 6-stop effect. Boom! Now that’s math I can do!
Others types enable varying strengths within the same filter. Variable neutral-density filters permit a photographer to change the intensity (that is, how much light to block) simply by making small turns to the filter while on your lens. Cameras with exposure-simulation technology will often adjust the shutter speeds accordingly in Live View mode, giving the photographer a clear idea of its effect on the exposure time ahead of snapping the shutter.

If you don’t have a neutral-density filter, you can always use a polarizer. A polarizer reduces exposure settings about one to two stops of light. It obviously won’t take a 1/30th of a second shutter speed meter reading to four minutes on a bright sunny day, but it’s often better than nothing.
Now, if, for whatever reason, you’ve left home without your polarizer and/or your neutral-density filter, but come upon a scene involving water that you absolutely must slow down or you’ll spontaneously combust, then you can tap into your camera’s multiple exposure capabilities to render a similar type of effect as you’d get with filters. To do so, once you’ve set up your composition:
- Get a decent base exposure at ISO 100 or 200 at f/16 or f/22.
- Go into your camera’s Multiple Exposure function. Set the number of exposures to your camera’s max. Then, turn on Auto Gain. (Keep Overlay off.)
- Click the shutter.
Voila! Moving water without filters! (Most cameras will blend the images in camera and spit out a single RAW or JPG file.)
If you have a camera that does not have the Multiple Exposure feature (or you have a camera like mine that touts “Multiple” Exposure, but only offers 2 frames as an option, and thus is really just “Double” Exposure…), you should sell all your photography equipment and become an underwater basket weaver.
No, just kidding!
You can mimic multiple exposures by holding the shutter—or better yet, the button on your cable release (which I formally call a “clicker-doo,” because that’s obviously a much better name for it…)—down while in continuous shot mode. This will make a series of images quickly, which you can then combine yourself in processing software to render flowy water. If you use this approach, I’d advise snapping a photograph of your hand before you start and end the series. This will serve as a visual reminder to you when you return home and start processing images that the frames in between your hands are the images you wish to combine out of the thousands of frames on your memory card. Maybe you’re better at it than I am, but I’m just not smart enough to remember this without a not-so-subtle hint.
Full disclosure: this is a technique I picked up from a workshop participant on my August 2019 Grand Canyon rafting photo retreat (thanks, Byron!). I have yet to try this in the field myself (since I don’t leave home without my neutral-density filter). Otherwise I’d show you some examples. I have coached several participants on my workshops through this approach with great success, though. It works! I promise! Even if you plan to carry your filters around, I’d encourage you to try this out if for no other reason than to have another trick in your bag to pull out if—and when—you need.
It may go without saying that long exposures and multiple exposures necessitate the use of a tripod. But I’m going to say it anyway. Use a tripod! Although image stabilization (also referred to by some manufacturers as “vibration reduction”) technology has improved tremendously over the years—affording photographers the ability to handhold the camera at slower shutter speeds than ever before—handholding your camera steady for four minutes isn’t a reality for any of us. (The slowest I’ve handheld, that is, balanced on my knee, and still kept the image tack sharp, is a remarkable four seconds. While this works in a pinch, I don’t advise this as a practice should you wish to render sharp images consistently in your work.)
Make sure to turn off image-stabilization/vibration reduction when you place your camera on a tripod. If you don’t, your camera thinks it has to stabilize itself and introduces counterbalance movement that doesn’t exist. This can cause unintentional blurriness in your image. No bueno.
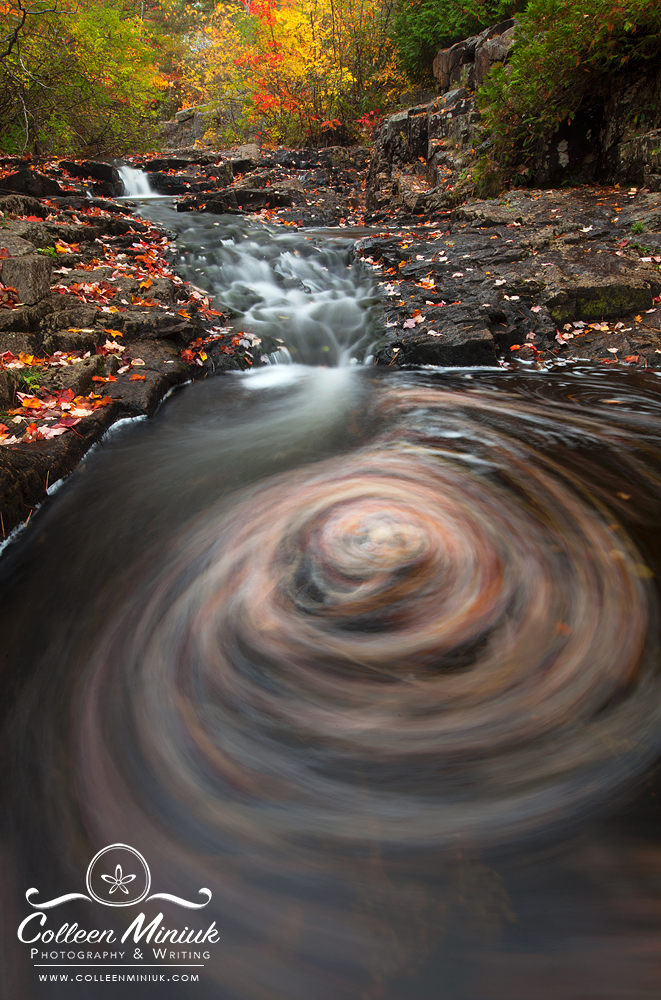
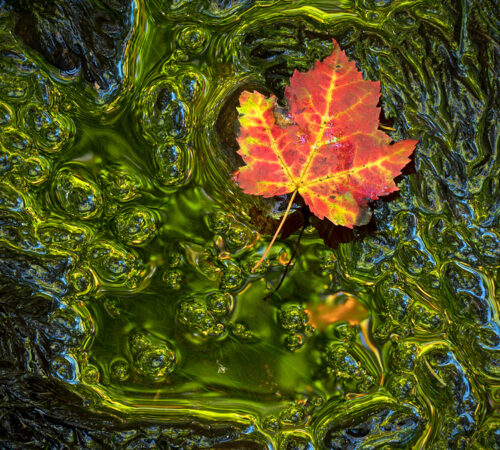
Now, I believe making compelling images of water—or of any subject—requires not just technical execution but also creative inspiration. Deepening your understanding of water’s behavior will help you mindfully evaluate your scene, pick up on nuances, and decipher in specific terms what it is you notice. For example, if I hadn’t learned what an eddy was during my stand-up paddleboarding and rafting endeavors, I would have likely never spotted the swirling water in the photograph at the top of this post from Duck Brook in Acadia National Park. And if I hadn’t noticed it, I sure wouldn’t have photographed it. It would have remained an invisible gorilla.
So educate yourself to expand your perceptions! My three favorite books about water behavior include:
- How to Read Water: Clues and Patterns from Puddles to the Sea by Tristan Gooley
- H2O: A Biography of Water by Philip Ball
- Sensitive Chaos: The Creation of Flowing Forms by Theodor Schwenk
So there you have it, Inquiring Minds Want to Know. I’m so glad you asked this question! I hope this gives you enough information to inspire you to get a move on and get into the flow of photographing moving water.
Be well, be wild,
~Bubbles
Have a question about photography, art, and/or the creative life? Need some advice? Send your question to Dear Bubbles at colleen@colleenminiuk.com to be possibly featured in a future column post. (If you’d prefer a different display name than your real first name, please include your preferred nickname in your note.)


2 Comments
Lori Ryerson
On the subject of the multiple exposure hack – as it happens, I use that all the time. And yes, a tripod is essential to achieve this one. But I hack Byron’s hack with this one: if your camera has a ME capability (Fuji, Nikon, Canon and of course, my own Panasonic all offer an in camera version), you can set your camera on ME, and then take 3+ exposures of the exact same thing, which will layer them in camera and give you the flow look (you know how you love flow, Colleen!). What I love about the ME version of water vs LE is that you can still see the individual water streams themselves, rather than the ribbon look. That’s just me… If you want to see what one looks like, here’s one of mine: https://www.focalocity.ca/p819498106/habc7e199#habc7e199 (PS, this was taken in one of Minor White’s favourite locations, Stony Brook state park in upstate New York).
Bubbles
Excellent, Lori! Thanks so much for sharing your insight and results!