Selling a Print

Dear Bubbles,
I have photos in the upcoming Sacred Spaces online exhibition. I’m terrified of selling a print. I wouldn’t even know where to start. How do I get it printed? What options do I have? What do I charge? And how do I send it?
~Deanna
Dear Deanna,
Hugest congratulations on your upcoming exhibition! Putting your photographs—and heart—on display is a big achievement and brave step in any photography journey. It can feel equal parts exciting and scary. I have insider information—wink wink—that tells me this Sacred Spaces show is going to be a beautiful and special celebration of your work.
And I sure hope you and all the artists in the exhibition sell a print! With any luck, you’ll soon receive an email that looks something like: “Hi Deanna! Saw your work in the Sacred Spaces exhibition. Amazing! I’d love to buy a print of [TITLE] for my living room. How can I do that?”
Hooray! But don’t panic! Before you do anything, find a slice of pie to celebrate. You’ll want some sustenance going into this lengthy process:
1. Gather the Customer’s Requirements:
Before you print or prepare anything, you’ll want to better understand what the customer is looking for. Specifically, ask them:
- What size print?
- What type of print surface?
- Do they want a print only or a “ready-to-hang” piece (i.e., mounted/matted only, mounted/matted and framed, or other finishing approach)?
- How—and when—to collect their payment for the piece?
- Where to ship the finished piece?
To start, ask what size print they are envisioning—and does that align with sizes you can and will offer? Although we tend to think in standard print sizes (i.e., 8”x10”, 16”x20”, 20”x30”), your standard sizing depends on your camera’s aspect ratio. Aspect ratio is defined as the relationship between height and width of a photographic frame. Most full-frame cameras have a 2:3 aspect ratio. For example, this will render an 8”x12” photograph. If a customer is trying to fit an 8×10 frame, you either need to crop 2” off or resize your image accordingly—neither of which preserves the integrity of your original composition, neither of which are desirable courses of action for me and my work. Instead, I present my 8”x12” as my offering and hope the customer has the flexibility to find a different sized frame.
Micro-four-thirds cameras, like my Olympus OMD EM1 Mark III, has, you guessed it, 4:3 aspect ratio. If a customer asks me for an 8”x10”, the best I can do in that range is a 7.5”x10” or a 9”x12”. (Since we’re on this topic: a square format has a 1:1 ratio while panorama format tends to follow a 16:9 ratio.) Of course, you don’t have to adhere to your camera’s constraints. You can make up any size you wish for your photograph through cropping and resizing. There isn’t a right or wrong answer here, only that your product matches the customer’s interests—and that you align on this up front.
When you have this conversation, make sure you and your client are talking the same language. Print size and finished print size are not the same thing. An 8”x10” print may get mounted, matted, and framed—“finished”—to an 11”x14” or larger size. And the mat and frame do not necessarily need to stay confined to the print’s aspect ratio. You could put an 8”x10” print into a 40”x40” mat/frame, or any other dimensions, if you want. If a customer isn’t sure on this terminology, I’ll often ask the dimensions of the space they are trying to fill and offer recommendations to them to ensure the finished print doesn’t end up swallowed by a lot of blank space or overwhelm a wall.
Next up is determining how you will print this photograph. You can print on just about anything these days! Print surface options include a plethora of fine art and specialty papers (that come in multiple forms like glossy, matte, lustre, bamboo, and watercolor), canvas, metal, acrylic, wood, glass, wallpaper, you name it. Don’t overwhelm yourself in analysis paralysis with all these options. When you have some free time, test a single photograph on a multitude of surfaces to learn more about your preferences. That said, know that individual prints may look better than others on certain textures and materials.
While I will always cater to a customer’s request for something different, I generally offer two types of surfaces for my prints: lustre paper and metal. I’ve tested a variety of these surfaces, and I generally like the way my work looks on those two materials. And only presenting two options helps to prevent analysis paralysis for my customers who may not be familiar with any of these details—they just want a print to hang in their bathroom. Keep it simple.
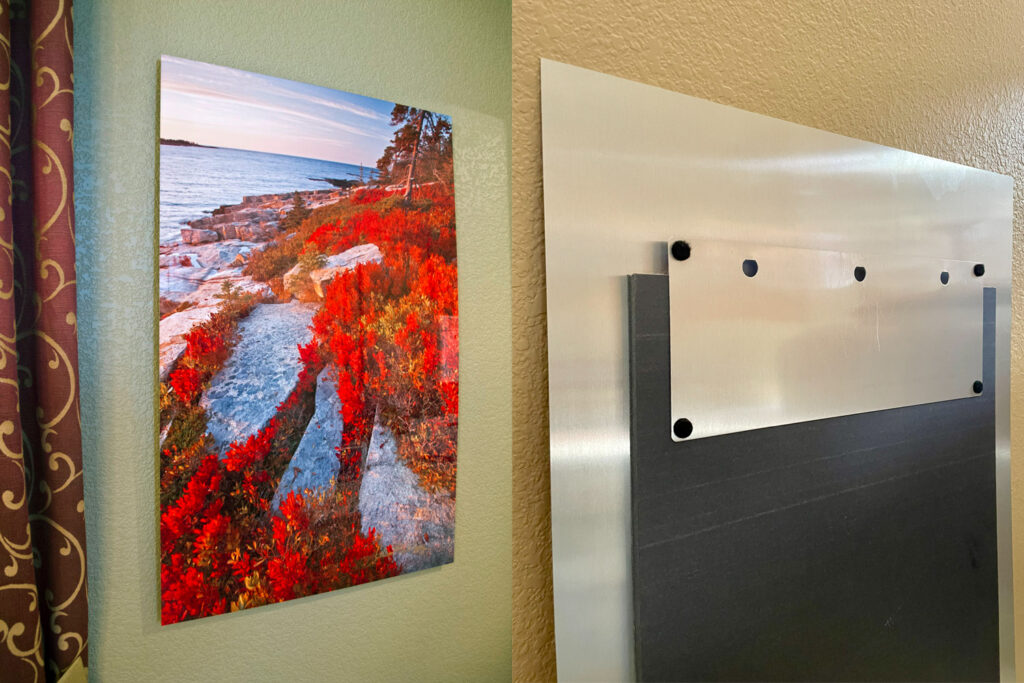
Which begs the question: is the print enough or does your customer want the photograph finished and ready-to-hang? Some surfaces, like metal and canvas, come ready-to-hang with hanging hardware once they are printed. Others, especially papers, don’t. Your client will need to hang your print somehow—and preferably not by just taping it to the wall. (However, if someone can duct tape a banana to the wall and call it art—and sell it for $6.2 million!?!!!—you can do anything you want.)
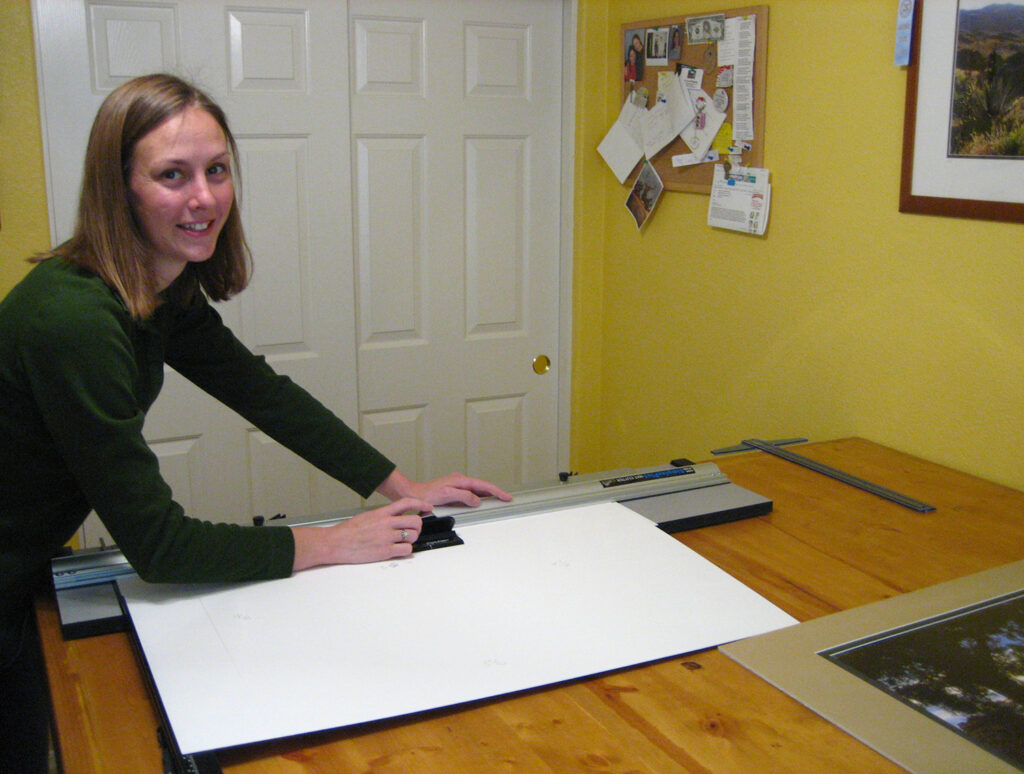
If your customer orders a print only, they will need to mount, mat, and frame your work themselves; or you could offer to do this for them. You could either mount, mat, and frame your piece on your own which, like printing your own work, comes with substantial equipment and learning curve. Or you can outsource. Most print labs offer finishing options…and there are a lot of labs out there with a lot of finishing options. More on print labs in a minute.
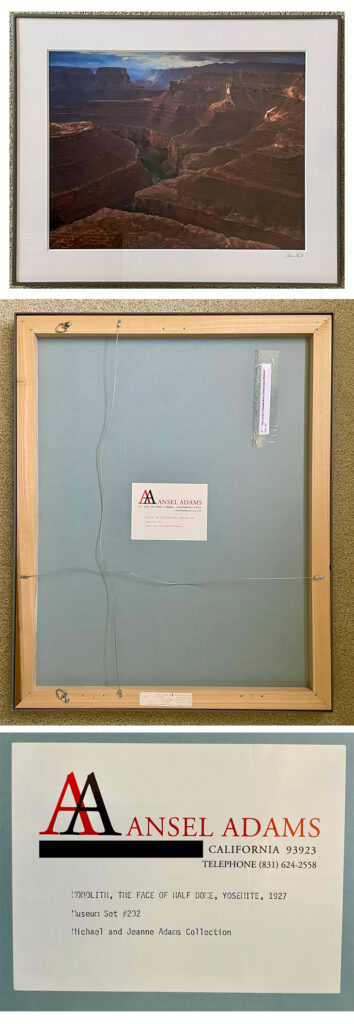
A mount board is usually a thin piece of foam core on which your print sits so that it doesn’t move in a mat or frame when hung. Most mount boards are white. No one is ever going to really see this backing board, so the color doesn’t matter much. More importantly, be sure to chose an appropriate thickness that fits your frame depth. I tend to use ¼” width (which is thin) to give me (and my customer) the most flexibility to fit in a variety of frame depths, especially since I don’t always know in what kind of frame the print will end up (especially if the customer decides to frame the print themselves).
A mat is a board made of paper pulp that acts as a barrier between the front of the print and the glass (so that the glass or acrylic doesn’t touch and damage the print). Mat boards are typically wider and taller than your print and are typically the same dimension as your frame. The mat board center will get cut out to display your print such that the mat serves as a sort of window around your photograph. This opening in the mat board will overlay the print by a small amount (e.g., 1/4” on all sides).
Some photographers chose a single mat but double and triple mats are also options (usually offset by small amounts in a tiered-layering effect that creates additional depth). Mat boards come in every color and shade in the rainbow. Some photographers chose neutral tones like white, black, or grey/silver to keep the emphasis on the print—which is what I offer if the customer wants me to mat and frame the print for them. The alternative is customizing the mats by matching color tones in the print itself and/or matching the décor in the room in which the print will reside. This is a lengthier, and more expensive, process. It’s also much harder to do if you aren’t familiar with your customer’s style and location.
No matter what you decide, when it comes to both mount and mat boards, be sure to choose acid-free and lignin-free materials so that they don’t damage and discolor your print over time (think: old photos yellowing). Printing services will sometimes use the terminology “archival” and “museum quality” to refer to these types of materials.
Prints on metal and acrylic can be fitted with hanging hardware on the back, but you can’t really hang a mounted and matted board on the wall. You’ll need a frame. Frames come in an insane number of styles, widths, depths, materials, and colors. Like mat boards, you can aim for neutral colors like white, black, or grey/silver. Or you can invest in more ornate options that provide their own personality and/or match décor.
The final finishing touch is choosing something to cover your print to protect it, namely glass or acrylic. Acrylic is lighter, shatter-resistant, and easier to ship, especially for large prints, but it scratches more easily than glass. Glass tends to be heavier and breakable (especially during shipping) but is more traditional and easier to keep clean. No matter what you choose, look for UV protection and non-reflective/non-glare options.
Don’t let the abundance of options and combinations overwhelm you. If this is your first time offering a framed print, keep it simple. Get fancy later (or don’t). Start with a ¼” think white mount board with a single white mat framed with a 1- or 2-inch-wide black or silver frame. Or skip the mount/mat and frame route all together and pick canvas or metal or acrylic which come ready-to-hang with hanging hardware.
Then comes pricing. A common rule of thumb is to simply double or triple the cost of the print, but that’s not the whole story. Your price should reflect the cost of the print itself, all the finishing materials used, packaging, shipping, your time and labor coordinating all of this, overhead costs (like the website in which you used to advertise the print), your experience, and perceived artistic value. After adding this up, you’ll add a bit for profit. Some photographers charge a standard price-per-inch to keep the fee consistent across multiple print and frame sizes. Do the math for your work. Find what works best for you. But beware of selling yourself short. Undercharging might feel generous, but it teaches people to undervalue your work and photography in general. Know your worth—and it’s more than you may think! (Remember, a banana duct taped to a wall sold as art for $6.2 million…)
Once you’ve agreed on the print, finishing details, and price, you’ll need to collect payment for your product and service. Some photographers require full credit card or other electronic payment for the print, finishing, and shipping up front. I do. I do not accept checks from strangers; I do from previous clients and friends. Other photographers request a deposit before printing and collect the final balance before shipping. However you approach this, make it easy as possible for the customer to pay you for your work.
A word of caution: there are an abundance of scammers out there. If someone emails you about your photography but starts talking about NFTs, wants to pay in bitcoin, is vague on their requirements, or sends you complicated payment situations, consider not responding. Be careful with anything that sounds too good to be true. Legitimate customers are usually clear, professional, and straightforward, while scammers hope to catch you off guard with confusion and urgency.
Once I’ve negotiated all this with my customer, I’ll send an email confirmation of what we’ve agreed to including size, print surface, finishing style, and price. I’ll also ask for their mailing address.
Although I’ve never had someone return a print, you may wish to state your return policy as well. I’ll offer a refund or free replacement if the print is damaged in shipping or somehow defective, but otherwise all print sales are final.
2. Print and Finish Your Photograph:
Now that you have your marching orders, it’s time to follow through. Start with your master file (which I’ll assume you’ve already processed to your liking for your exhibition). Resize your photograph to match the customer’s print expectations. Use interpolation as needed to ensure good image quality at larger print sizes.
Either print the photograph yourself using a professional-level printer or outsource to the experts in printing. Learning how to print your own work with your own printer is not a quick afternoon endeavor. It’s an art form in itself and takes a significant amount of time to understand and do well. So if you get a print order in and you don’t currently print your work, I’d advise against going out and buying a printer right away. If you find you love seeing your prints come to life on paper, then buy a printer as a longer-term investment in your photographic efforts.
Instead, hire an expert who can help you in your short turnaround time. My buddy and fabulous photographer, Michael Gordon offers printing services for those seeking exhibition-quality prints. He also offers custom print profiles should you decide to print your photographs using your own printer. Visit https://www.michael-gordon.com/page/printing-service to learn more about how he can help.
Alternatively, you can contact a print lab. I use Tempe Camera, a local lab close to my home in Arizona, for my paper-based prints, though I have had excellent experiences with locally based Image Craft and Artisan Colour. (As I wrote this column, I learned that Tempe Camera is ceasing offering its finishing services but will continue to offer its printing services.) I used to outsource my metal prints to an online company called Aspen Creek Photo. They got bought out by Bay Photo, the company I had quality issues that led me to switch to Aspen Creek Photo. Since the transition, they’ve done a decent enough job with my recent prints, so I’m cautiously optimistic.
If you’re working with a new-to-you shop, ask for their print profile for the paper you plan to use and load that profile into your processing software. Assign this color profile to your photographic file. (For example, in Adobe Photoshop, go to File/Convert to Profile and select the profile from the Destination Space Profile drop-down menu).
Adobe Photoshop, and possibly other software, allows you to get an idea of what your print will look like in this new profile. In Adobe Photoshop, go to the View menu and select Proof Setup. Under Device to Simulate, select the color profile you uploaded from the printer. Click OK. Then select View/Proof Colors. The screen will display a rendition of that color profile for your photograph (note that backlit monitor will typically display brighter tones than what will print—watch your histogram!). Do yourself a favor if you’ve never printed with a labbefore: order a test print. It’s the best way to calibrate your system with theirs before dropping a load of money on a client print. Polish your photograph up and keep doing test prints until you like what you see.
Then place your order!
3. Packaging the Print for Shipping:
I strongly recommend against shipping a print directly from the lab to the client without seeing the print first. (I once shipped a metal print from the old Bay Photo to my brother, and it arrived to my brother folded like a taco…good times.). Open the packaging carefully—you can often reuse the shipping materials if you keep them in good shape. Inspect the print for quality. Remember to wear gloves so the oils from your fingers don’t end up on the print as you handle it.
Once you’ve completed your quality checks, it’s time to add your signature. Where should you sign? Do you sign the print or the mat? This topic has sparked more debates than deciding on the best pie flavor. If the print gets separated from the mat, a signature on the mat doesn’t help identify the print maker. But if you sign the print directly, some argue it takes away from the aesthetic of the image. Do whatever feels right to you. When I first started out many moons ago, I signed the mat. Now I sign the print itself, in the bottom right-hand corner, using a silver archival marker—positioned up and in away from the print edge so there’s room for a mat later. You don’t want your signature covered up by a mat board!
Another topic that’s hotly debated is whether to offer limited or open edition prints. Limited edition indicates you’ll somehow limit the number of prints for a particular photograph (by title, size, finishing style, etc.—some photographers even committed to destroying the negative, slide, or file once they’ve sold out an edition). Open edition means you’ll print however many prints you want without restriction.
I could do a lengthy Dear Bubbles article on the pros and cons of each option but this is already the longest column I’ve written to date (and I still haven’t gotten to shipping!). In short, though, limited editions were first introduced to make reproductions of original art pieces so that more people could purchase them at a lower price than the original. Restricting the supply of these copies was a way to keep the demand and the long-term value of the reproduction high. With today’s digital technology, we can make countless original photographic prints at the press of a button—which makes the limited edition direction a somewhat arbitrary choice based on business reasons (e.g., you wish to keep the supply low and the price and value of your work high artificially).
If you think you ever might want to offer a limited edition for a given photograph, you must decide this before selling any print of that photograph. You’ll not only have to number the print (# out of how many, usually represented like 3/100, meaning this is the third print out of 100 that will be printed), but also you’ll need to keep track of the edition numbers, sizing, finishing, customer information, and more so you don’t sell more than you’ve committed. Note that you could choose to do a blend of limited edition and open photographs across your portfolio—the choice for edition size pertains to a single photographic frame, not your entire hard drive.
There’s so much more to say on this…as my buddy and fabulous photographer, Guy Tal sums up, “Every print I make and sign my name to is part of a limited edition. Because I am mortal. I can’t tell you what the final count will be. Odds are it will not be anywhere the limit that most people who sell limited editions set for themselves.” Read more of his insights in his article “The Ethics of Limited Editions:” https://www.pictureline.com/blogs/archive/guy-tals-the-ethics-of-limited-editions.
Finally, you may wish to add a label to (or for) the back of the mount board. I include the title and location. Some people will add the year or date of creation. Make sure the label carries your branding: your name, your website, and other contact information. This piece represents you out in the world!
4. Ship the print:
Packaging a photographic print, especially if it involves glass, is the best time to channel your inner overprotective self. If you are shipping a simple print or a mounted/matted work, cover the print with a protective sheet of glassine paper. Place the print in a plastic sleeve then tape the corners of the plastic onto an oversized piece of cardboard, leaving at least 1 to 2 inches barrier around the print. Place another piece of cardboard over the top to make a cardboard sandwich. Place the cardboard sandwich in a separate cardboard box—do not ship in an envelope unless you want the postal or shipping service provider to bend your print for you. Add cushioning (like packaging paper) to fill the empty space in the box so that the print does not move within the box when shaken.
I’ve stopped shipping prints in circular tubes long ago. Yes, they’re cheaper, but I find them almost impossible to open without risking damage, and the print curling can be significant if they stay in the tube for too long. Shipping flat is kinder to both the print and the person receiving it. Let’s be kind to ourselves and each other (and our planet, while we’re at it).
If you are shipping a framed print, skip the glassine paper and wrap the framed piece in bubble wrap. (If inquiring minds wish to know whether the bubbles go toward or away from the print surface, have a read at https://dearbubbles.com/2020/02/bubble-wrap). Use cardboard or foam corner protectors to, you guessed it, protect the corners of the frame.
Then place it in a sturdy shipping box. I mark the box “fragile.” Will that change how it’s handled? Hard to say. Does it make me feel better? Absolutely.
When you’re ready to ship your print, get a tracking number (or confirmation of delivery service) and insurance to cover any damage. Once the print is on its way to the customer, send them a confirmation email with the tracking number and estimated delivery date. After you’ve tracked it as delivered, follow up with the customer to make sure it arrived safely and that they are happy with their purchase.
5. Eat pie!
Whew! We made it to the end! All this may sound like a lot of work—and it is!—but as with anything, the process will become more familiar and less scary as you do it. As you work through each of these steps, hold onto the pride and excitement of someone else not only purchasing your work, but also enjoying the magnificence of your creation for a long time. How amazing is that?! Your efforts are pie-worthy!
Now get out there and sell a bunch of prints!
Be well, be brave, be wild,
~Bubbles
Have a question about photography, art, and/or the creative life? Looking for advice or inspiration? Send your question to Dear Bubbles at colleen@colleenminiuk.com to be possibly featured in a future column post. (If you’d prefer a different display name than your real first name, please include your preferred nickname in your note.
Thanks to the generous support of many, the Dear Bubbles monthly column will remain free for all to read. If you’d help contribute while gaining access to the Making the Photo video series, the forthcoming “Bubble Wraps” image reviews, and other special perks for as little as $2/month, please consider becoming a Dear Bubbles Patreon supporter. Your generosity at any level keeps this site ad-free and focused on learning which is hug-worthy and greatly appreciated!


One Comment
Lori Ryerson
This is awesome. Truly, just yesterday, I had a client who said “I’ve always wanted to buy a piece of yours, but I didn’t know where to start with the choices!” This perfectly explains why every purchase starts with a discussion of the client’s space. For your Sheography Sacred Spaces exhibitors (awesome idea, Colleen, congrats!), they might even consider asking the client for a picture of the space they want to fill; gives them a better idea of the client’s personal style for them to suggest a treatment that suits. Sending light and good vibes to all of you from Canada!