Extending Your Reach
Dear Bubbles:
I have extension tubes, and I was wondering if you think those would work in place of a macro lens. I’m debating about buying a macro lens, but they are pricey. Do you find you use your extension tubes quite a bit in your photography? Thanks.
~Rondy
Dear Rondy,
Back in 2014, I set out to snowshoe up the closed road to the summit of Cadillac Mountain in Acadia National Park, Maine. Because I like hiking uphill as much as my cat liked taking a bath, I kept my backpack load light for the climb. Which meant I emptied my pack of any and all unnecessary gear—extra batteries, battery chargers, diffuser/reflector, neutral density filter, and the like. Since I was expecting to soak in broad expansive views from the top, and not small scenes, I left my macro lens in the car—but kept my two extension tubes with me, because I dunno, just in case…
When I got to the top of the mountain some 4.5-cold-and-wind-blown miles later, what do you think I saw?
- A Starbucks serving snow cones
- Bigfoot tanning himself
- The Mecca of all Mecca’s of ice bubbles in the parking lot
Yes, C is correct.
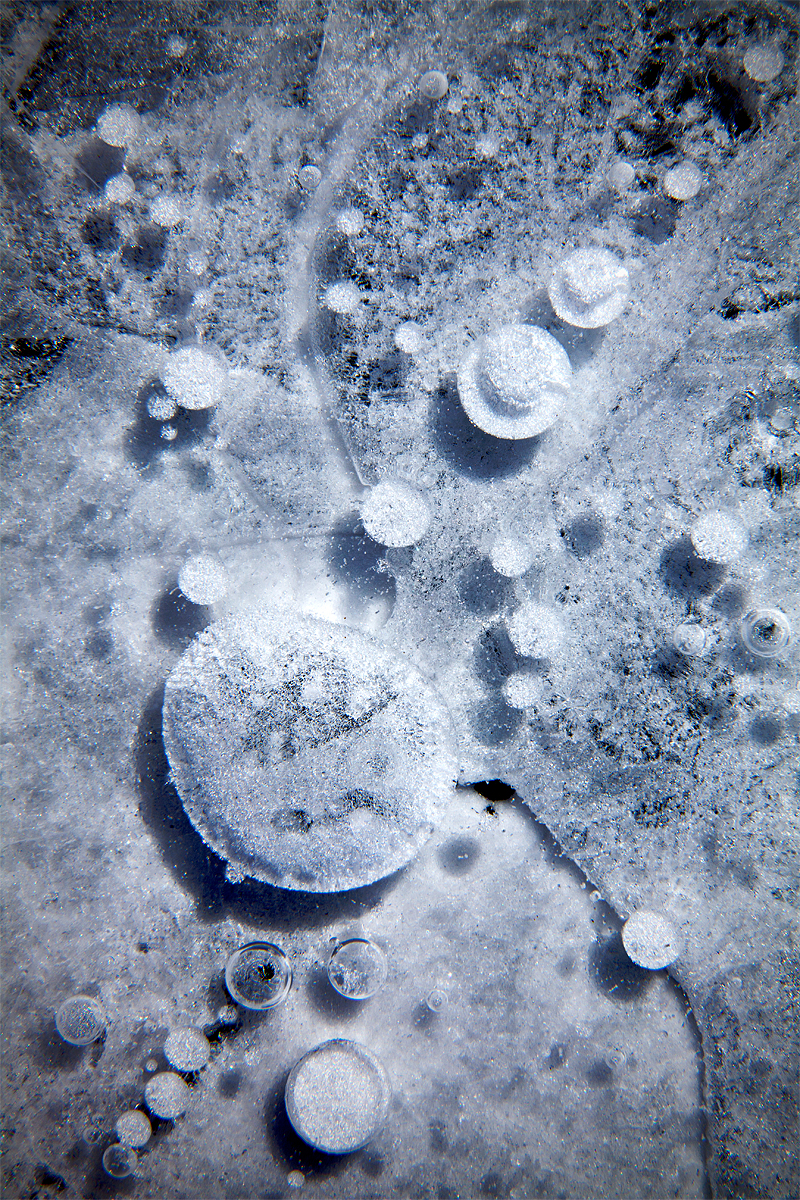
After I stopped squealing with delight, the voices in my head cursed at me, “How could you have left your macro lens behind!?!!” Other voices quickly stepped in and said, “Don’t worry! You have your extension tubes!” I fixed my two 12mm extension tubes onto my Canon 24-105mm, and boom, made myself some good-lookin’ ice bubble images that day like the one at the top of this post. (I did look for Bigfoot afterwards with less success…) Ever since, I—and my legs—have been a big fan of always, always, always carrying extension tubes in my bag—whether I carry my macro lens or not.
For those who are unsure about whether they’d enjoy macro photography, plunking down several hundred dollars—or in some cases, thousands of dollars—might feel like a little too much of a risk. Oh sure, you could rent a macro lens and try it for a week or so. But what if I told you that you could spend that money on an accessory that would not only help you determine your interest in smaller scenes by almost replicating a close-up perspective, but would also extend the reach of all of the lenses you currently own?
You can! May I present to you, the extension tube.
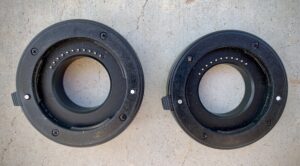
An extension tube is a hollowed-out ring made of aluminum or plastic placed in between your lens and your camera. This accessory can be used on any lens from wide-angle to telephoto and including macro lenses. While this accessory can range in price from super cheap to expensive, they cost definitively less than a worthwhile macro lens.
Extension tubes come in varying lengths (i.e. thicknesses). I own two extension tubes, a 10mm and a 21mm by Meike. While this brand is no longer available, they cost me a whopping $27 total in 2017. My Olympus 60mm macro lens cost $500. And since I broke the first one I purchased, I’ve since doubled that investment.
Despite some people on the The Almighty Library of Wisdom—the internet—suggesting you’ll spontaneously combust if you stack extension tubes, you can stack these puppies. So if I stack my 10mm and my 16mm, I also get a 26mm out of that $27. A 3-for-2 deal! And I have yet to spontaneously combust! Or break them by dropping them! A win all the way around.
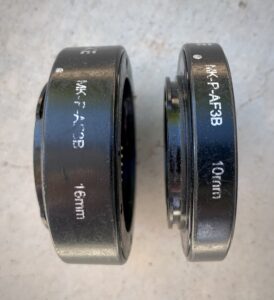
The main purpose of attaching an extension tube to your lens is to put distance between your lens and your camera sensor. Doing so enables you to achieve focus on subjects at a closer distance than would normally be allowed by your lens. The longer and thicker the tube, the closer you can get to your subject matter and still render sharp focus. Having multiple extension tubes in varying lengths gives you some flexibility in the field to move around to get the perspective and visual message you desire.
Extension tubes also increases the magnification abilities of your lens. The longer the length (i.e., the thicker the tube), the greater the magnification. For those who love math—I mean who doesn’t?! (Me!)—you can determine the additional magnification effect by dividing the extension tube length divided by the thickness by your lens’ focal length. For example, if I pair my 16mm extension tube with my 150mm lens, I achieve a 0.11x magnification.
Whoohoo! Johnny, tell them what she’s won!
Well, Bubbles, in addition to this fabulous Broyhill five-piece dining room set, we add this magnification to the existing magnification capabilities of the lens. So if you’re using the Olympus 14-150mm zoom lens, which has a max magnification ratio of 0.44x, the magnification ratio becomes 0.44x + 0.11x = 0.54x with 150mm lens.
Is this useful to know in the field? Not really. But you’re sure to impress your friends at parties around your new dining room set. And that’s what photography is really about, showing off with useless information, isn’t it?
What’s more practically important to know is that I can get closer to my visual elements, which makes them appear larger in my frame, while still rendering them in sharp focus. Get this! If you use an extension tube with a wide-angle lens, say a 24mm or wider, you have to be physically touching the subject in order for it to appear in focus. I haven’t figured out a way to make a good image with this technique yet, but I’m still working on it!
True macro lenses (or micro lenses, as Nikon calls them, since they had to be different) bypass all of this and typically deliver in between 0.5x to 1.0x magnification ratios right out of the box. (A 1.0 magnification means you can render a subject at its full size on the sensor.) My Olympus 60mm macro has a maximum of 2.0x magnification. One Canon lens offers a 5x magnification! Now, if you pair one or more extension tubes with a macro lens, you could get nose-hairs on bees! I mean, who hasn’t dreamed of making that photo?
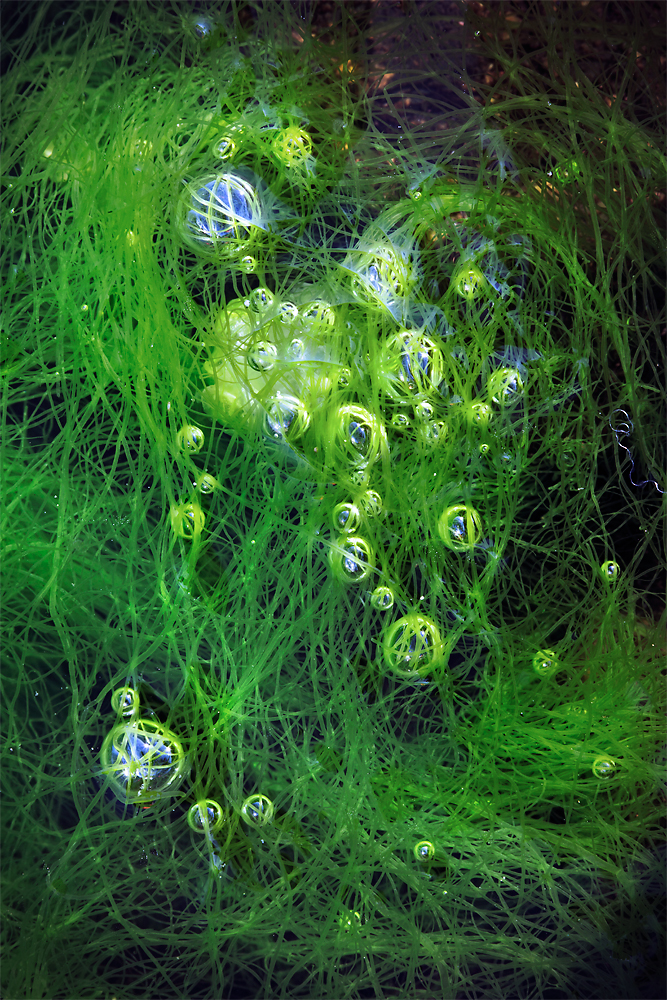
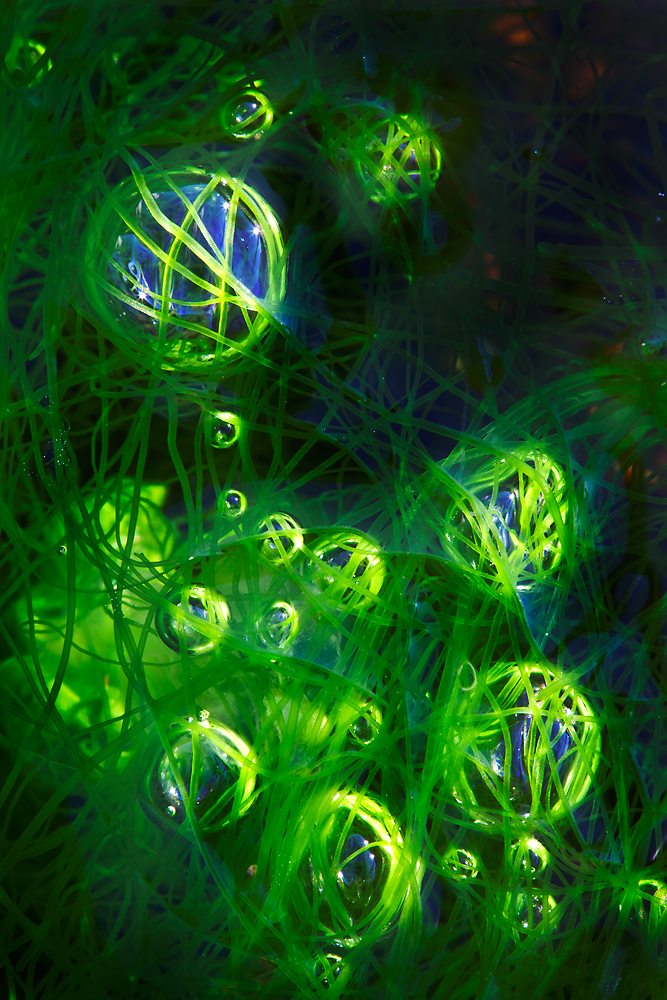
Whether you use extension tubes or a macro lens or both together, any increase in magnification translates into shallower depth of fields. So shallow that focusing at infinity is no longer achievable in a single frame. This is typically a non-issue for close-up and macro photography when we generally aim to isolate visual elements using blurred foregrounds and backgrounds anyhow. Most macro lenses cannot focus to infinity either so this puts extension tubes on equal footing in this regard. But macro lenses will allow you to focus on objects in the distance (albeit with shallow depth of field). Extension tubes will not; extension tubes require you to focus at close distances (which will also render shallow depth of field).
Adding an extension tube to your gear will also reduce the amount of light your camera sensor collects during an exposure. The thicker the tube, the greater the loss of light. This translates into slower exposure times. One could calculate the exact loss of light by using the inverse square law. But why would we? I fear I’ve done enough math for one post already and that doing one more completely impressive impractical formula might actually lead to me, maybe even you, spontaneously combusting. I just can’t let that happen. But if you’d like to for your lens and tubes, the inverse square law formula is “Light intensity=1/distance2” (or put more simply, “light falls off fast…”). Knock yourself out! (I mean, not literally, please.)
Back in the day, when we had less sophisticated camera gear, we’d have to factor this into our exposures and adjust accordingly. (Can you imagine how much fun that was?!) Today, our cameras are so technologically advanced, they adjusts for this automatically in the metering system. (Thank goodness!) So much so that the apparent loss of light from using an extension tube is not significant enough for me to notice or to deviate from my normal shooting process.
When using an extension tube or two or three, do what you normally do when you shoot: Meter and check your histogram. Adjust exposures as needed. Increase your ISO to increase your speed if you see unwanted movement in your frame. Use a tripod if you have trouble hand-holding your lens, especially a telephoto lens. Eat pie for breakfast. You’ll be fine.
Because extension tubes are hollow, they do not affect the optical quality of the lens. They differ from, but achieve similar benefits to, a close-up filter (also called a close-up diopter). A close-up filter is like a magnifying glass screwed onto the front of your lens. Because most of these types of filters are made of glass, the quality of the close-up filter can affect the quality of the image your lens and camera records. Color shifts and a reduction in sharpness are possible with cheap filters. So if you’re gonna drop thousands of dollars on a lens, do not—and I repeat, do not—buy a $27 close-up filter. Buy the best one your money can buy.
Extension tubes also differ from teleconverters which, like tubes, fit in between the lens and the camera, and like close-up filters contain glass. Teleconverters differ from both of these items such that they increase the apparent focal length of a lens. Longer focal lengths do achieve higher magnification but they also physically narrow the angle of view. An extension tube does not physically reduce this mathematically calculated angle of view. (Of course you can—and will—change what you include within that perspective by getting closer to an object with a tube.)
Another inexpensive alternative to buying a macro lens is a lens reverser ring. This accessory allows you to attach your lens to your camera backwards. Yes, that’s right, backwards. Talk about a cool party trick! When flipped, the lens optics serve as a magnifying glass. In this case, the shorter the focal length, the greater the magnification. Meaning your wide-angle lens will produce more pronounced results at closer focusing distances than your telephoto lens.
Whether you decide to go with extension tubes, a close-up filter, a teleconverter, or a combination of any of these, look for ones that fit your specific camera mount. If using autofocus and aperture settings are a priority to you, make sure to look for products with electrical contacts. This will preserve your normal camera functions. Without electrical contacts, you’ll be forced to use manual focus and shoot at your widest aperture setting. Which may not be all that bad of a deal, quite honestly. I could think of worse things…I love the bokeh created with wide apertures (read more at “Don’t Go Astray on a Bokeh”), and generally I don’t use autofocus with my manual lens anyhow. It takes the camera too long to find the right focus point even when I use spot focus…if it finds it at all.
Of these options, I chose to buy into extension tubes for a variety of reasons. They are lightweight. They don’t take up that much room in my bag. They’re easy to use. I don’t have to worry about negative impacts to my image quality. They work with all my lenses so I can play to my hearts content. I can leave my macro lens at home (and I do on trips like the Grand Canyon rafting where we have weight and space limitations). I can make images I’m proud of. And I can eat pie afterwards.
I also love my macro lens just the same. If I see a smaller scene in which I wish to create a photograph, I’ll first grab for it. Then if I can’t fill my frame enough or get close enough, I’ll slap on the extension tubes.
I don’t see extension tubes versus a macro lens as an either-or proposition. Both have value to our close-up and macrophotography pursuits. Less-expensive accessories like extension tubes (and close-up filters, teleconverters, and lens reverser rings) can extend your technical capabilities in the field whether you possess a macro lens or not.
I’d ask you Rondy and those out there considering the same question: how frequently are you using your extension tubes? Are you enjoying using them? Are you enjoying the results when you use them? Then keep using them! If you feel like you want to do more dedicated macro work, then by all means, plunk down that hundreds of dollars.
Even if you aren’t ready to purchase a macro lens now, and even if you change your mind later to splurge, using your existing extension tubes won’t go to waste. They will always have a place in your camera bag. And if you love them, then you’ll probably love a macro lens too. Both—either on their own or together—will always help you find joy in the little things.
Be well, be wild,
Bubbles
If you liked this post, please consider supporting Dear Bubbles either through a monthly contribution through Patreon or a one-time donation through Buy Me a Coffee. Learn more about both at https://dearbubbles.com/support.
Have a question about photography, art, and/or the creative life? Need some advice? Looking for inspiration? Send your question to Dear Bubbles at colleen@colleenminiuk.com to be possibly featured in a future column post. (If you’d prefer a different display name than your real first name, please include your preferred nickname in your note.




2 Comments
Chris Baird
You are such a hoot! Your posts always put a smile on my face. I found the Meike tubes on Amazon and ordered them. Looking forward to trying them out.
Sarah S
So thorough and helpful as always! I love that you go beyond the basics and really explain how things work. Thank you!