Not So Black and White
Dear Bubbles,
If I want to make a black and white photograph, is it better to shoot it in black and white or to shoot a color photograph then convert it to black and white in post-processing? Thanks!
~Living in the Gray
Dear Living in the Gray:
Back in the good ‘ole days of film, a photographer had to decide whether to keep or drop color before we loaded a roll of film into the camera—and oftentimes before we even knew what types of subjects or light or connections we’d encounter. Would it be color positive (slide) film? Color negative film? Black and white negative film? Once we made our choice, we were then locked into shooting in color or monochrome for 24 or 36 frames without seeing the results until hours, days, or weeks later after we developed our film.
Today, most cameras have a function that enables photographers to change the styling from frame to frame and to get immediate feedback on its aesthetic value either by pressing a button or selecting it in the menu on our cameras. Of course, the camera manufacturers couldn’t all play nice in the sandbox together and call this feature the same thing. Oh no! That’d be too easy and too logical. To change your image output to monochrome, look for either a function, button, or menu item labeled:
- Canon: Picture Style
- Nikon: Picture Control
- Fuji: Film Simulation
- Sony: Creative Style
- Olympus: Picture Mode
- Panasonic: Photo Style
(Give it up to Fuji who obviously used the thesaurus for “picture” and “style” so they could be really, really different than everyone else…)
Now that we have digital technology that provides more flexibility, you’ve gotta wonder, how did we ever survive those film days?! But when humans have many options to choose from, as we have with digital cameras today, we encounter stress and anxiety in making a decision. Psychologists call this the Paradox of Choice. It’s even more challenging when the “right” answer isn’t so, well, black and white…
Bubbles has two philosophies that work together. I believe in:
- Visualizing our photographs before we shoot it so we know which technical and creative choices to make to support the delivery of our desired visual message.
- Aiming to get the best file we can in camera so as minimize—or eliminate—the amount of “fixing” we need to do while behind a computer and to give ourselves options to express our vision differently than we originally intended later in processing.
The fact that you’re asking your question means you’re already accomplishing goal #1. You know what you want. High fives all around!
(For additional tips on how to make a decision between color and monochrome, visit “Color or Black and White” on Dear Bubbles at https://dearbubbles.com/2019/12/color-or-black-and-white.)
But now how do we handle #2 so that we get not just a monochromatic result, but the best monochromatic result? The answer to your question is, wait for it…it depends. (Which is the answer to all questions about photography, right?) It depends on whether you’re photographing in RAW or JPG format because the goals for the two differ.
RAW is a larger, uncompressed data file, not an image file. It’s considered a lossless format meaning we can make adjustments to the file without negatively impacting the image quality. The goal for photographing in RAW format, then, is to not get the best photograph in camera but rather to collect as much data as possible to increase the quality of our resulting image as we convert it into an image on our computer.
In RAW, the camera collects the maximum amount of data regarding color (and other data. For a refresher on the type of information RAW and JPG records, visit “Restoring Balance” at https://dearbubbles.com/2020/06/restoring-balance.) Even if you change the Picture Style/Picture Control/Film Simulation/Creative Style/Picture Mode to monochrome as outlined above, your camera will still collect all the color data if you’re shooting in RAW. You aren’t given a choice.
Now, when you do change the Picture Style/Picture Control/Film Simulation/Creative Style/Picture Mode to monochrome and shoot in RAW, your camera will display a monochrome image on your LCD (or viewfinder) in Playback mode. Some cameras will also turn the electronic viewfinder (EVF) to display black and white as well. Don’t let this fool you. The RAW still collected ALL the color data behind the scenes. What you’re seeing is a JPG rendition of the RAW file. As I noted in last month’s column, “Seeing the Light”, this is an excellent way to conduct a tone check—visualizing tonal contrast—as you’re working through a composition.
For those paying attention, I realize this may sound like it’s in opposition to Bubbles Philosophy #2 but remember, with RAW, you’re aiming to get the best data, not the best photograph. There’s a difference.
The goal for JPG differs from RAW. JPG is a smaller, compressed image file. It too collects data, but differently and in much smaller quantities than a RAW format does. According to Adobe, a RAW file can be up to six times larger than a JPG file. Photographing in JPG format is WYSIWYG—what you see is what you get. What you see on your LCD or in your viewfinder is an actual photograph which is made up of data, but of data that has already been converted into something viewable on computers, mobile devices, etc. (unlike RAW which requires data conversion). Also JPG is a lossy format. Manipulating the pixels through things like contrast, exposure, hue and saturation, and converting color to black and white in processing software impacts the quality of the photograph. Thus, when photographing in JPG, we strive to get the best image out of our camera without any intent of processing it later.
So, if you’re photographing in JPG format and envision your final image as a monochrome, it’s better to shoot the JPG in black and white and be done with it. Just know that the color information for that frame is gone forever and ever and ever. And that might be okay. Unless you aren’t sure…
What if you haven’t visualized—GASP!—a black-and-white image before you pressed the shutter button? Or what if we want to render the final photograph in BOTH color and monochrome? (Two different stylings can be the right answer for different reasons.) Or what happens if what we envision in the moment isn’t what we envision later while we process our work? What if we thought we wanted black and white but now we want color instead?
Minor White classified these types of decisions as “post-visualization.” It’s remembering what you visualized but not getting so locked into your vision that you fail to reimaging new possibilities for the final photograph. Yes, you’re allowed to change your mind at any time within the creative process. You will not spontaneously combust if you do, I promise. Photograph is art, not settled law etched in stone. Anything goes when it comes to creativity.
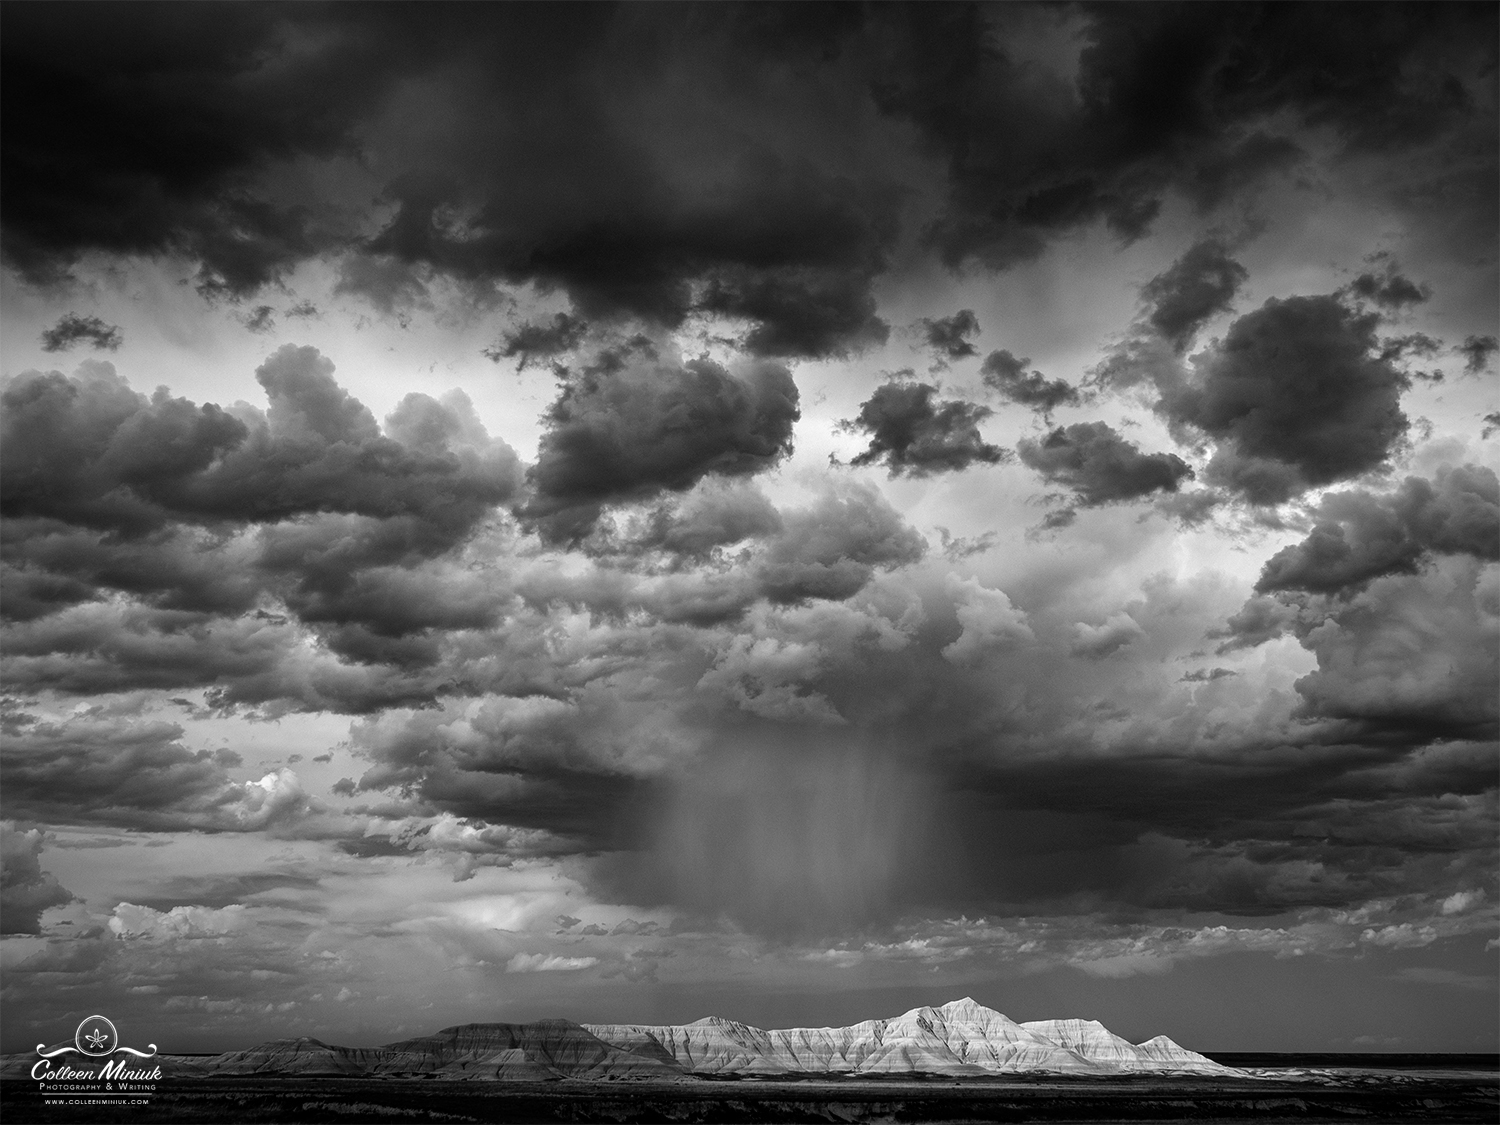
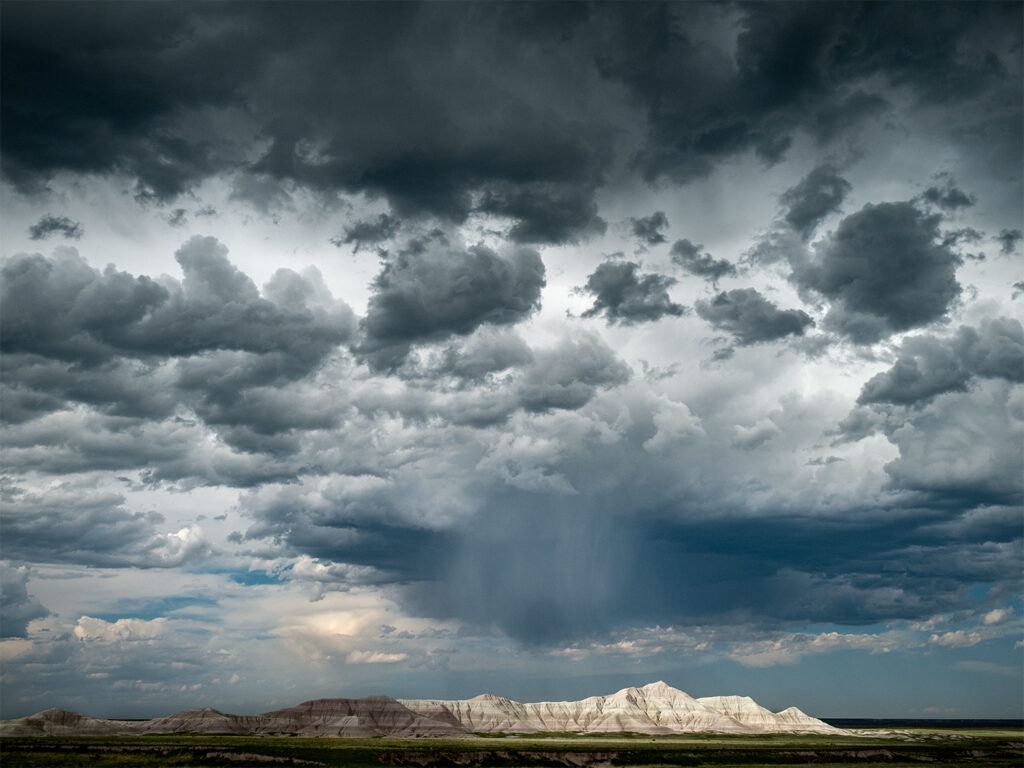
For example, I created the photograph at the top of the post in RAW format. When I initially photographed it, I saw the color version (a JPG…) on my LCD. I asked myself if color was important to the message for the photograph. At first I thought it was. I liked the juxtaposition between the imposing clouds over the grassy (read: peaceful) land. I made a few frames in color.
Just for fun, I I quickly changed my Picture Mode on my Olympus camera to Monochrome. I snapped another frame to see what it would look like if I were to process it as black and white. Ooooohhhhhhhh. This scene absolutely needed to be rendered as a monochrome. The blue sky—too cold—and the green grass—too peaceful—distracted from the sheer power and drama I wanted to emphasize. In the moment, my camera displayed the image on my LCD in monochrome while recording all the color data in RAW. When I brought the image into my processing software, the RAW file appeared in color, I converted it to an image via Adobe Camera RAW, and then processed it as a black and white image using the Black-and-White adjustment layers.
As a quick aside, conversion in processing software comes in many flavors. Some may choose to tap into the software’s canned algorithms by clicking on the Black-and-White icon (e.g. in Adobe Camera Raw) or by selecting the Black-and-White adjustment layer (e.g. in Adobe Photoshop). Some prefer to use color channel mixing approach, changing the color profile to Grayscale, or by desaturating the colors independently. From there, one can modify contrast, exposure, etc. as you would for all your images. As with many things in photography, there are many ways to get to a right answer. Find what works best for you in terms of black and white processing through experimentation and study, and go with it.
If you aren’t sure which direction you’ll take, shoot in RAW or shoot a JPG in color. Once you lose the color in the file, it’s impossible to get it back. Shooting in RAW or a color JPG gives you the chance to explore both a color and monochrome option after you photograph. (Yes, even if you have to do a single adjustment to the JPG to convert it to monochrome in processing—you’ll live and the image quality will be just fine with minor changes.)
There’s no need to limit yourself unnecessarily. Remember the last part of Bubbles Philosophy #2: give yourself options. In other words, define your visual intent to the best of your ability ahead of time. Make the best decisions you can to deliver your message. But don’t be afraid to stay in the gray.
Be well, be wild,
Bubbles
Have a question about photography, art, and/or the creative life? Need some advice? Looking for inspiration? Send your question to Dear Bubbles at colleen@colleenminiuk.com to be possibly featured in a future column post. (If you’d prefer a different display name than your real first name, please include your preferred nickname in your note.
If you liked this post, please consider supporting Dear Bubbles either through a monthly contribution through Patreon or a one-time donation through Buy Me a Coffee. Learn more about both at https://dearbubbles.com/support.


