Polarizing Decisions
Dear Bubbles,
When should I be using a polarizer?
GSM Sheographers
Dear GSM (Great Smoky Mountains) Sheographers:
Whenever you want to photograph polar bears at the North Pole…”polar eyes.” Get it? Okay, okay, I can hear you groaning from here.
A polarizer, or more formally called a “polarizing filter,” prevents polarized light from entering the lens while allowing non-polarized light to pass through to a camera’s sensor. In other words, it deflects reflected light we see as glare and specular highlights on non-metallic surfaces like lakes, rocks, leaves, flower petals, and glass.
The filters are typically circular in shape and screw on to the front of your lens. Square filters, which are less common but convenient for use with larger diameter and/or bulbous lenses, slide into a filter holder (which then attaches to your lens via a separate filter ring sized to fit the diameter of your lens).
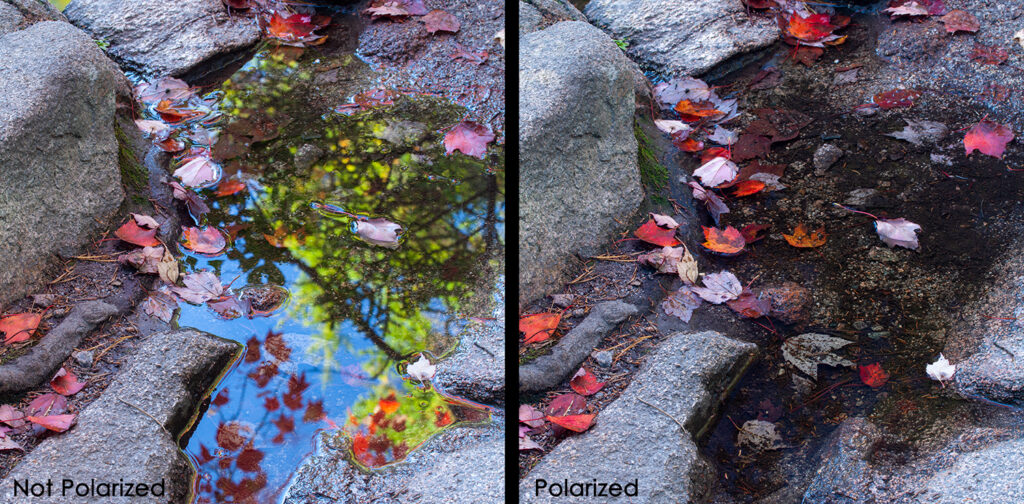
Regardless of its shape, a polarizer is a useful accessory in a number of situations. It can enhance or eliminate reflection—two effects that processing software cannot reproduce. Yet. Processing software can’t make-up a reflection that doesn’t exist in the original photograph. Well, in theory, there’s nothing technically preventing you duplicating pixels manually but that would require a significant amount of expert-level processing skills AND a substantial amount of wine. In a similar vein, processing software can’t get rid of a reflection unless it knows what’s under the water surface or behind a piece of glass. And it doesn’t and can’t know it unless that information exists in the original image. Hence the need for the polarizing filter at the time of image capture.
In addition, a polarizer can reduce atmospheric haze and increase the appearance of color saturation in your images (by removing the glare). In a pinch, it can also double as a neutral-density filter to slow your shutter speeds to convey movement in your scenes. (Think silky water in mid-day light.) A polarizer will reduce your exposure settings in between one and three stops of light.
But simply adding it to the front of your lens won’t do much. You have to rotate the front part of the filter, turning it slowly, to see a noticeable change in the amount of haze, saturation, and/or reflection. Because the filter typically attaches to your lens with a clockwise motion (turns to the right when facing your lens), I recommend continuing to turn the front part of the filter clockwise when the filter is attached. If you turn the front ring counter-clockwise, you can loosen the filter unintentionally from your lens and it will fall to the ground and shatter on the sharp rocks and you’ll cry and then you’ll have to buy another polarizer. (Ask me sometime how I know this…)
To see the maximum effect, position your camera 90-degrees from the sun, give the filter a twirl, and watch the sky or reflections in water. To find 90-degrees from the sun, you can “shoot the sun.” Point your pointer finger at the sun then extend your thumb to create a gun shape with your hand. (Public service announcement: please do not look at the sun—do not burn your retinas…) Then rotate your arm so that your thumb rotates along an imaginary circle around the axis of your finger. The angle at which your thumb points are the directions where you will see the maximum intensity of the polarization.
In less visual, but perhaps more simpler, terms, you see the best polarization when you’re photographing side light. Your polarizer will have little to no effect on reducing haze, increasing saturation, or adjusting reflections when photographing front and back light. If you wish to visualize whether it’s worth digging out your filter from your camera bag, put on polarized sunglasses and tilt your head from side to side. If you see a darkening and lightening effect, your polarizing filter is likely to help in your photographic pursuits. So get out that polarizer! You can do it!
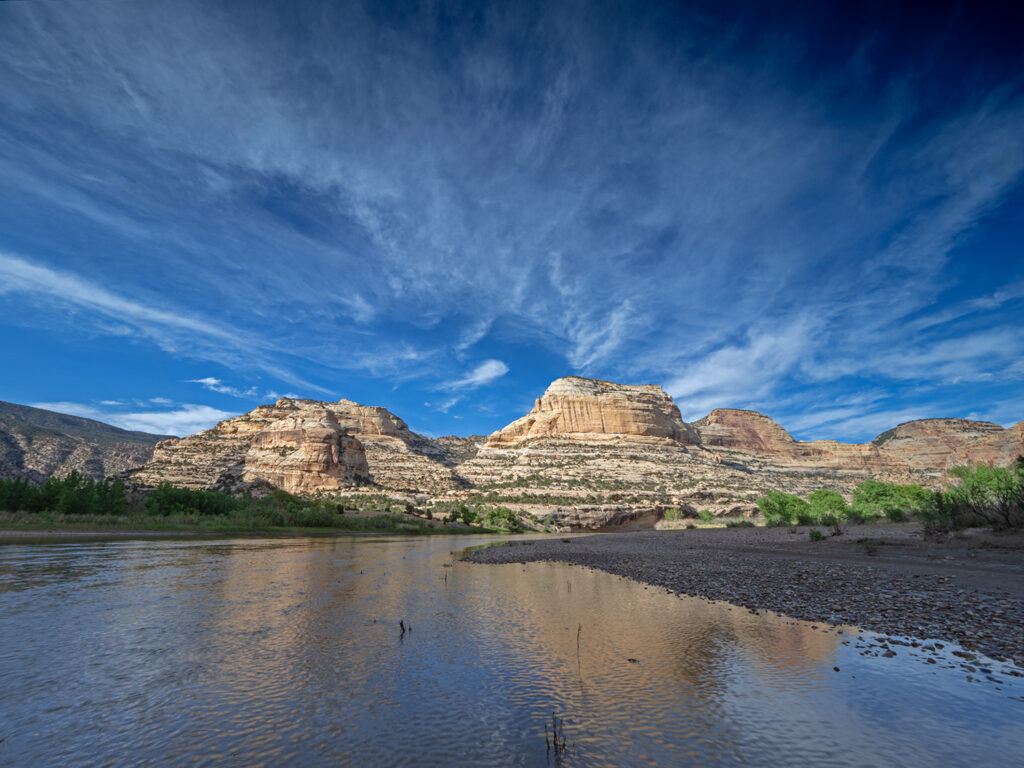
Knowing how much—or how little—to turn the polarizer to get a polarized effect is a bit like adding salt and pepper to taste to a meal. It’s a personal decision developed over time and with experience. That said, be careful of over-polarization, where the sky turns an unnatural blue color. You can actually turn a mid-day clear blue sky to almost black at higher elevations. Try it when you’re next in the Colorado mountains sometime. This is a super fun party trick! Trust me, you’ll impress all your friends!
Also be on the watch for uneven polarization. The sky can appear dark blue on one side of your photograph and fade to lighter blue on the other when shooting at angles between 45 and 90 degrees. To avoid this, turn the filter slightly until the shades of the sky match better. You’ll see this shift in your viewfinder or on your LCD if you’re paying close attention. You can address the uneven polarization issue in processing software through the highlight, white, and linear gradient adjustments but which would you prefer: spending more time behind a computer tinkering or be out playing and rolling in dirt?
Uneven polarization also occurs when using a polarizer on wide-angle lenses with focal lengths equal to 24mm or wider. It appears as a dark blue half-oval at the top of your photograph. I don’t use a polarizer at all when shooting wider than 24 mm. I do darken and enrich the sky in processing software for those images because there is no in-field solution for this—it’s a function of physics and perspective differences.
Otherwise, as I mentioned in the Dear Bubbles column “Protecting Your Lens,” I keep my polarizer on the front of my 14-150mm (28-300mm equivalent) lens 87.4% of the time. I only take it off if and when:
- I need a faster shutter speed to freeze motion. Like if I went to the North Pole to photograph polar bears. My polarizer would slow me down about a stop of light and if that bear is moving, well, as Maverick and Goose said in Top Gun, “I feel the need…the need for speed.”
- I am photographing straight into the sun (backlight). The sun reflecting into the extra layer of glass will create increased lens flare and unsightly artifacts.
- I am creating a panoramic image via multiple consecutive frames. The vast perspective within a panorama is too great for the polarization effect so creating one with a polarizer on will introduce uneven polarization in the final image.
- I am shooting night skies (star trails, the Milky Way, the moon, etc.) and can’t afford to slow my shutter speed down any more than it’ll already be in low lighting conditions (i.e. pitch black).
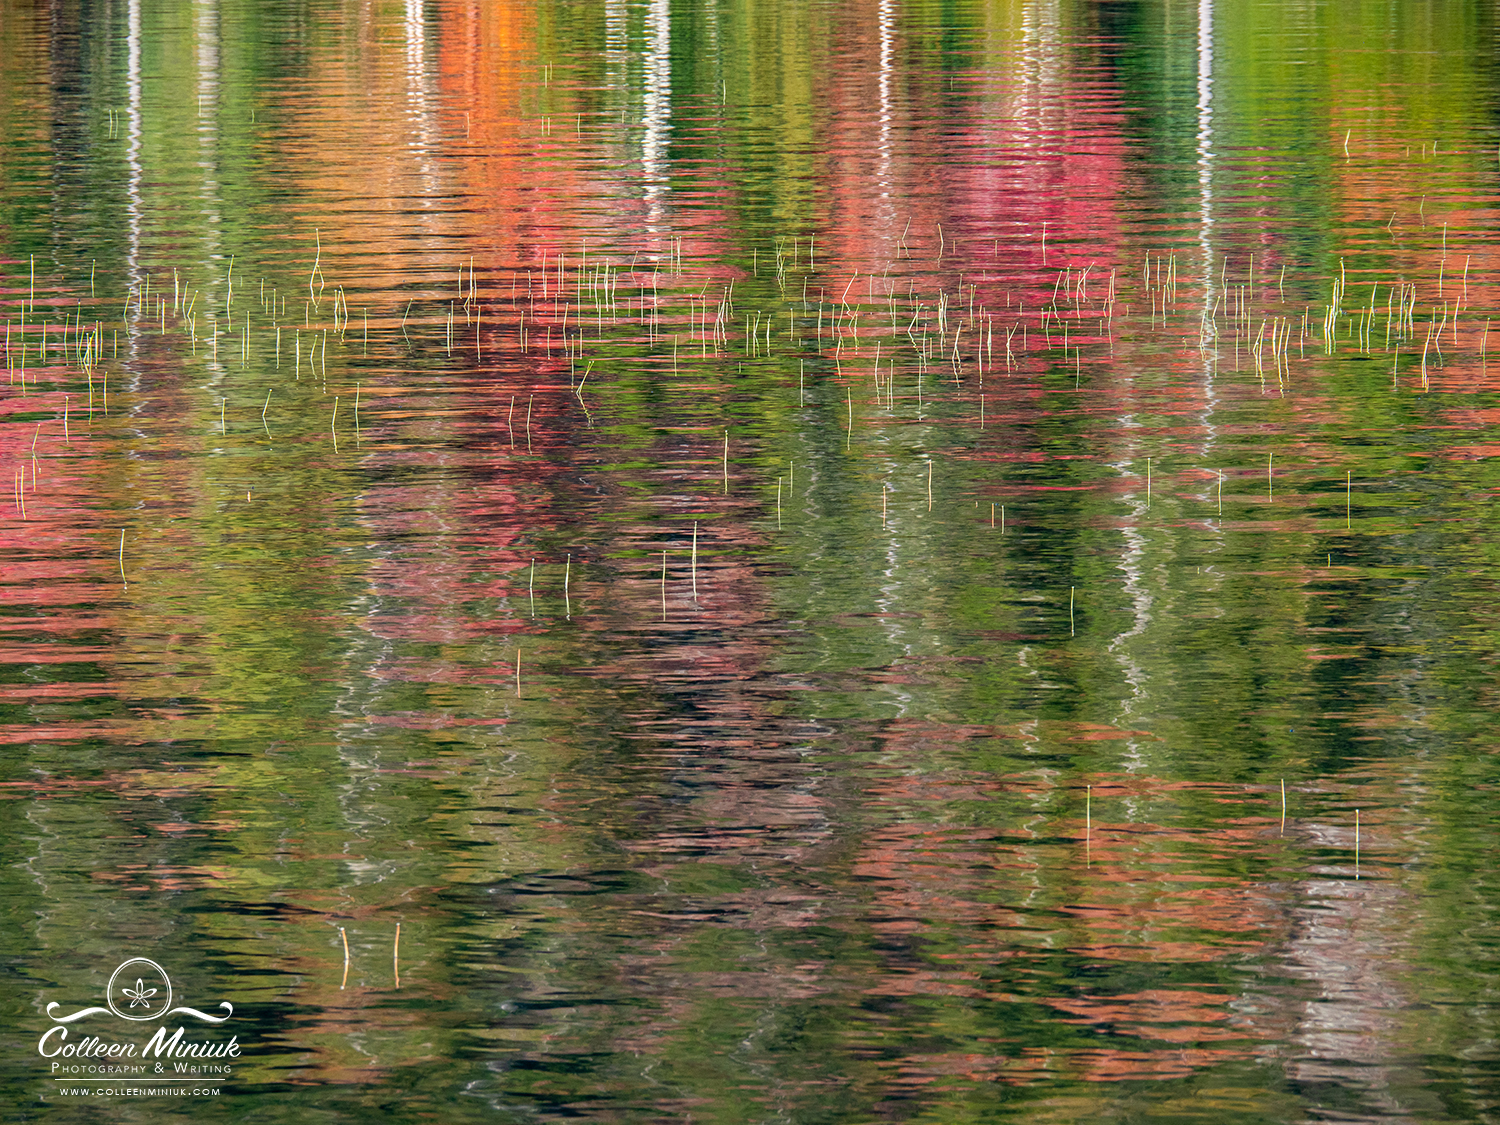
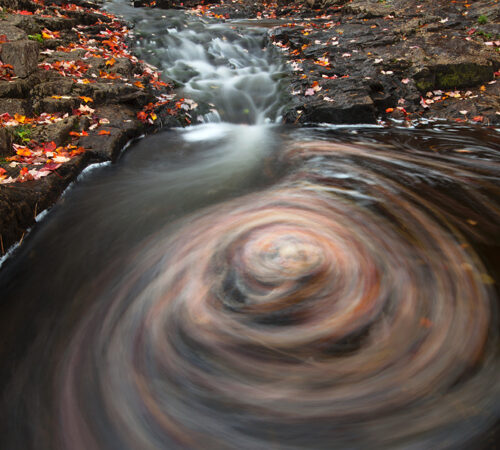
- When I want bright, color reflected light to appear in my photographs (like in water surfaces, as in the photograph below), meaning I don’t want to filter out the polarized light. I want to feature it. For example, in the photograph at the top of this post, I wanted to emphasize the reflections in the water at Jordan Pond in Acadia National Park, ME so I removed my polarizer. Had I kept my polarizer on (and had turned it such that the polarizer removed the polarized light), the photograph would have revealed rocks submerged below the surface.
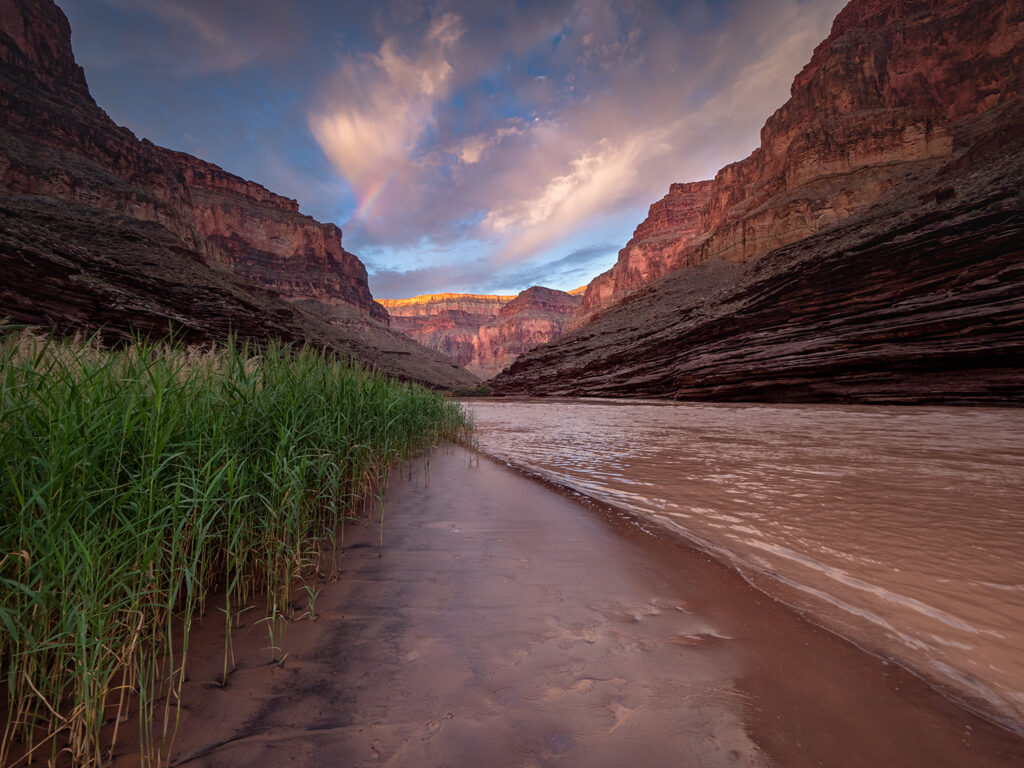
Now, when photographing rainbows, which occur anti-solar (and thus, are photographed in front lighting conditions), I won’t remove my polarizer. But I am careful to turn it so the colors pop out from the background sky. You can actually make a rainbow disappear in your photograph if you turn your polarizer too much. This is not a super fun party trick. Trust me, no one will believe you that it existed in real life if it’s not in your image…
A good polarizer won’t come cheap. Budget a few hundred dollars if you want clear, color-neutral filter. (You can get 10% off at https://singh-ray.com if you use colleen10 as the coupon code at checkout.) After all, it’s nonsense to spend thousands of dollars on a fancy camera body and a fancy lens only to put a cheap filter in front of it all.
If you have multiple lens, instead of buying a polarizer for each of your lenses, buy one polarizer to fit your largest diameter lens. Then purchase step-up rings, which run in between $5-40, to match the size of the polarizer filter to the diameter of your other lenses. For example, if your largest diameter lens (typically a wide-angle lens) is 82 mm, buy an 82mm polarizer to attach directly with this lens. Then buy step-up rings to enable you to use the 82mm polarizer with all your other lenses. I have a 58mm lens so I’d need an “58mm-82mm step-up ring” to attach the polarizer to my 58mm lens. Of course, if you decide to keep a polarizer on the front of your lens at all times (in lieu of a UV filter), you’ll need multiple polarizers…
Regardless of the direction you go, having a polarizing filter in your bag isn’t a polarized decision. Get one. And use it. Especially if you make images involving water, skies, buildings, foliage, or glass. Just not when photographing polar bears in the North Pole…
Be well, be wild,
Bubbles
Have a question about photography, art, and/or the creative life? Need some advice? Looking for inspiration? Send your question to Dear Bubbles at [email protected] to be possibly featured in a future column post. (If you’d prefer a different display name than your real first name, please include your preferred nickname in your note.
If you liked this post, please consider supporting Dear Bubbles either through a monthly contribution through Patreon or a one-time donation through Buy Me a Coffee. Learn more about both at https://dearbubbles.com/support.

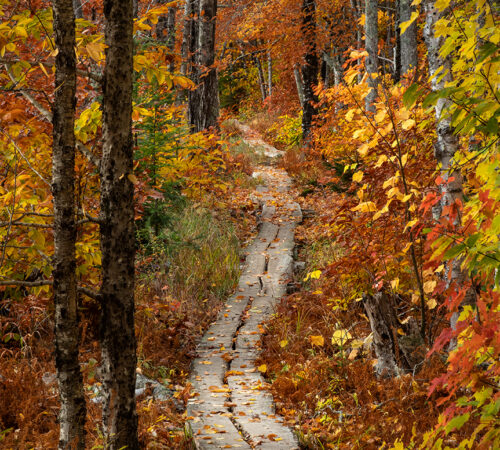
Falling for Fall

2 Comments
Tom Phelps
Dear Bubbles:
One cautionary note – if you wear polarized sunglasses in the field to protect your precious eyes, you will discover that you won’t see any impact of your polarizer when you look through your viewfinder – you need to remove your sunglasses first. (At least this was my experience when I wore prescription sunglasses.)
Tom
Bubbles
Yep! I wrote about that in “Two for One: Sunglasses and Processing”: https://dearbubbles.com/2020/04/two-for-one/