Falling for Fall
Dear Bubbles:
I’m headed to the Northeast for the first time this October. Do you have any tips for photographing fall colors?
~Michelle
Dear Michelle,
Why, of course I do!
While the aspens, maples, and oaks gracing Arizona’s high country started turning color in late September, the only way I know it’s fall in the desert is that my local Starbucks starts selling Pumpkin Spice Mochalattechino’s—and the daytime air temperatures fall below 100F. Desert dwellers rejoice!
I certainly welcome the new flavors and cooler temperatures, but I don’t stay around to enjoy them. Those are merely my queues to jump on a plane to Maine so that I can experience a more discernible change in the season. Since my second artist-in-residency in 2010, I have spent almost the entire month of October every year since then except 2020 (you know, that whole COVID thing…) in Acadia National Park wandering among the jaw-dropping kaleidoscope of colors. (My first residency took place in November 2009, a few weeks after the peak of autumn.)
The riot of almost neon-like color overwhelmed me at first. I acted like a squirrel on Red Bull. I ran from tree to leaf to tree to leaf to—OMG, look over there! I’d spray and pray, meaning I’d make a bunch of images and pray one came out. Except few ever did. Over the years, I’ve settled into a more mindful, calmer rhythm of photographing all the opportunities autumn presents. There’s no need to rush. Trees don’t moving very fast…(So put down the Red Bull, Bubbles…)
When I’m in the field, I spend an enormous amount of time simply looking, sensing, admiring, feeling grateful. How fortunate we are to see this magical and colorful change in season! To help me narrow my visual message down from “OMG THIS IS SO INSANELY BEAUTIFUL” to something more deeply representative of the experience I’m having in the moment, I start with my standard approach to all types of photography: I ask myself “To what am I responding and why?”
While the answer to this question might be “it depends”—like the answer to all questions in photography—it behooves us to be as specific as possible in your response. (Side note: am I the only one who loves the word “behooves?”) Go beyond “I just love everything about it” and “Well it’s so pretty.” Keep scrutinizing the scene. Why THAT leaf and not this leaf? Why that cluster of trees and not the one on the right? Why that hillside and not the one behind you? Look up, look down, look all around. There are millions of possibilities. Your “job” as a photographer is to narrow this down to a single frame or a series of frames that best encapsulates how your are experiencing the scene in this unrepeatable moment.
Tap into metaphorical associations and conceptual blending to help connect your individuality with the landscape or subject. Ask, “What else is it?” Your answer comes from your immense set of raw materials in your brain—your background, interests, perceptions, etc. There are no wrong answers so let it flow without judging (i.e. dismissing) your responses.
Then fill your frame with just that answer whatever it is. This is your visual message or visual intent. Once you have this defined, it’s a matter of picking out the right technical techniques to bring your idea to fruition in pixels. Easy peasy, right? Well, sometimes!
To help you bring home the beauty of fall no matter where your travels might lead you, here are specific things to keep in mind as you’re out there frolicking in the leaves:
- Tell a story, YOUR story of your experience and relationship with autumn: What is it about the season that excites you? Depresses you? Any and all reactions you have about the season, place, and time are validr. How can you visually express those emotions in a photograph through lines, light, color, shape, balance, focus, motion, etc.? Obviously the color grabs our attention but what about all the transitions happening: summer to fall, fall to winter, life and death. (This might be a great time to reread my earlier column “Putting it into Words:” https://dearbubbles.com/2020/11/putting-it-into-words).
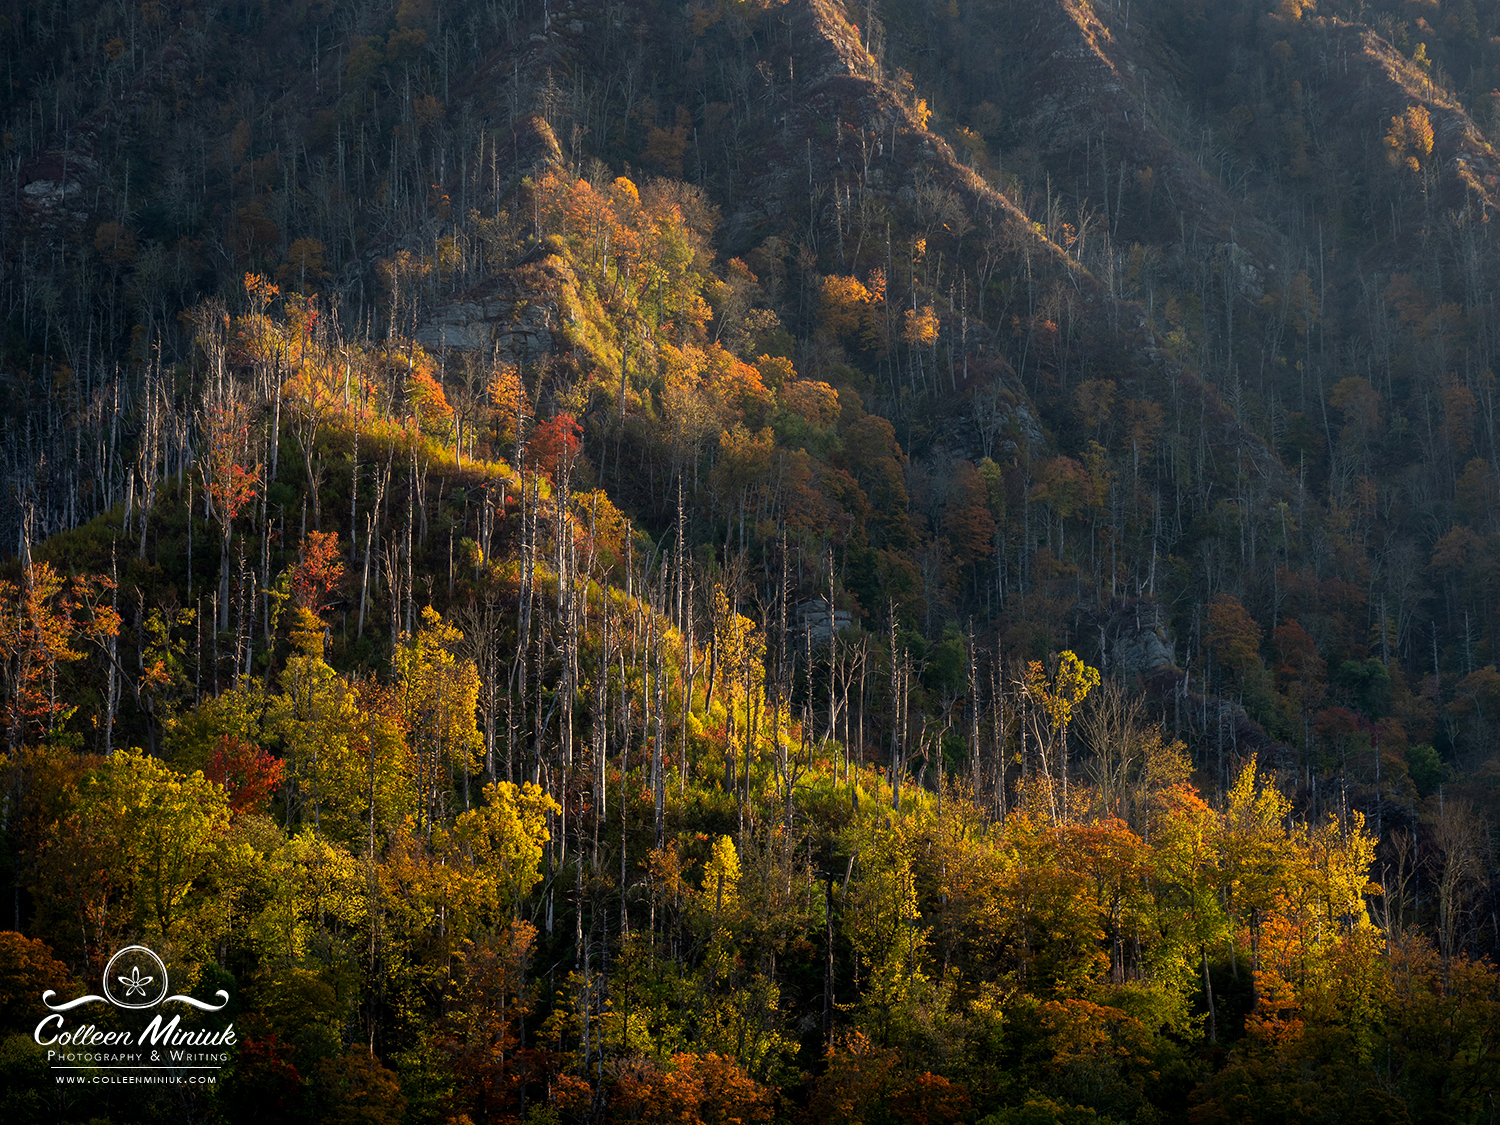
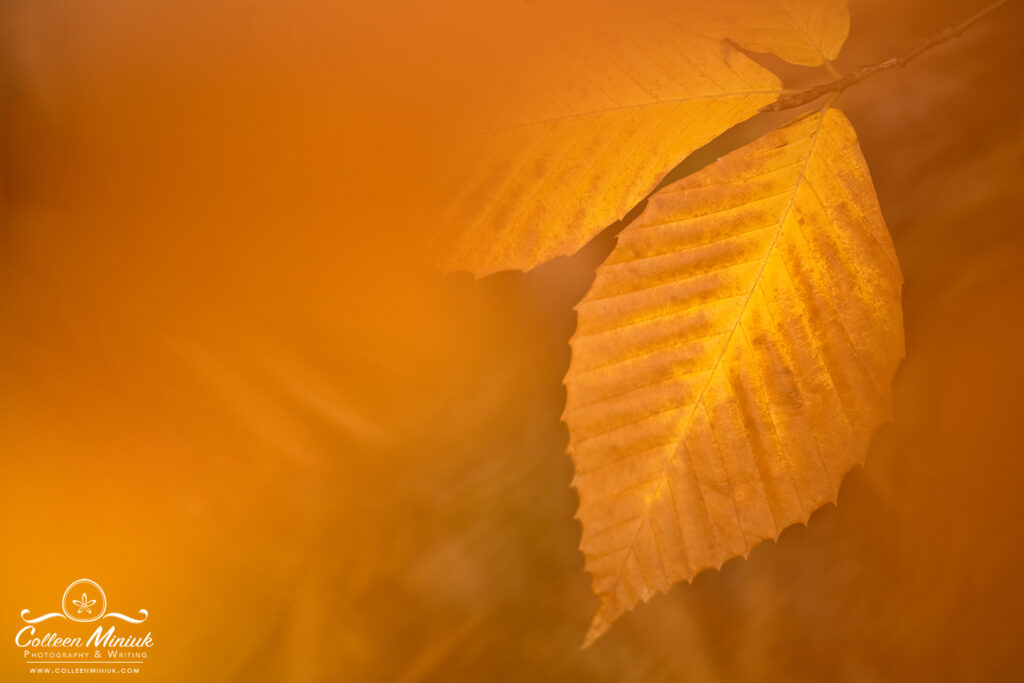
- Change it up: To help you avoid repetitive compositions, consider using the three-shot photojournalistic story-telling approach: in a single location or on a single trip, create one photograph from a broad, vignette, and detail perspective. Start by making a wide-angle landscape frame to establish the scene and context for your story of autumn. Then, pick out the minute details and pieces that make up the scene and isolate them with a telephoto and/or macro lens. In between the wide-angle and the detail perspective is the vignette. It’s a more intimate look at your surroundings, oftentimes done with a mid-range focal length (~70-100mm) and oftentimes without a sky in the composition. As William Cowper’ wrote in his poem “The Task” in 1785: “Variety is the very spice of life, That gives it all its flavor.
- Stand your grounds: As you set up your camera, position yourself not just to achieve balance among your dominant visual elements (referred to as “figure” in visual design) but also consider how they relate to your grounds—your foreground and background. I try to find at least three distinct layers separated by shapes, light, tonality, and color which isn’t always easy when photographing trees straight on, for example. Add an extra layer by getting your lens close to surrounding foliage which will serve as a framing device. Shoot through the foliage while focusing on something in the distance using a wide aperture like f/2.8 or f/4. This will blur the foreground and background and give you the illusion of depth you need in a two-dimensional photograph.
- Be one with the wind and rain and fog: With the change in season comes the change in weather. Don’t let the wind, rain, and fog (and maybe even snow) keep you in the house. Get out there! Just be prepared. The saying goes, “There’s no bad weather, only bad clothing.” Wear rain gear and winter clothing and waterproof boots and hats and gloves and whatever else you need to stay warm, dry, and comfortable. Go ahead, look like the Stay Puft Marshmallow Man! No one cares what you look like (and if they do, tell them you’re just breaking in your Halloween costume.) Protect your camera too with shower caps, garbage bags, fancy rain covers, and umbrellas. Bring extra lens cloths to wipe spray and sap off your glass. Then embrace the atmospheric conditions photographically. If it’s windy, make sure you use fast ISO and shutter speeds to freeze the motion. Or show the blur of the leaves fluttering in the wind by using slower shutter speeds and/or intentional camera movement. If it’s overcast, eliminate textureless grey skies (which will grab attention due to its brightness). If it’s pouring and you’re reluctant to get out of your car, shoot through drops on the windshield. Just remember to park at an appropriate angle so you have a colorful background outside the windows you’re photographing. If it’s been raining, look for BUBBLES! One of the best part about not letting the weather hold you back is that you’re usually the only crazy out there and you get the location to yourself. Let’s all be crazy!
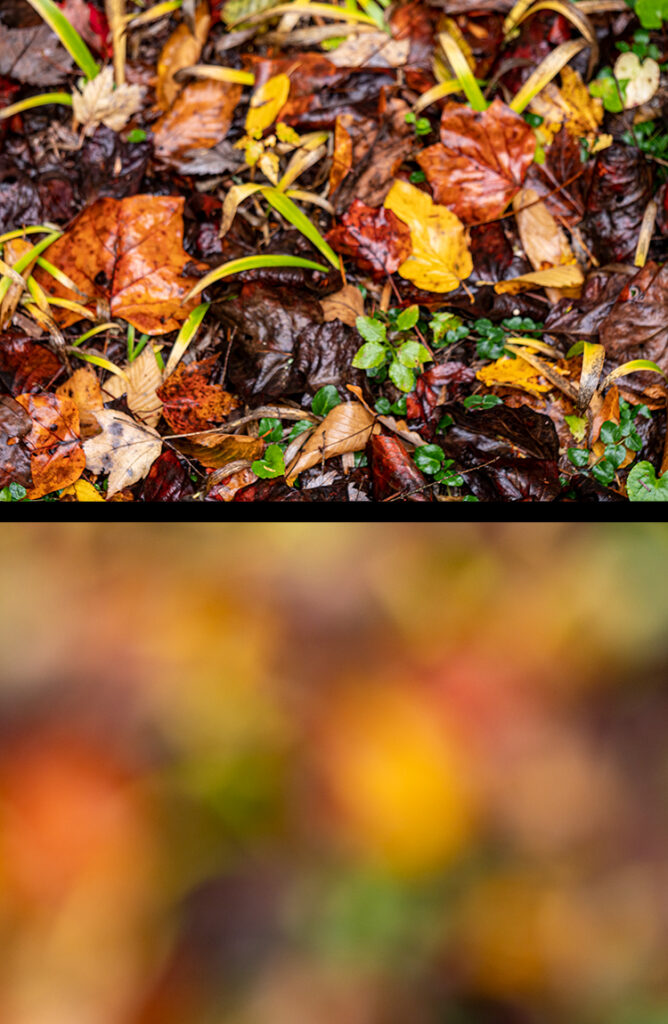
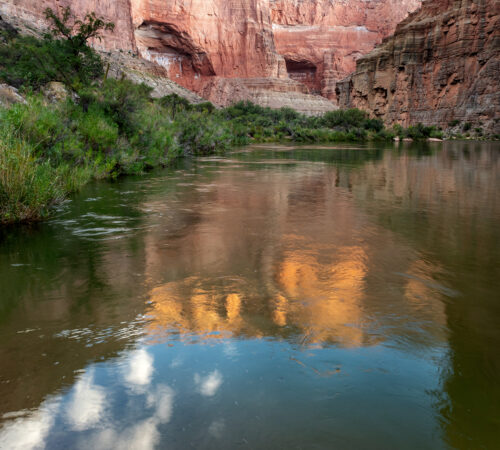
- Shoot backgrounds for use in multiple exposures: If you’ve spent any amount of time in photography, you’ve likely been taught to look for subjects and scenes that you can render in focus in a single frame. During autumn, when there are so many colorful shapes around, I specifically look for subjects I can render out of focus to use as potential backgrounds for multiple exposure compositions. I shoot leaves on the ground out of focus on purpose. I shake my camera in front of clusters of trees on purpose. I blur the water of a reflection on purpose. By the end of fall, I typically end up with a stash of new backgrounds I can use in the months ahead even if I’m not exactly sure in the moment how or when I’ll use them. On their own, they may not look like much. I just like to have a lot of these “haha” options on hand for when the “aha” moment strikes. Most frequently, I like to pair these backgrounds with an in-focus subject or scene either from the same shoot or a later one. (For more information on this technique, read “All About ME (Multiple Exposures)” at https://dearbubbles.com/2022/05/all-about-me-multiple-exposures.)
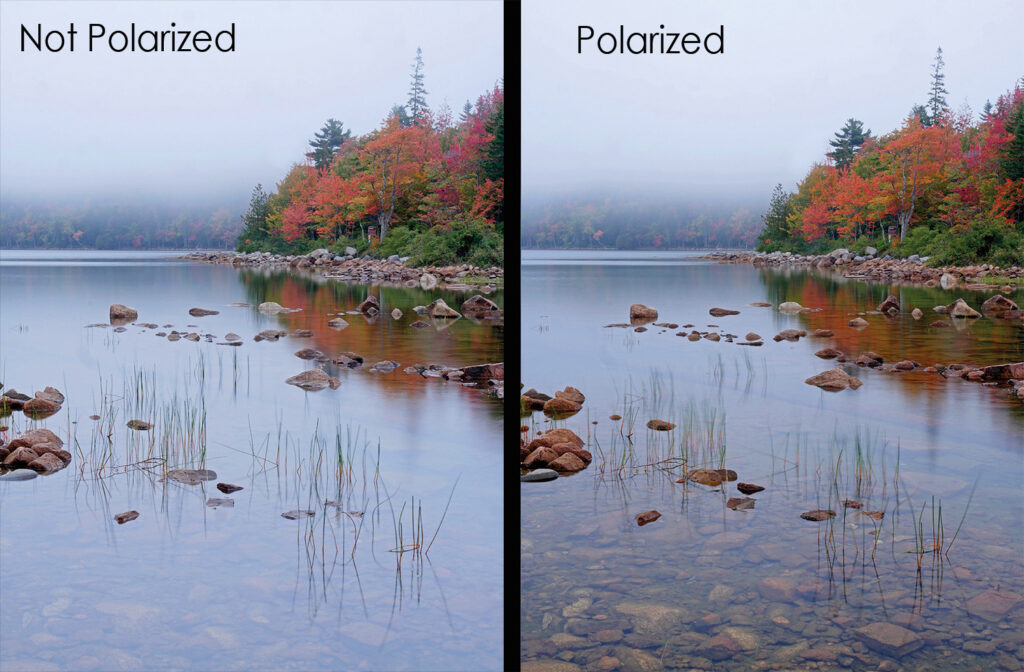
- Apply a polarizer to your lens: A small twirl of the polarizer can do a couple of positive things for your photography. First, it can remove reflected light, specular highlights, and sheen from leaves, especially if they have dew or bubbles on their upright surfaces. This will render the appearance of increased saturation in the colors in your photograph. Second, a polarizer can either enhance or eliminate a reflection. Should you wish to convey a sense of symmetry, you may wish to enhance the reflection. If you wish to emphasize the color in the landscape—and not the water—you may wish to eliminate it. Turning the polarizer gives you the option to do either. Or both. I leave my polarizer on my lens most of the time I have my camera out. The only downside to doing so is that I lose about 1-2 stops of light. If I need a faster shutter speed because of the wind or water movement, I’ll simply take the filter off for those compositions, then reattach it when I’m done. I use the polarizer in autumn way more than I don’t.
- Lighten up: Consider how lighting will affect your composition. Like weather and clothing, there is no bad light, only light that doesn’t support your desired visual message. But don’t get too attached to your own wants and expectations! We can’t control the lighting conditions Mother Nature provides to us (although I am still working on getting the sun to rise at 11 am…). But we can understand how to read the light and best incorporate it into our visual messages. Direct side and back light, as well as reflected/bounced light, will create contrast. Front light will create even illumination which typically looks flat unless the illuminated subject is against a dark background. Diffused light will increase the appearance of saturation. If you aren’t seeing the conditions you hoped for, bank the idea in your brain and change your message to make the most of your current situation. You can make images in any light, in any weather, if you’re willing to let go of expectations and celebrate the present moment exactly as it happens.
- Manage midday light: Creativity does not turn off right after sunrise and turn back on right before sunset. Creativity can happen at any time. Including the middle of the day! Sure, the light can be overly harsh for big landscape scenes, so switch over to a telephoto or macro lens to isolate detail and intimate scenes. Pull out a reflector to add light into your shadow areas. Use a diffuser to reduce the light and contrast across your entire frame (as if it were a cloud obstructing the sun). Use both a reflector and a diffuser at the same time to illuminate a subject in diffused light respectively. (You’ve grown a third arm over the summer to hold them in place, right?)
- Keep an eye on your RGB histogram: The luminosity histogram may suggest a proper exposure but in autumn, given the rich reds, yellows, and oranges, sometimes the Red channel of our RGB histogram can be overexposed. To see your RGB histogram, you may have to enable it via your Menu folder options and/or by pushing the Info or Display button on the back of your camera. Sometimes it’s hiding in there among the other data displayed…After each frame you make, check your RGB histogram to ensure you don’t see any spikes off the right side of any of the Red, Green, or Blue channels/histograms. A spike touching the right edge means you’ve blown out that color and the camera has not recorded any data for that color. That’s a bad thing! Especially if you wish for your final photograph to express the best, truest color. If you see a spike on the edge of the graph, underexpose—take away light—until the spike shifts to the left. Unfortunately, we do not (yet) have the capability to modify light intensities for each color channel independently in RAW. If you photograph in JPG format, you can modify your White Balance to affect the Red channel. (For example, set your camera to Tungsten or Incandescent. This tells the camera your scene features excessive orange light, and it’ll add blue which serves to reduce the orange).
Have a lovely trip to the Northeast, Michelle. And to all happy autumn! Here’s hoping you all fall in love with fall–and your photographs!
Be well, be wild,
Bubbles
Have a question about photography, art, and/or the creative life? Need some advice? Looking for inspiration? Send your question to Dear Bubbles at [email protected] to be possibly featured in a future column post. (If you’d prefer a different display name than your real first name, please include your preferred nickname in your note.
If you liked this post, please consider supporting Dear Bubbles either through a monthly contribution through Patreon or a one-time donation through Buy Me a Coffee. Learn more about both at https://dearbubbles.com/support.

Not So Black and White

4 Comments
Laurel Parrott
Thanks Colleen! Excellent post as always and so timely that it comes as I’m packing to come meet you in Maine. I’m jazzed!
Bubbles
HAHAHA! Here’s hoping it helped in Acadia. So great to see you again!
Phyllis
Such valuable information!!
Thank you.
Bubbles
Great to hear, Phyllis! Thanks for reading!