Shedding Light on Dark Frames
Dear Bubbles:
Something weird is going on with my camera. Sometimes, but not always, after I shoot an exposure, I get a message on my screen saying my camera is “processing.” What is being processed? And why does it take so long to do whatever it’s doing? When this happens, my camera locks up and I can’t shoot another frame. What am I doing wrong?
~Feeling Tortured
Dear Feeling Tortured,
Camera manufacturers can’t agree on things like image file extensions, the name for macro (or is it micro?), and locations of buttons. But they can agree on how to torture a photographer. And they do! A full description of the specific torment you can expect from your camera is listed on page 666 of your instruction manual.
I’m kidding. Although it may not seem like it, particularly as you stand there waiting for your camera to process data, your camera is trying to help you make a higher quality image. The “processing” you see is a function called “long exposure noise reduction.” Almost all newer digital cameras, including digital SLRs and mirrorless ones, possess such a feature.
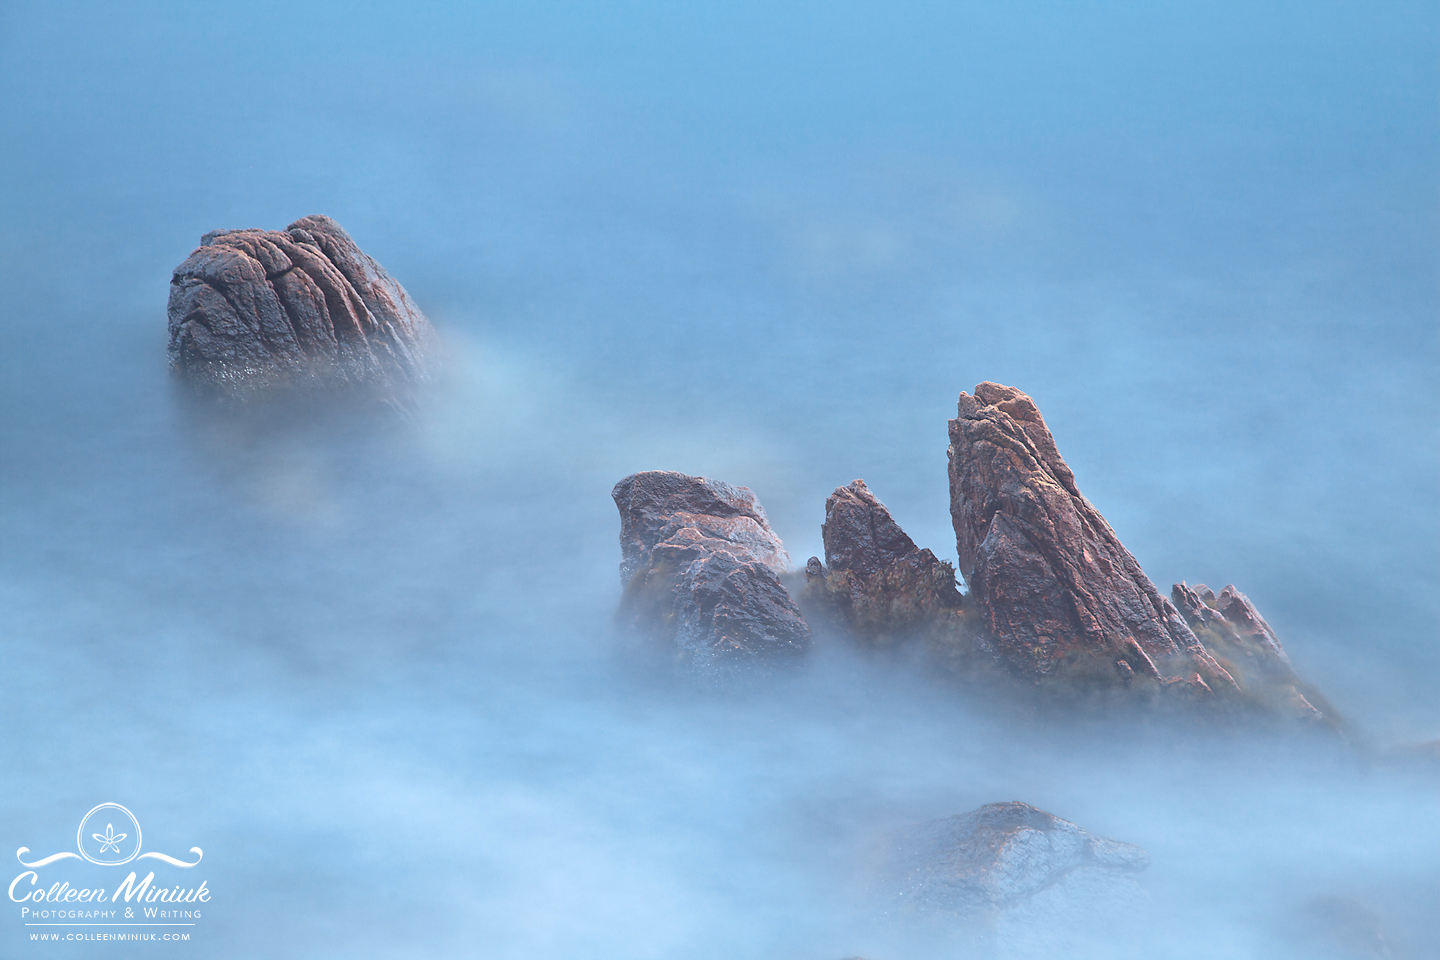
Our camera sensors heat up as we make longer exposures. Some believe high air temperatures exacerbate the issue. Photographing the Sonoran Desert around Phoenix in summer at 115 degrees Fahrenheit (46 degrees Celsius) will warm the camera sensor more so than photographing the Acadia coastline in Maine in winter at -26F (-32C) no matter how slow your shutter speed is.
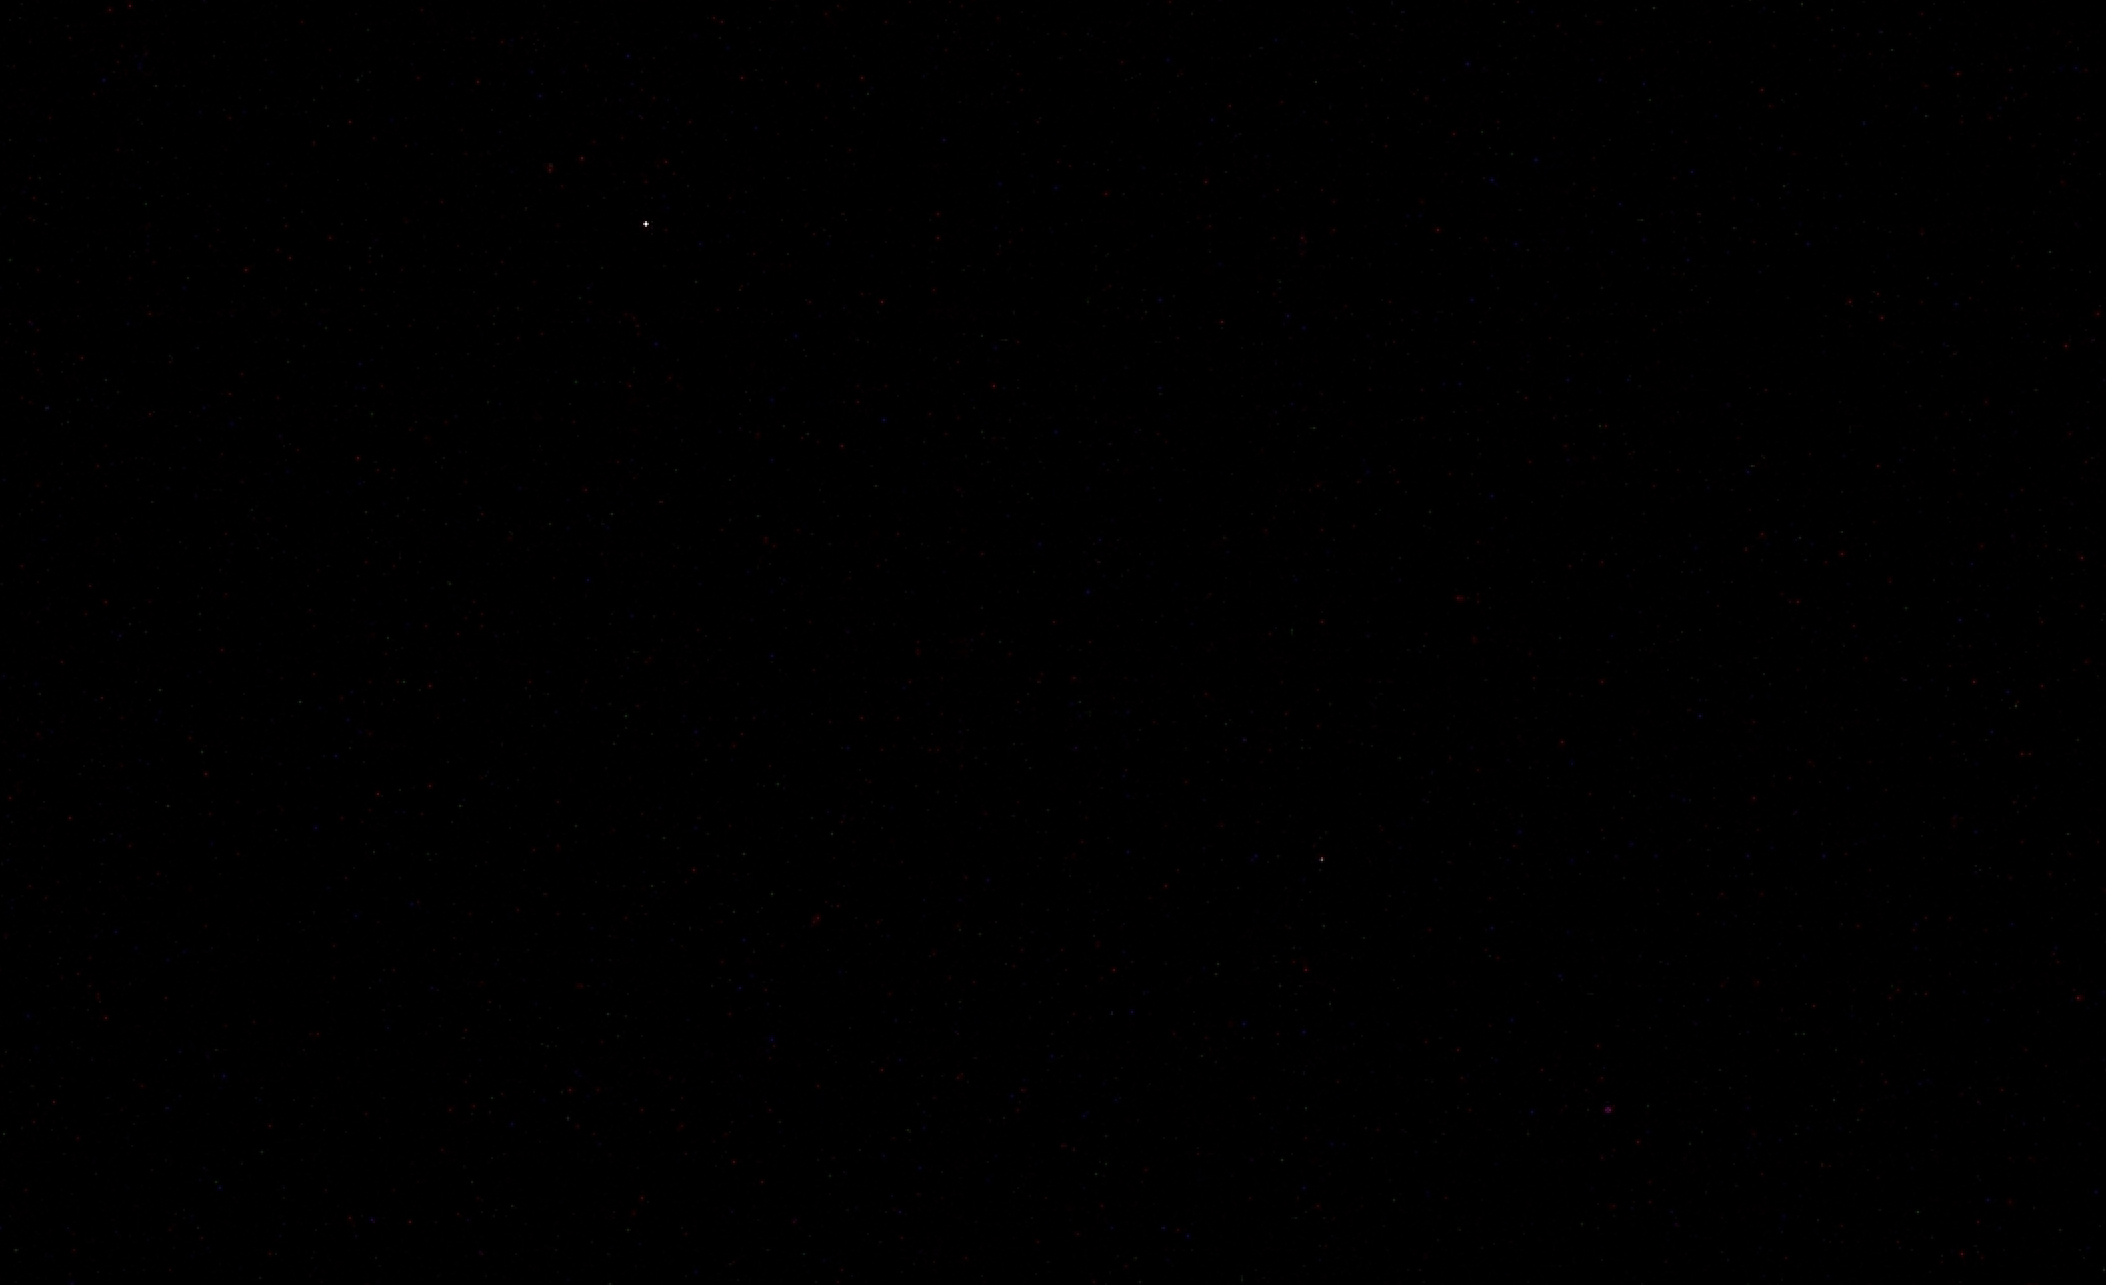
When the sensor heats up enough, it generates static which results in digital noise. These artifacts appear as tiny circular specks of various colors scattered randomly across our image frame (formally called “chroma noise” or informally “hot pixels”). The speckling looks different than actual data in a pixel since the noise blocks the sensor from recording reflected light during an exposure in those spaces. The long exposure noise reduction feature aims to reduce this usually subtle, but unsightly, effect.
From what I’ve seen during my many photography workshops (where I have the chance to interact with a broad variety of camera brands), the long exposure noise reduction function defaults to “ON.” This means the effect kicks in automatically (i.e., without your permission and without prior notification) when the camera detects a shutter speed equal to or longer than one second. This would explain why you see it sometimes and not always.
You likely see it while photographing at sunrise or sunset when the natural light is low enough to produce lengthier exposure times (especially if you’re also using a polarizer, neutral density, and/or graduated neutral density filters). You’ll most often see it with astrophotography when shutter speeds can exceed 30 seconds and into the minutes and even hours. You won’t experience it while photographing flowers midday in bright, sunny conditions (assuming you’re properly exposing and aren’t using filters to intentionally slow you down).
When the long exposure noise reduction kicks in, your camera makes two consecutive frames at the same shutter speed. The first is the actual photograph you’re trying to create. The second is a “dark frame.” In the latter occurrence, the camera restricts light from entering the lens as if you had your lens cap on. It processes (or exposes) for the same length of time you shot your actual photograph. This means if you have a 10-second exposure, the dark frame takes 10 seconds as well. If you have a 10-minute exposure, it takes an additional 10 minutes to complete. Once the second exposure finishes, the camera then compares the two images—your original and the dark frame—and subtracts the noise it found in the dark frame from your original shot. Your camera then displays the final image. You won’t ever see the dark frame in your LCD or in your image count. It’s a frame the camera makes–and keeps–behind the scenes.
While your camera works on this fine sequence of activities, it will display a message saying it’s “processing.” Most cameras will not permit the photographer to make another frame while it does its business. It makes you wait and wait and wait. And the waiting can be torture…especially when photographing fleeting light, moving waves and other subjects, or any other decisive moment. Attempting bracketing, multiple exposures, and time-lapse with long exposure noise reduction ends in disaster–there is no continuity in the movement of the scene.
But good news! If you don’t want to double your exposure times, you can turn the long exposure noise reduction function off in your camera’s menu. Of course, that means you’ll see increased digital noise in your image–and this type of noise is difficult to remove in processing software. Oh sure, there’s Noise Reduction in Adobe Photoshop and in other software packages (On1, Topaz, Photo Ninja, etc.). But you can create the dark frame in camera in a single shot and manually subtract the noise in processing software yourself after the fact…here’s how:
- Turn long exposure noise reduction off in your camera’s menu.
- Make your images as you normally would.
- At the very end of your photographic outing, place your lens cap over your lens and shoot a single frame equal to the longest shutter speed you used in step #2. This will collect maximum noise in a dark frame.
- In Adobe Bridge (or Adobe Lightroom), select an image you wish from step #2 and the dark frame simultaneously. Select Tools / Photoshop / Load Files into Photoshop Layers.
- In Adobe Photoshop, select both layers. From the Blend mode pull-down field (it’ll default to say “Normal”), choose “Subtract.” The dark frame will pull the noise out of the actual image.You may need to play with the Layer opacity to achieve a balance between removing the original noise and creating new artifacts.

What if you don’t have a dark frame or forget to make one in the field? You should quit photography. I’m kidding! Not to worry! An alternative with processing software exists:
- Open your image in Adobe Photoshop and duplicate your Background layer so that two copies of the same photograph appear in the Layer window.
- Select the top layer and then select Filter / Noise / Median. Enter a radius in between 3-5.
- Select the top layer again then change the blend mode to “Pin Light.”
- If you’re using this technique for astrophotography, review your image to make sure you didn’t accidentally make stars disappear or change color. If so, use a mask on the top layer and “paint” the stars back to normal with a black brush.
Voila! Problem solved sans dark frame.
All this said, while camera manufacturers suggest a dark frame is necessary when you have exposures longer than 1 second, I’d argue–although I have not done extensive scientific testing to back this up with data–that a dark frame doesn’t do much until you reach 30 seconds or longer with higher/faster ISO speeds. I don’t torture myself about dark frames (or noise, really) while photographing at 0’dark thirty with shutter speeds ranging from 8-30 seconds at ISOs in the 100-400 range. I do torture myself about making a dark frame after photographing the night sky for hours with 30-plus-second exposures at ISOs ranging from 1600-5000. Creating the single dark frame manually isn’t nearly the hassle waiting the extra time for “processing” by your camera in the field is.
Be well, be wild,
Bubbles


One Comment
Angie
This is a great tutorial, Colleen! Thanks for addressing this technique. It’s always informative and fun to read your posts!