What’s SUP? Paddling with a Camera
Dear Bubbles:
Do you stand-up paddleboard with your camera? How does that work? How do you protect it? Aren’t you afraid of falling in with it?
~A Nosy Nellie
Dear A Nosy Nellie:
I sure do!
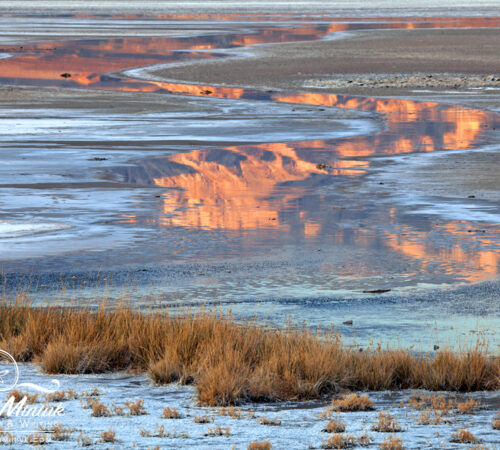
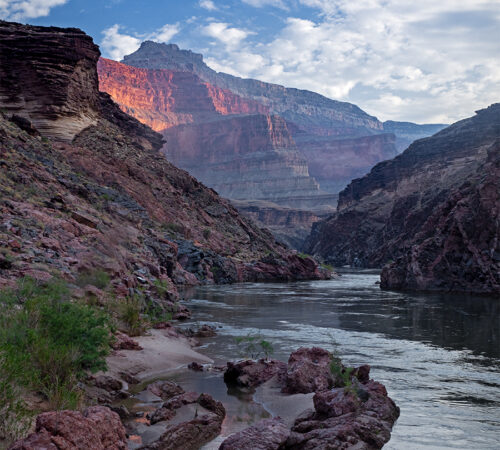
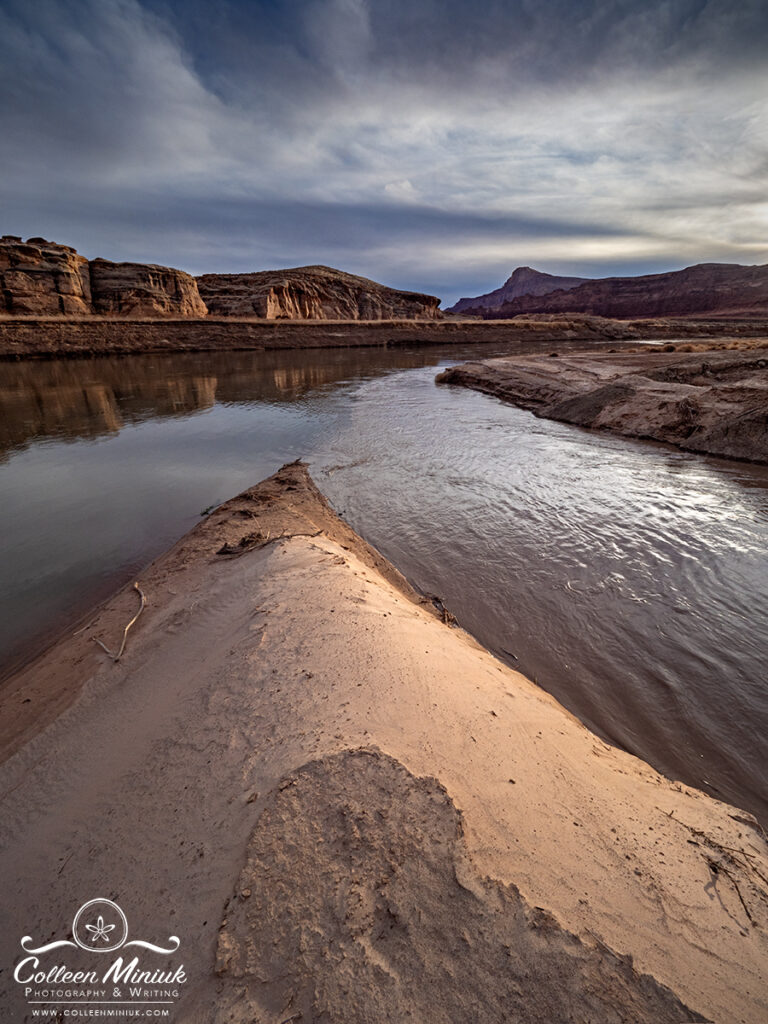
Traveling on rivers and lakes on my stand-up paddleboarding gets me into wild places I otherwise couldn’t experience. Oftentimes, I paddle through landscapes with no roads, no hiking trails, no modern-day human presence. I bring my camera on these trips to record and remember the beauty of these special places—especially since some of these spots are threatened by development and may change significantly in the future. As part of my purpose, to help people get outside, I want others, some who may not get the chance to see these places, to experience them, at least through my photographs, to see that they are worth visiting, protecting, and keeping wild.
I usually photograph sunrise and sunset from the shore, in between making meals and setting up (or taking down) my camp. I spend most of the rest of the day on the water. Photographing from the middle of a river or lake offers different challenges than photographing non-moving subjects on dry land.
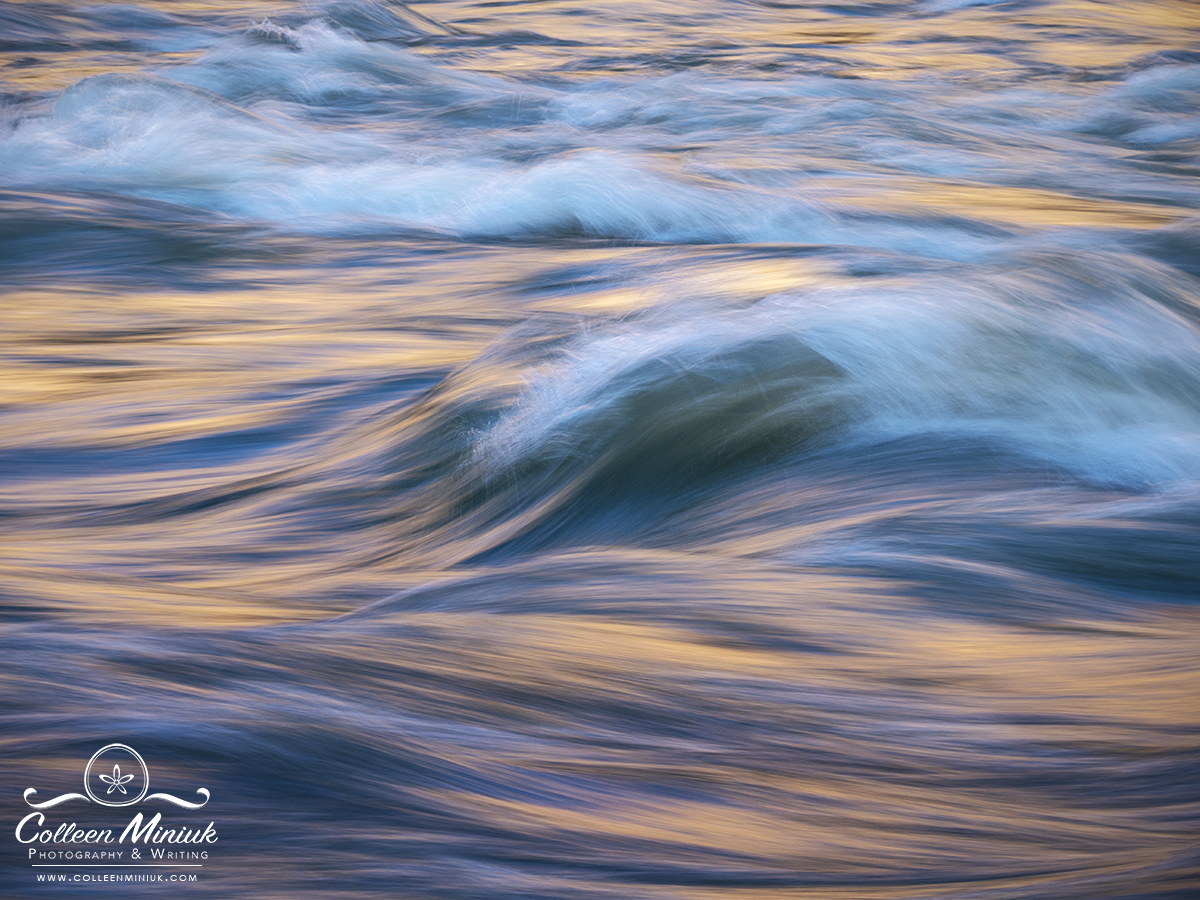
For starters, when you float down a river on SUP, you are moving even if the rocks, cliffs, and trees around you are not. Also, there’s no room on a SUP to set-up a tripod (and even if you could, it wouldn’t serve a purpose), so I have to handhold my camera. So I treat everything as if I’m photographing action, not landscapes, even when I’m focused on conveying the static scenery. This means faster ISOs (e.g. ISO 400-1600) and shutter speeds (e.g. faster than 1/200th of a second) depending on how quickly the current is moving (usually in between 4 and 6 mph).
Oftentimes, I have to use a wider aperture than I’d otherwise choose (for broader depth of field) to get enough light during an exposure—which may sound like a sacrifice. It’s not. Rarely do I include dominant foreground in images I make from my SUP. Other than my board and the water, I’m not close to much of anything. (Other than the occasional sand bar I accidentally run into because I wasn’t paying close enough attention to the movement of the bubble line…) In other words, I don’t usually need an extremely wide depth of field. F/8 usually retains the depth of field I need while letting in enough light to keep my shutter speed fast enough to freeze motion. In other words, when it comes to photographing from a SUP, it’s all about balance…
Which can get tricky in bad weather. Any wind stronger than a gentle breeze pushes my SUP around no matter how hard or often I paddle. In high winds, particularly headwinds, I become a sail. I typically sit down on my “loveseat” (an inflatable chair that attaches to my board) to maintain control. Trying to balance on board that’s 14-foot long and less than 3-feet wide and loaded with 50-75 pounds of gear on flatwater can be a challenge even for someone with good balance. Trying to balance on that same board while a bullying wind kicking up whitecaps tries to push you off can make you feel like a contestant on the Ninja Warrior television show.
With wind often comes blowing spray and sand. Sometimes it rains too. Water and electronics don’t mix well. Sand and electronics don’t either. Gear in this environment can take a beating.
I realize, at this point, you might be questioning my sanity. Despite all of the challenges (or maybe because of them), SUPing on rivers and lakes remains one of my favorite things to do. The key to making this and other outdoor activities work with photography is to get gear you aren’t afraid to destroy and protect it the best you can given the circumstances.
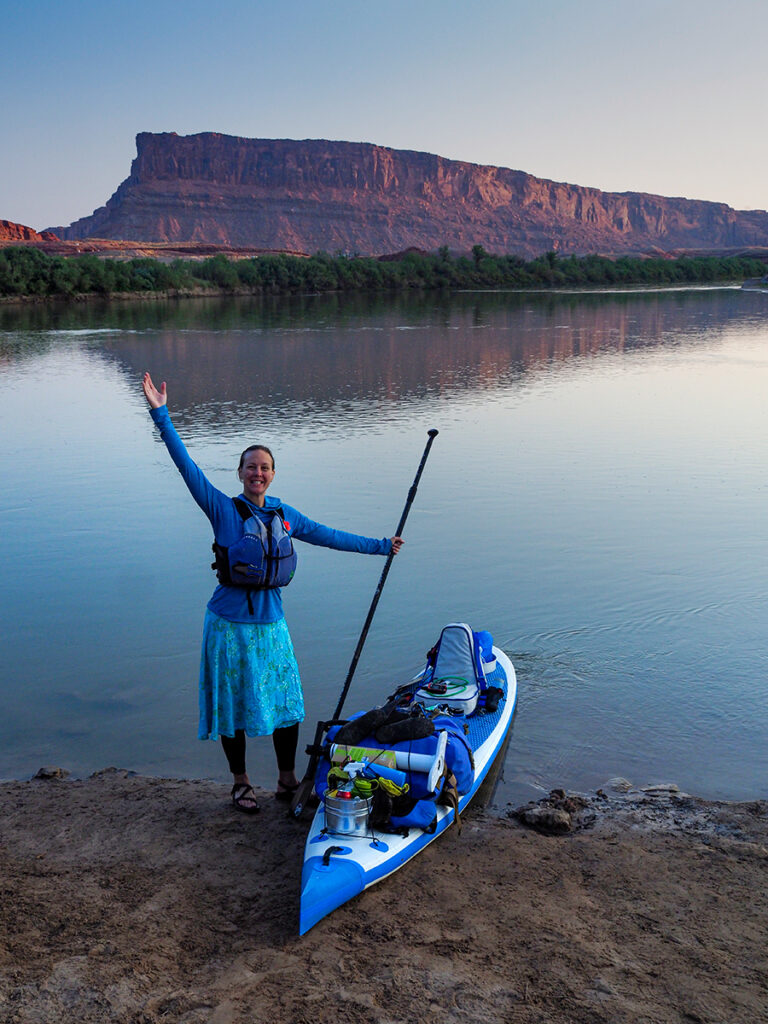
I used to use Canon DSLRs for all my land-based landscape work. When I started SUPing rivers more frequently, in 2015, I purchased a smaller, lighter, and cheaper mirror-less camera to pack on my river-based adventures. I started with a Panasonic LUMIX GX8 originally, then moved to an Olympus OMD EM1 Mark II, both of which could fit in my coat pocket. I also bought the broadest zoom lens I could find so that I didn’t have to change lenses while trying to navigate flows and weather. I ended up with a 14-150mm lens, which is a 28-300mm lens equivalent in 35mm speak. Given that range, I rarely change lenses while I’m actively paddling down a river.
My touring SUP, a Seaeagle Needlenose, can carry 275 lbs. That may sound like a lot, but when you add a 6-foot human carrying all their food, water, clothes, and shelter for a week, it gets allocated quickly. Weight and space matters. My mirrorless kit weighs less than 4 lbs. In comparison, that same set-up for my Canon DSLR weighed over 9 lbs. That leaves me a little more room to pack the Pringles. (It’s river law: it’s not an official river trip unless you have at least three cans of Pringles along.)
On top of that, all of my mirrorless equipment (including accessories) cost me less than a single DSLR body. I’m not going to say I wouldn’t cry if I damaged or lost my mirrorless camera, but I can say it’d be a lot less painful for me to lose my Olympus to the water gods than my Canon based on its replacement cost alone.
I didn’t intend to make this mirrorless set-up my workhorse kit, but given how much time I’ve been spending around water, it has become just that. It’s all I photograph with these days. If you’re interested in learning more about how I made the decision to transition from DSLR to mirrorless cameras, read my earlier Dear Bubbles post on “Switching Gear.”
When I’m on a river or lake, I keep my camera gear in a waterproof dry bag. I’ve tested a number of different brands and the one I’ve come to appreciate the most for its durability, size, and convenience is the Watershed Ocoee. I attach the dry bag to my board with bungee cords and carabiners on flatwater or cam straps in whitewater. Hard-sided cases like Pelican cases offer robust protection from all the elements, but I’ve found accessing the camera when you need it is not as convenient. I’ve also tried thinner dry bags like Sea to Summit. Those work well for flatwater and general rain protection, but they are not beefy enough for me to trust in whitewater where getting soaked and flipping always a possibility.
I use a padded insert for my Watershed bag to give me extra protection on shorter trips. If I’m doing a multi-day trip, I usually have enough rain gear and day clothes I can use as padding around my camera instead.
I like to contain my gear in one place so it doesn’t end up becoming a yard sale inside my dry bag. While I keep my camera with the 14-150mm lens paired with a polarizer separate (so it’s always ready to shoot), I use an oversized lens sleeve to hold the rest of my photographic gear: my 7-14mm lens, my 60 mm macro lens, a three-stop graduated neutral density filter, Vari-ND, cable release, rain cover extra batteries, and extra memories cards (in a Pelican storage case). Sometimes I just use socks. Socks make for excellent lens protectors and hold quite a few batteries and memory cards. Plus they keep your feet warm in camp (after you take out the lens and batteries and memory cards…).
Charging equipment, including my solar panels, battery chargers, and cords all go into my “electronics” bag which is a small dry bag I put into a larger dry bag that contains my tent, sleeping pad, pillow, chair, and tarp. Why double dry bag it? Well, I dropped my solar battery into Lake Powell on the first day of my attempt to cross the reservoir in November 2015 and now I’m extra cautious…it’s a long story…(it’s in my forthcoming memoir, I promise.)
I keep my camera in the dry bag until I see something I wish to photograph. I’ll admit, though, that when I travel long stretches of flatwater in low or no wind, I’ll paddle standing up with my camera slung around my neck, turned on, set to ISO 400 and f/8 (and shutter speed equal to whatever the camera deems necessary to bring in enough light during the exposure). I’ve learned through many river trips that when something grabs my attention, I don’t always have the chance to stop, pull out all your gear, decide what lens you’re going use, switch lenses, put on a filter, put a new battery in, and then make a photograph. If I see something, I have to shoot it right then and there. Otherwise I miss it. Or I spend a lot of time and energy paddling upstream which is exhausting. I’ve missed many a big horn sheep scrambling up cliffs along the shoreline because my camera was buried at the bottom of my dry bag.
Am I worried about falling in with my camera? The short answer: no. Falling in is a risk. However, I spent 40 years being terrified of water were I couldn’t see my feet. In situations where I attempted to swim in muddy lakes, rivers, and oceans, I hyperventilated and had severe panic attacks. While I have faced my irrational fear multiple times after falling in a rapid in the Colorado River in Moab in 2015, having expensive camera gear around my neck is an outstanding motivator to keep me atop my board and away from all the scary human-eating monsters that live in muddy waters.
In addition, I don’t usually struggle with balance on flatwater. As a young girl, before I grew to 6-feet tall, I was a gymnast. I landed back flips, aerial cartwheels, jumps, and pirouettes on a 4-inch wide beam 4-feet above the ground. No, I don’t do any of that on my SUP now. Age and height have changed my relationship with gravity. But I can stand steady on one foot on my SUP and think that’s pretty special!
I have fallen off and flipped my board upside down before in whitewater on the Green and Lower Salmon rivers. I even flipped my board in calm flatwater on Lake Mead (while attempting to straighten out my tripod and prevent it from dragging in the water…another long story…it too is in the memoir…). In all three cases, the dry bag containing my camera gear was completely submerged underwater. Everything inside stayed dry. I got lucky on Lake Mead. I was making an open water crossing in Bonelli Bay mid-afternoon in a light breeze and decided to pack my camera away just minutes before I tipped.
Even with precautions, accidents do happen. In fact, just two weeks ago, I accidentally knocked my camera into the Colorado River during my rafting trip through Cataract Canyon. Everything felt like it happened in slow motion: the camera sliding off the side tube, splashing into the water, then disappearing into the silty water while the neoprene neck strap lingered near the surface. I leaned over, grabbed the strap, dried it in my shirt, then pulled out the memory card and battery. I removed the lens for a second to see if the sensor looked wet. Everything appeared dry. I put it back in my dry bag.
I shouldn’t have turned it on later that evening. I should have waited until after I had the chance to put it in a bag of rice (which acts as a desiccant—like the small packets that says “Do Not Eat” that comes in shoe boxes) and allowed the camera to dry out for several days before I tried turning it back on. I could have short-circuited the electronics. But we decided to camp at the confluence of the Colorado and Dirty Devil rivers and I had to make a photograph of it, one because it was so amazing to experience and two, I’m in the early stages of working on a new book about confluences in the Colorado River watershed.
The camera turned on but after a single shot, the camera stopped recognizing the lens and the shutter seemed to stick—meaning the camera would shoot and record the image, but not let me shoot again unless I turned the camera off to reset it. I managed to eek out about 12 images plus a few videos before I gave it a rest. Fortunately the camera dried out on its own in the days following the trip. While the lens connects get confused when I change lenses every now and then, the camera works as it did before I dumped it in water. I feel fortunate that in all the time I spend around water, this has only happened once in six years. But I got really, really, really lucky this time. I won’t likely next time. That was my warning shot to be more cautious in the future.
Although my mirrorless is not built to take a soaking, I have, and bring, cameras that are. I own an Olympus T5 camera. It’s waterproof to 50 feet. It shoots RAW format at 12 MP. The manufacturers specifications suggest it’s also shockproof from 7 feet, but I haven’t tested that feature yet (and don’t intend to, not on purpose at least).
Depending on my mood and how much stuff I want to bring with me, I sometimes bring my Go Pro camera which is also waterproof to 33 feet and shoots both video and stills (in RAW format). My Olympus OMD takes remarkable 4K video with the press of a button. So unless I’m going to face big waves in whitewater, I’ll go for the Olympus, not the Go Pro.
Even waterproof cameras like Go Pros aren’t fail proof. I took a nasty swim in a Class III rapid called Half and Half on the Lower Salmon River (named because half the time you make it, half the time you don’t). I had the camera attached to my helmet so the Go Pro stayed with me when I fell in, albeit not on the top of my head after the initial impact with the water. But the side door protecting the USB and HDMI ports somehow separated from the camera in the rapid and the river flooded its guts. It did not recover, even after drying out in rice for several days.
If you’ve not done a lot of paddleboarding yet, but are interested in doing so with your camera, I’d recommend using a waterproof camera (or even your mobile phone in a waterproof case) to start. Find your balance, in both calm and windy conditions, then graduate to bringing your fancier, more expensive gear as you get more comfortable with the water. Try it! To quote Dr. Seuss: “Oh the places you’ll go! There is fun to be done!”
Be well, be wild,
Bubbles