DAM! Sorting Out Image Management
Dear Bubbles:
My first photography influencer told me to keep my photographs by years. Now I have six different external drives and, being of a certain advanced age, I can’t remember where I parked my car far less what year I took a photo. When I want to find images of say, windmills, I have to keep switching Lightroom catalogs and external drives until I get through them all. Searching for other ideas on the web is overwhelming. So I bow to your Bubbliness and ask, How do you keep your external drives organized?
~Wendy
Dear Wendy:
“Your Bubbliness?” Oh boy, you better stop there before the two marbles in my head swell so much they explode. Before I answer your question, though, let me put my tiara on.
There, is it straight?
No doubt, digital photography has brought some helpful advances into our medium. Things like the histogram, variable ISO speed settings, and focus peaking to name a few. While the cost of snapping a photograph declined, this technology came with a price: image management. Image management is also referred to as Digital Asset Management, or D.A.M., which is appropriate considering how many expletives have been shouted at computers when one can’t find their images. Organizing thousands upon thousands of images, most of which will never see the light of day through the dust on a hard drive, is, in fact, such a DAM mess (pun intended). Ah well, we must suffer for our art.
In digital’s defense, this asset management problem existed before with film, just on a smaller scale. With film, you’d get max 36 frames on a roll. With digital, you can get thousands of frames on a single memory card. We have the ability to produce an excessive amount of images. Or as some say, too much “digital diarrhea.” (Oh come on, now, you all have enough toilet paper right now to survive that joke.)
I don’t know that I have the most efficient image management process for my own work, but it’s one that has served me well throughout the years. I established a location-based system back when I shot slide film and have continued to use that approach even as the storage mechanism changed from a filing cabinet to hard drives. Much like I labeled and organized Manila filing folders with film, I organize my images through my own file folder structure in Adobe Bridge. I don’t use Adobe Lightroom. When Lightroom first came out, I already had a system I liked in place. I was busy trying to get my feet off the ground as a full-time freelance. I didn’t have the bandwidth, or need, to learn a new software. It wasn’t a priority.
In the last few years, bending to societal pressure to “get with the times,” I’ve tried to figure out Lightroom’s Library on no less than three attempts. I’m certain it took at least 15 years off my life. Or at least gave me increased crow’s feet around my eyes from scrunching them when I repetitively said, “What the [four-letter expletive]?” The Lightroom cataloging feature and I are like oil and water. Like me and Nikon cameras. Or me and all my ex-boyfriends. We just don’t belong together.
So while I’ll gladly divulge my set-up, I can’t comment extensively on Lightroom functions. No matter the software you choose to use, though, a good image management system enables three things:
- Safe storage of your images.
- Maintain back-up copies for recovery of images, if needed.
- Provides efficient retrieval of images, when needed.
Keep in mind, though, what’s right for me is right for me. It may not be right for anyone else. My recommendation is that you keep sorting things out until you find a system you’re comfortable with. After all, you’re the only one who has to use it. Not me, not anyone else.
So hold onto your tiaras, here’s my image management process with an explanation of each step after the graphic: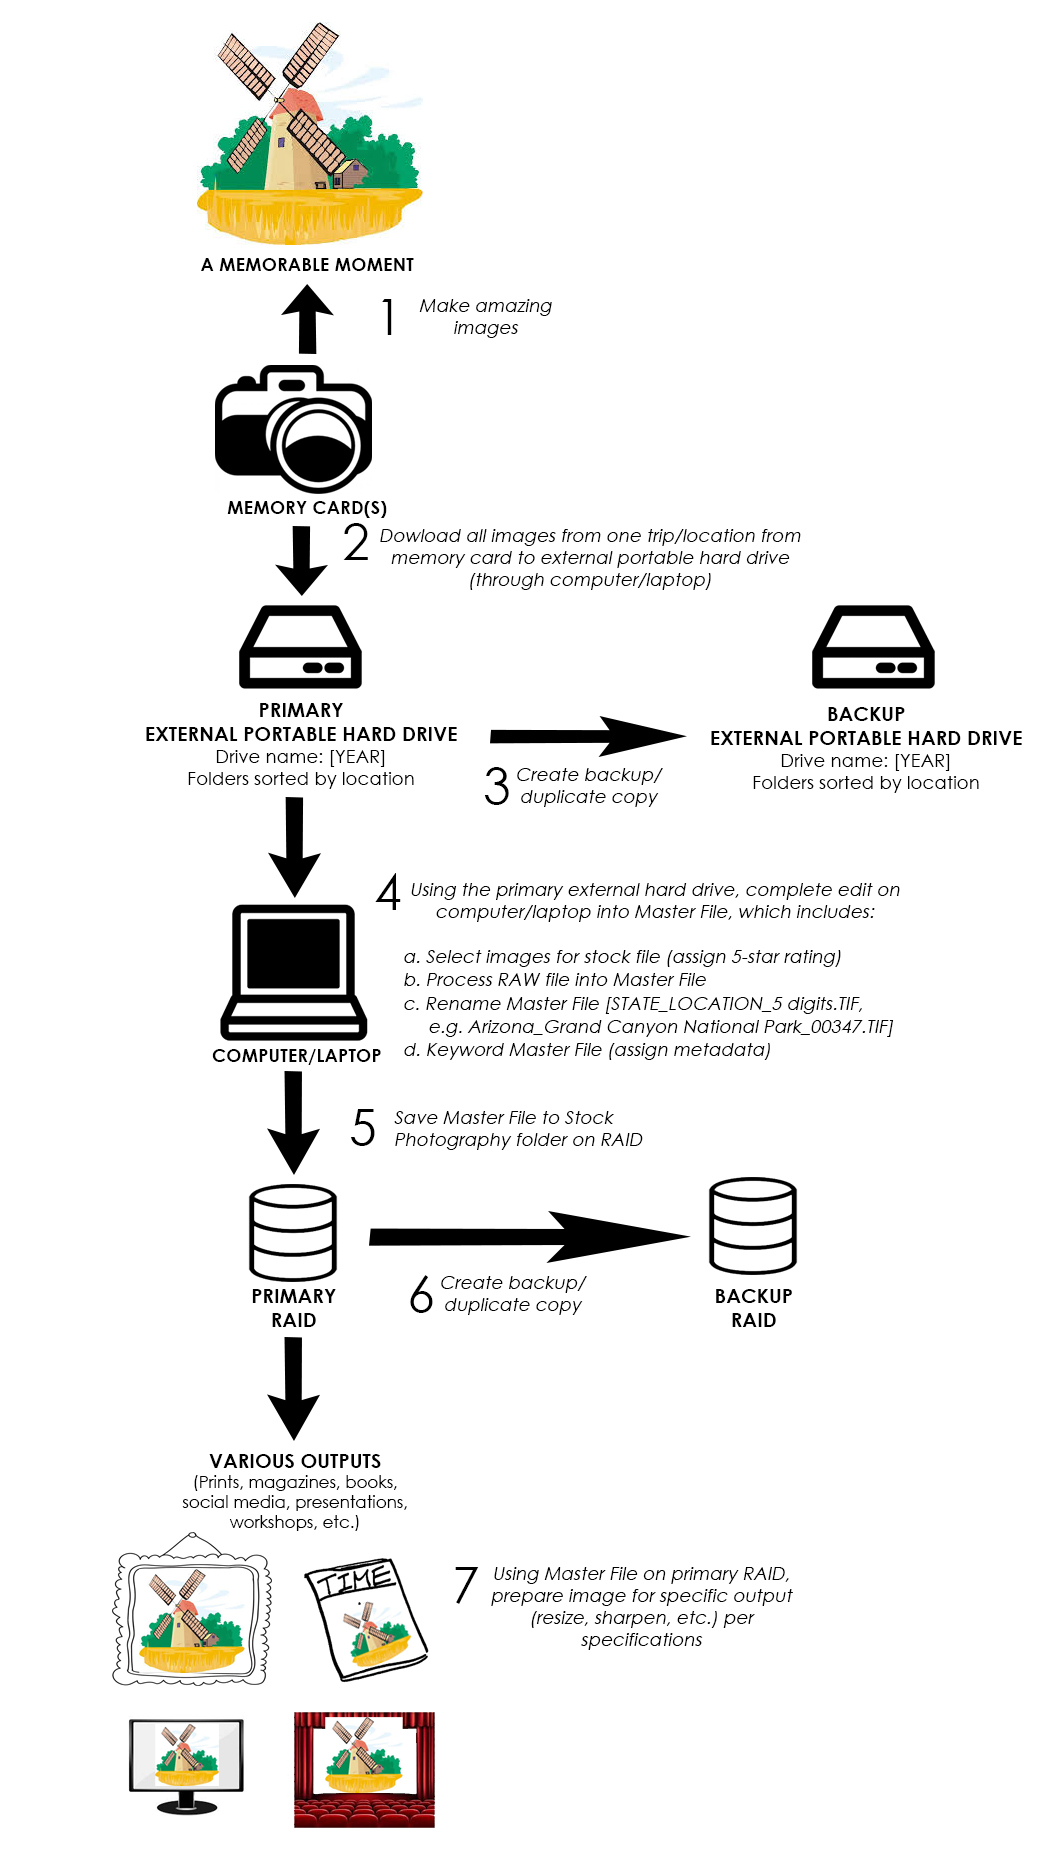
- Make amazing images in a memorable moment. Let’s get this digital asset management process started off on the right foot!
- Download all images from one trip/location from memory card(s) to an external portable hard drive. When I’m on the road in the middle of a trip, I often download my photographs from my memory card to an external portable hard drive each evening. Occasionally, I’ll get lazy and wait a few days or weeks. I’ve had enough trouble with corrupt and damaged memory cards, though—and subsequently lost hundreds of images—to follow a more disciplined approach to downloading. It’s never easy to swallow losing work you love, but you get less grey hair losing lose a day’s-worth versus a week’s-worth.I have a portable hard drive dedicated to each year. I name a new folder after the primary location and add the number of the month in front so they are in sequential order when I sort by Name. For example, if I’m downloading images from a trip I took to Acadia National Park in February2018, I download to my 2018 external hard drive into a folder called “2_Acadia National Park.” If I’m transferring images from Great Smoky Mountains in October 2019, I move everything onto the 2019 external hard drive into the “10_Great Smoky Mountains National Park” folder. That way, if my advancing age permits me to recall the date and location, I know where to find it. I’ll also assign some high level keywords to all the images in that folder. More on that in a minute.
- Create a backup/duplicate copy of year-based hard drive. I used to create the back-up copy of my year’s hard drive at the end of the year. I have recently changed to creating the duplicate copy as I download the original copy. It goes back to not wanting to lose a large quantity of images. I strive to have at least two copies of ALL my images at any given time.
- Using my primary external hard drive, complete edit on either my computer (home) or laptop (road) and process into a Master File.
- This is where I cull the herd. Because I take comfort that I have a backup copy of everything I’ve shot, I have no issue deleting my obvious crap. And yes, I shoot a lot of crap. (Good thing we don’t keep track of batting averages in photography.) I identify my “keepers,” images I’ve deemed good enough to display publicly in some form, for prints, magazine articles, stock submissions, books, presentations, social media, etc.). I’ll tag them with a five-star rating in Adobe Bridge so I can find them in step #5.
- Sometimes immediately, or sometimes in weeks, months, or years, I’ll process those images through Adobe Camera Raw and Adobe Photoshop to create a single Master File, the file from which all other versions of the file are born. I save this Master File as a TIF and save my adjustment layers, you know, in case I change my mind on how to process the image. It happens. A lot.
- When I’m saving the Master File, I give it a new name. I start with the state, location name, and a sequential five digit number. For example, Arizona_Grand Canyon National Park_0436.TIF. Because, as it turns out, “_MG_850293.ORF” straight out of my Olympus camera isn’t that helpful in finding a subject or location later.
- Keyword my Master File. This is such an important topic, I’ll cover it in more detail below after I finish explaining my process flow. Stay tuned.
- Save Master File to my RAID into my Stock Photography folder. A RAID is a “redundant array of integrated discs.” It’s a suped-up set of stacked hard drives set up to mirror each other. Different configurations exist, but I have mine set up in a RAID 1. Half of the capacity of the RAID is dedicated to an original copy; the other half stores a copy. My Stock Photography folder on my RAID acts as my main catalog of images for professional use. It’s not only serves as storage and backup for my best and usable work, it’s also the pot I search in when I need to find an image for some usage.
- Create a backup of my RAID. Yes, I’m that paranoid.
- Using the Master File on my primary RAID as the source, prepare images for specific output. I resize, sharpen, etc. per the output specifications (like magazine submission guidelines). I save the prepped images to different folders on my primary RAID based on their use. I have folders for specific clients, for social media use, presentation and workshop use, books, etc. I don’t save back to my Stock Photography folder so as to keep my Library clean and tidy.
The lynchpins in this process are having a single centralize repository and keywording.
Keywording is act of assigning labels to your images, or metadata, data about data. Metadata is information about our photograph. It’s labeling a photograph “windmill” to tell the system and the world, “Hey, this is photograph of a windmill.” Keywords act like your key fob does on your vehicle. It helps you find what you need when you need it. When you press the unlock button on your key fob, your car beeps. When you enter the word, “windmill” in search, all the photos you labeled “windmill” appear. You can have the best folder setup or the best Lightroom catalog set-up in the world, but if you don’t keyword, you’ll end up wandering the dark and lonely parking lots on your hard drive looking for an image hiding behind a tree. You’ll get lost. The image will starve. It’ll start raining tears. We don’t want that.
We also don’t want you to get lost searching in multiple Lightroom catalogs and external hard drives. No matter how well you keyword, it’s too inefficient. And frustrating, as you’ve learned, Wendy. That’s why I have one Stock Photography folder, which would equate to a single Lightroom catalog.
Now, there’s an art to keywording. Years ago, one of my stock agencies, Alamy, sent out a tip sheet on how to keyword your images. I still use it as guidance in keywording my own work:
- Literally: what’s in my image? E.g. dog, car, woman, man, child, flower
- Location: from where is my image?
- Specific: what’s my image of? E.g. The White House, Washington DC, USA
- Generic: what’s my image of? E.g. house, school, office
- Interaction: what’s happening in my image? E.g. running, walking, shouting, touching, flying
- Broad subjects: what’s the subject of my image? E.g. travel, sport, business, lifestyle, wildlife
- Techniques: have you used any specific techniques? E.g. black and white, digital manipulation, grainy, blurred
- Attributes: what does my image show? E.g. happy, calm, young, old
- Concepts: what moods, emotions and metaphors does my image show? E.g. heat, power, happiness, strength, humor, teamwork, tranquility
Keywording software exists to supposedly speed this up. I tried a couple many moons ago and found them to be more trouble than they were worth. I haven’t tried newer versions, though. Maybe they’re like wine, they get better with time? I can tell you from many years of experience, wine definitely makes the keywording process more tolerable. Spend your money wisely.
I start keywording in step 2 above. Once my images are on my external portable hard drive, I do two things:
- Select all images and apply a metadata template for basic information: Metadata templates help automate and speed up the laborious task of typing keywords into thousands of images. In Adobe Bridge, metadata templates are found under Tools/Create Metadata Template. I have one called “Colleen Miniuk Basic” which applies all pertinent information that I apply to every single image I create. It includes my name, contact information, credit line, and copyright notice. This prevents me from typing my name and address on thousands of images individually. (In Lightroom, you can add keywords during the Import process from your memory card to your library. You can also create and assign Metadata Presets which act like Metadata Templates—similar goal, different approach, different name.)
- Select all images and assign a location keyword in Keyword and Description field. Since my photographs are grouped together by location, it makes sense to label them all at once. So I’d label a batch of Lake Powell images as “Lake Powell, Lake Powell National Recreation Area, Arizona, Utah, National Park Service, national park.” (In Lightroom, you can do this in the Import process as well.)
Later, in step 4d, I’ll assign detailed keywords for single images. I defer this task until I have a Master File prepared. I simply don’t have the time or energy to label images that I’ll never use. No, not even during self-quarantines and travel bans in the midst of a pandemic.
Over time, as I’ve noticed patterns in my work, and thus my keywords, I’ve created new metadata templates to speed things up. For example:
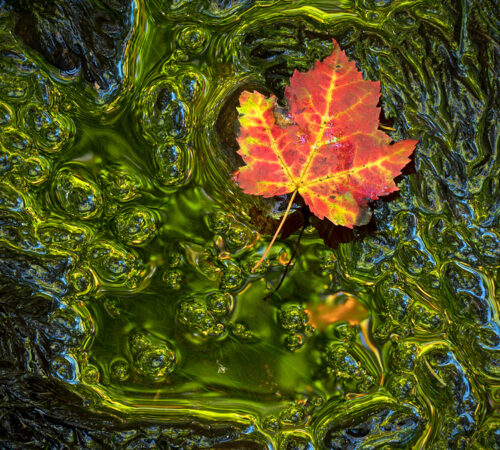
- My “Wildflower” template assigns “wildflower, flower, flora, bloom, blooming, spring”
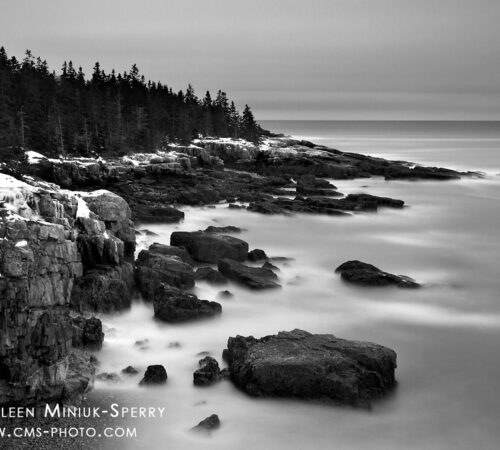
- My “Coast” template assigns “coast, coastal, coastline, shore, shoreline, seaside, seashore, ocean, water, sea”
I adjust these as needed, adding or deleting words as they apply to an individual photograph.
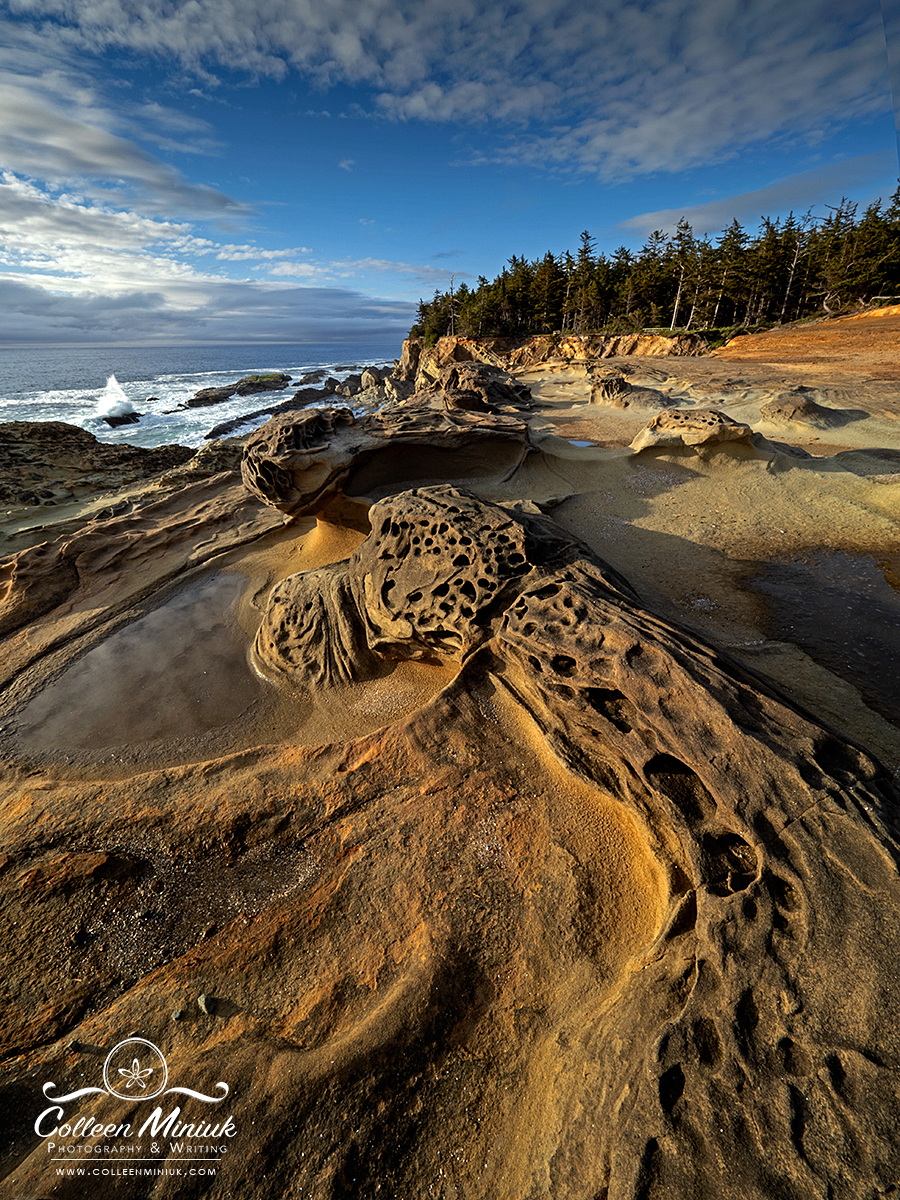
For example, for the image at the top of this post, I listed: “coast, coastal, coastline, shore, shoreline, seaside, seashore, ocean, waves, water, sea, crashing, swirling, sandstone, erosion, geology, rocks, cliffs, seastacks, clouds, afternoon, scenic, landscape, viewpoint, vista, energy, excitement, tourist destination, Shore Acres State Park, state park, Cape Arago Highway, Coos Bay, Oregon, Pacific Northwest, Pacific Ocean.”
Keywording individual images requires time and energy. (Remember, we must suffer for our art…) But there’s an upside! And an incentive. The more diligently you keyword upfront, the more time you’ll save searching for it later. Then that’ll free up time for you to look for your car, go outside, and experience more amazing moments with things like windmills.
Be well, be wild,
~Bubbles
Have a question about photography, art, and/or the creative life? Need some advice? Send your question to Dear Bubbles at [email protected] to be possibly featured in a future column post. (If you’d prefer a different display name than your real first name, please include your preferred nickname in your note.)

Histogram is Out of Shape

2 Comments
Mary Gill
Thanks, Bubbles. Very timely info since I’m spending this self-isolation period trying to straighten out the mess on my hard drives. I have had a problem in the past with Adobe Bridge losing keywords on photos. I spent a whole day keywording recently and the next day they had vanished. Any experience or thoughts on this?
Bubbles
Hi Mary! Good use of free time :D. I haven’t experienced the troubles you’ve had with Bridge. Yikes! I did a quick online search and found this: https://community.adobe.com/t5/bridge/keywords-disappeared/td-p/8920864?page=1. Maybe that could help? Good luck!