Graduating to Grad ND’s

Dear Bubbles:
You listed “graduated neutral-density filters” on your workshop’s recommended gear list. I’ve never heard of them before. What are they and what do they do? Do I really need them?
~A Filter Virgin
Dear A Filter Virgin:
Well, there’s a first time for everything. Remember, we are all filter virgins at some point in time. Don’t worry, I’m an experienced graduated neutral-density filter user. And I’m here to help!
In the past 18 years, there have been few sunrises, sunsets, and storms when I have not used a graduated neutral-density filter to help me manage difficult exposures. Of all the crap in my camera bag, it’s one of the most used pieces of equipment I have—and I’m not a filter addict or a gear junkie.
It all started in 2001, back in the good ‘ole film days…
(Cue nostalgic music…)
I used to photograph with Velvia 50 slide film. Oh man, do I miss that stuff! It was a touchy film to work with, though, in that it had a tight dynamic range, a small gamut of tonalities between highlights and shadows. The Fujifilm specs said it had a five-to-six-stop dynamic range, but it sure felt like only three, maybe max four. By comparison, today’s digital camera sensors can hold up to a whopping 10- to 14-stops of dynamic range. Throw in the in-camera High Dynamic Range functions (more on that in a minute), and the possibilities now to expand the tonal range in a single frame are mind-blowing, especially to an ex-Velvia 50 user.
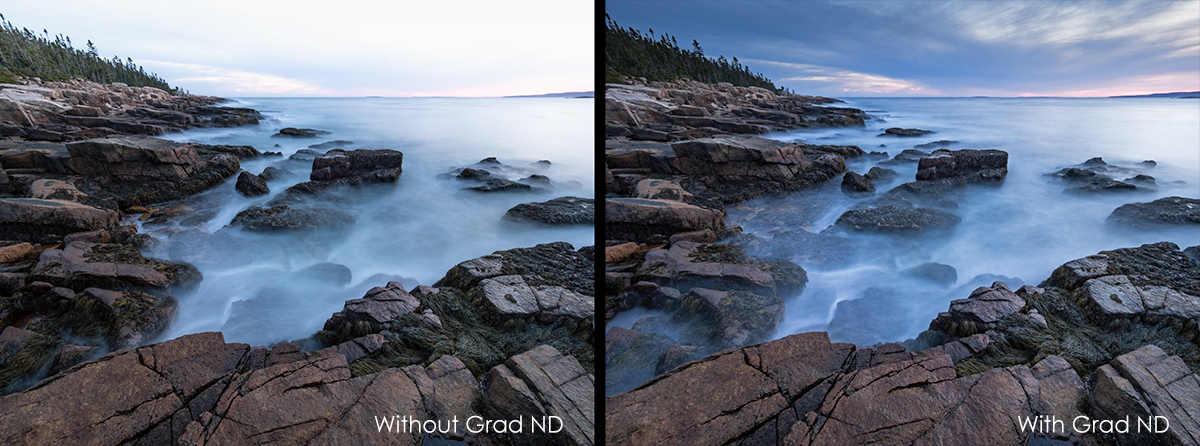
Anyhow! Early in my photographic journey, when I composed a landscape scene, I’d frequently record photographs with areas that appeared washed out and featureless on film. An overly bright sky was the usual culprit. When I tried to compensate for this, by underexposing, the sky would finally look acceptable, but the land would render too dark. After enough iterations of missed moments and subsequent hair-pulling frustrations, I knew I needed something that would help me expose my entire frame properly, not just a part of it.
A graduated neutral-density filter to the rescue!
I first learned about these filters after reading the late Galen Rowell’s The Inner Game of Outdoor Photography just months after I started my Introduction to Photography class at the local community college. The concept of graduated filters had been around since the early twentieth century, but it was Rowell’s partnership with Singh-Ray in developing the “Galen Rowell Graduated Neutral-Density Filters” that brought them into more mainstream use.
I’ll be honest. Rowell’s work made me drool. Back then, I figured if I had the same tools he did, I could make images like him someday. I’m now more interested in making photographs I can call my own, but using graduated neutral-density filters made a huge impact on my abilities to record a proper exposure on film—and still does today as I’ve made the transition to digital photography.
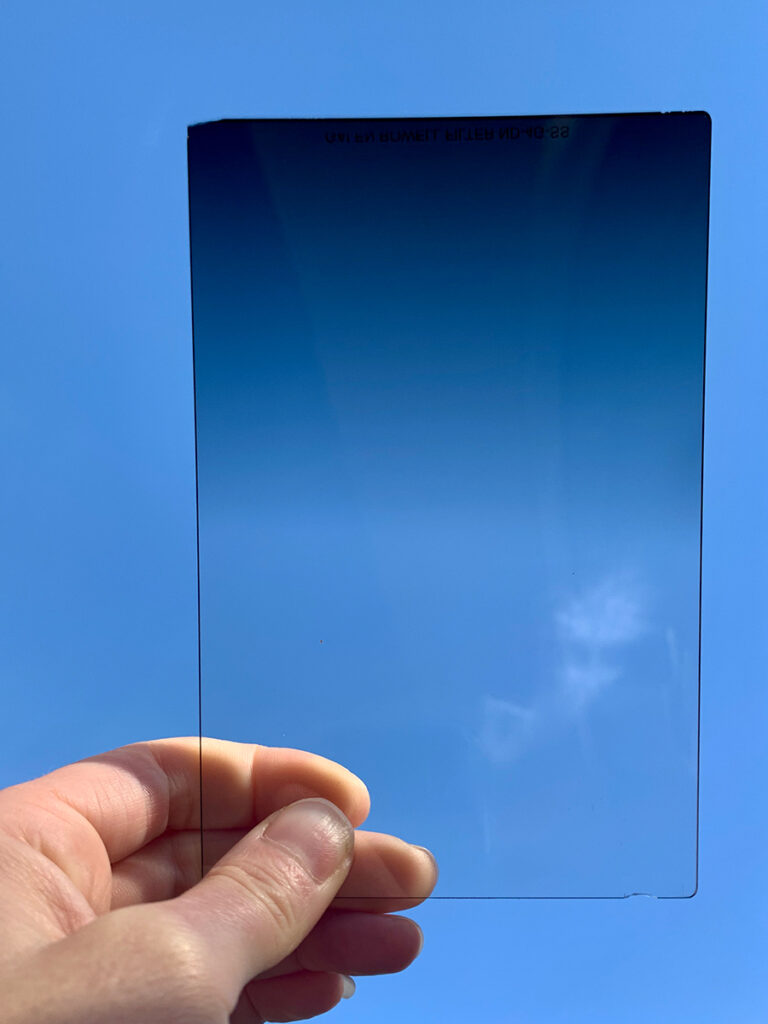
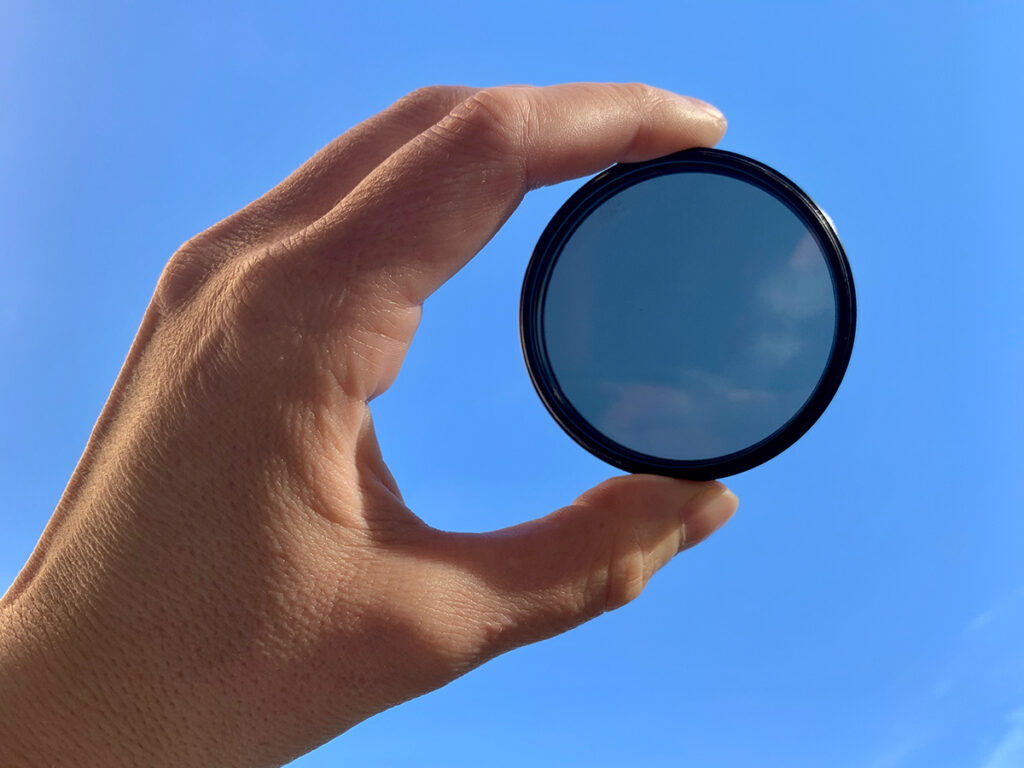
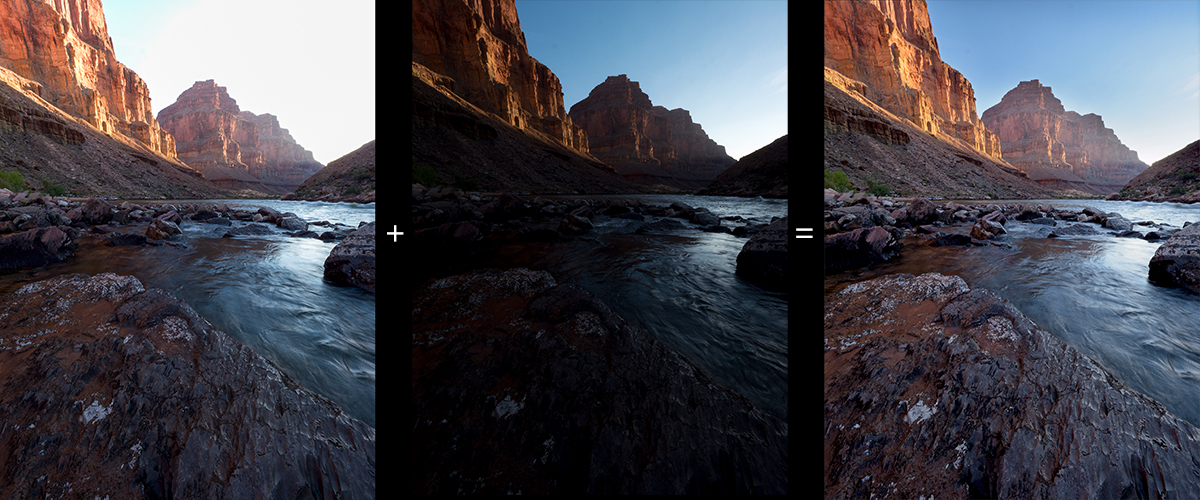
So what is this magical tool? A graduated neutral density filter, which is also called a split neutral-density filter or a “grad ND,” is an external piece of resin or glass that allows varying levels of light to pass through it and ultimately onto a camera’s sensor (or film). This filter displays a grey tint, but only across part of the filter. Hence, the terms “graduated” and “split.” It helps to reduce the bright parts of the frame (e.g. the sky) while exposing the rest of the photograph (e.g. the land) properly. You can’t fix an overexposed sky, one that’s completely white (and blinking at you through your highlight alert function on your camera’s LCD screen) in processing software, so it’s something we want to pay attention to in the field.
You may have heard of its cousin, the neutral-density filter, which is grey across the entire filter. This filter helps you slow your shutter speeds down, especially in bright midday lighting conditions or when you wish to blur moving objects like water and clouds. Different function, similar name. Confusing? I know!
Carrying on, grad NDs come in a variety of shapes, including circular, square, and rectangular. Square and rectangular grad NDs tend to offer more flexibility in placing the gradation along the horizon than circular ones. With circular ones, which screw on the front of your lens, changing the position of the gradation, which is centered, isn’t possible. With square and rectangular ones, it is.
They also come in different sizes. I use rectangular 100mm x 150mm filters, which were appropriately-sized for my bigger Canon full-frame DSLR lenses and are now oversized for my Olympus mirrorless lens set-up. That said, I now have a great deal of wiggle room in where I can place the gradation. I like giving myself as many options as possible.
In addition to shape and size variations, as the name implies, they also come in different densities from one- to five-stops of light. I have found the three-, four-, and five-stop (the latter being harder to find these days) most useful in my own work. Despite what the internet will tell you, you can stack multiple filters. I promise, you won’t spontaneously combust if you do so. At least I haven’t yet.
But wait! There’s more! Grad ND’s also come in hard or soft gradations. Soft-edged filters are more forgiving with an odd-shaped horizon than hard-edged ones. Think trees, mountains, and other things that stick out of a landscape. I don’t run across many completely straight horizons that would match a hard-edged gradation other than the top of the Grand Canyon and across oceans, so I only use soft-edged filters in my work.
Not all grad ND filters are created equally. Cheaper brands tend to have unsightly color shifts which are difficult to correct in camera or in processing software. The expensive ones do not. You truly get what you pay for when it comes to these things. My preferred brand, after testing a bunch of different ones of the years, is Singh-Ray: https://singh-ray.com/shop/galen-rowell-graduated-neutral-density-nd-filter. (If you decide to go with Singh-Ray, you can get a 10% discount with the code colleen10. Every bit helps!)
If you’re just starting out, I’d recommend picking up a three-stop soft rectangular graduated neutral-density filter. Say that three times fast!
In addition to buying a grad ND filter, you’ll also want to pick up a single filter holder that matches the filter’s size. Then, you’ll pick up an adapter ring for each lens you plan to use the filter on, each ring matching the diameter of your lens (e.g. 67mm, 72 mm, 77mm) The adapter ring screws onto your lens and holds the filter holder, which holds the filter. I’m not currently able to fit a filter holder or filter over my wide-angle lens’ bulbous glass, but rumor has it Haida has a solution to address that.
Theoretically, you can hand-hold your grad ND in front of your lens during an exposure. You risk, however, dropping them, positioning them incorrectly, and introducing accidental lens flare—all of which I have done on multiple occasions until I stopped being stubborn and lazy and just bought the damn filter holder already.
To use a graduated neutral density filter, start by switching your camera’s shooting mode to Manual so you can more easily adjust the exposure settings as you decide which strength of filter to apply. If you’re absolutely set on using Av-priority or Tv-priority modes, that’s cool. Just dial in your exposure setting for the landscape and lock the exposure through the AEL function.
Then change your metering mode to spot metering to precisely measure the difference between the sky and the land and decide which density of grad ND you need:
- Decide the correct exposure for the dark area by aiming your camera at the darker spots in your foreground. Adjust your shutter speed and aperture until your meter’s tick mark lines up with the center part or “0” on the meter. Note the shutter speed and aperture.
- Meter for a bright area (most commonly in the sky). Again, make adjustments (I change the shutter speed, not the aperture so I only have to deal with one number, not two) and note the exposure readings.
- Calculate the number of stops between the two exposures. The difference in exposure equals the strength of the graduated neutral density filter to use. For example, a three-stop difference in exposure indicates a three-stop filter would work best.
Important! Before you shoot, remember to reset the exposure settings to the aperture and shutter speed you metered in the dark area (step #1) once you have decided which filter to put in front of your lens. The grad ND will hold back light and darken the bright areas for you.
To position the graduated line, look for a natural horizontal or diagonal line between the light and dark areas. If the horizon line falls at an angle, tilt the filter to match the horizon line. To get a better idea of where to place it, hold down the depth of field preview button (if available on your camera) while moving the filter around. Stopping down to a small aperture such as f/16 or f/22 will make the placement of the graduated line more apparent.
Then, blast away! Check your histogram and your highlight alerts after each frame to ensure your starting exposure and the filter’s strength combine to render acceptable results. Adjust either the exposure, the filter density, or both as needed. That’s it!
Instead of using graduated neutral density filters, some photographers prefer capturing multiple images at different exposure levels to later blend in post-processing software to create High Dynamic Range (HDR) images. Specialized filters within processing software can also re-create the effect of a graduated neutral density filter for a single image.
In situations where I’m required to adhere to strict weight limits, like on my Grand Canyon rafting trips, I don’t typically bring or use filters. Instead, I employ blending techniques (inclusive of HDR). Besides the weight restriction, I have found it challenging at best to position a straight line across V-shaped canyon walls.
Otherwise, I chose to use grad NDs in the field to help me get the best image I possibly can out of my camera. I spent 10 years behind a computer as a software engineer. The last thing I want to do is spend more time behind a computer in photography. I believe processing has a critical place in polishing my final vision. By the time it hits my computer, though, the opportunity to fix something of concern has likely passed, save for some exposure adjustments, color adjustments, and cropping. As a discipline, I simply don’t subscribe to the idea that I’ll “fix it in Photoshop.”
Yeah, yeah, I know. It means more gear in an already heavy camera bag. It’s worth it, though. Grad NDs yield better results in windy conditions and with moving subjects (like water) where aligning the visual elements across multiple exposures isn’t easily achieved. They also don’t come with as steep of a learning curve as HDR does—you just hold those puppies in front of your lens, and boom, you’re done.
I get more consistent, controlled results from frame to frame when I use a filter, more so than I do when I try to guess what the HDR software algorithms will spit out for me when it blends my images. I also don’t risk ghosting—an unsightly halo around lines of contrast sometimes evident with processed HDR images. Grad NDs don’t affect an image’s overall contrast level either. Unprocessed and poorly processed HDR images can lack contrast, which make them look flat.
That said, an HDR approach does better in rainy conditions, in spray from waterfalls or waves, and as previously mentioned, V-shaped canyons—basically in situations where an external piece of gear becomes cumbersome or impractical. HDR is also a cheaper option, unless you start buying into a great deal of external software and plug-ins to help you process your images. Then it’s closer to a wash.
Even with these pros and cons, I’m not convinced this is an either-or proposition. I see grad ND’s as an additional tool in your bag to use, not as a replacement for blending images in processing software or using HDR, both of which have their rightful place in any workflow. Or vice versa. If you’re comfortable and pleased with HDR/multiple exposure (or however you work in your processing to balance exposures), then grad ND filters maybe aren’t necessary. If you’d prefer less processing work, grad NDs are essential. If you aren’t sure, try both!
What I definitely don’t want to happen to you is that you come to the workshop and make a bunch of images with overexposed skies. If this is something you’re struggling with, we’ll graduate you to filters, blending, or both. Whichever direction you decide to go, I’m excited to help you make the best images you possibly can with whatever tools and process you feel best fits your photographic approach. As is said, “Six one, half dozen the other.” There are many ways to get to many right answers.
See you soon! Until then, be well, be wild!
~Bubbles

Live Your Dreams Now